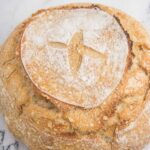
Roasted Garlic Sourdough Bread

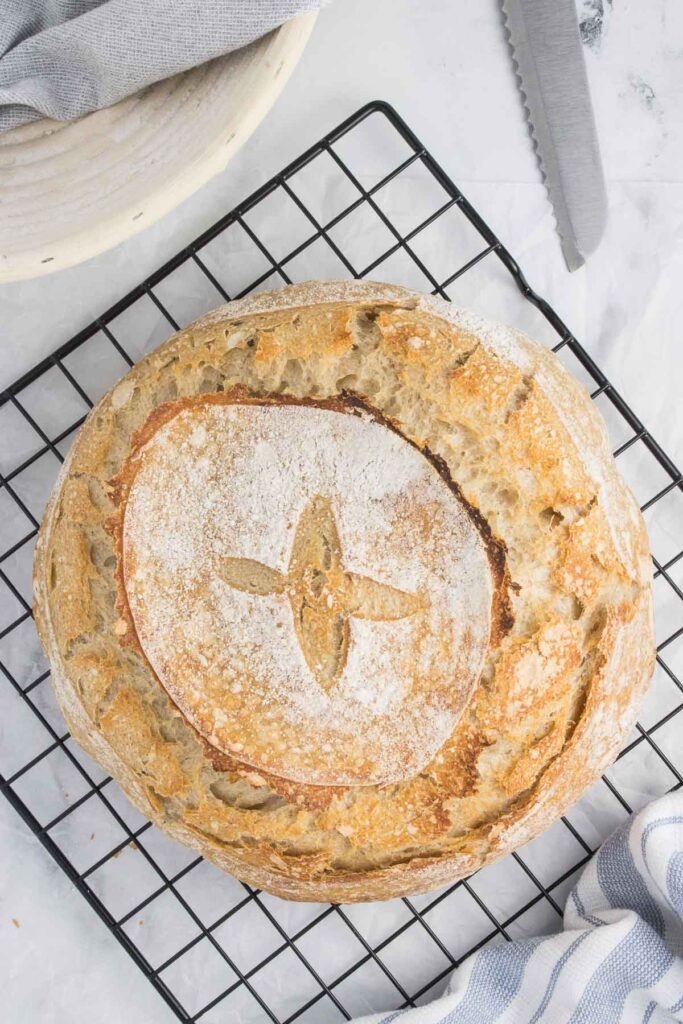
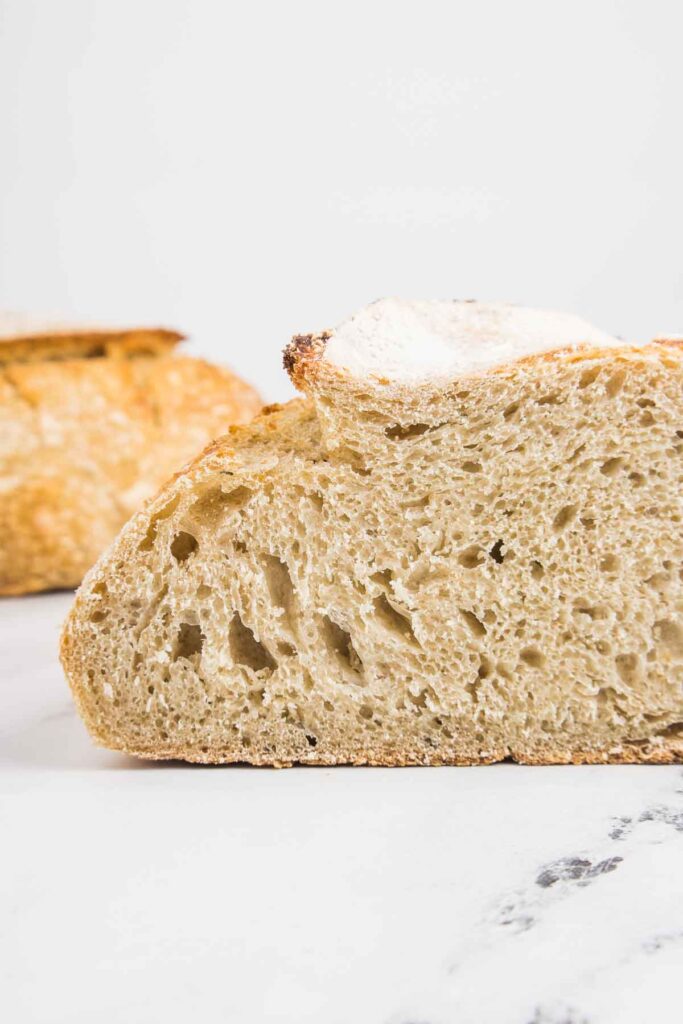
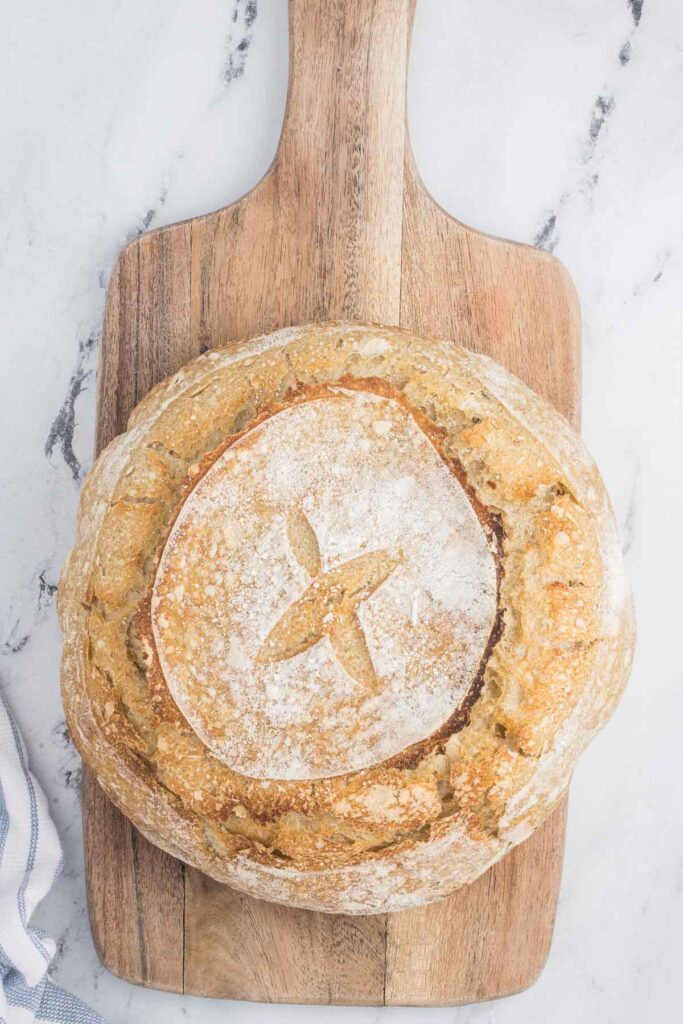
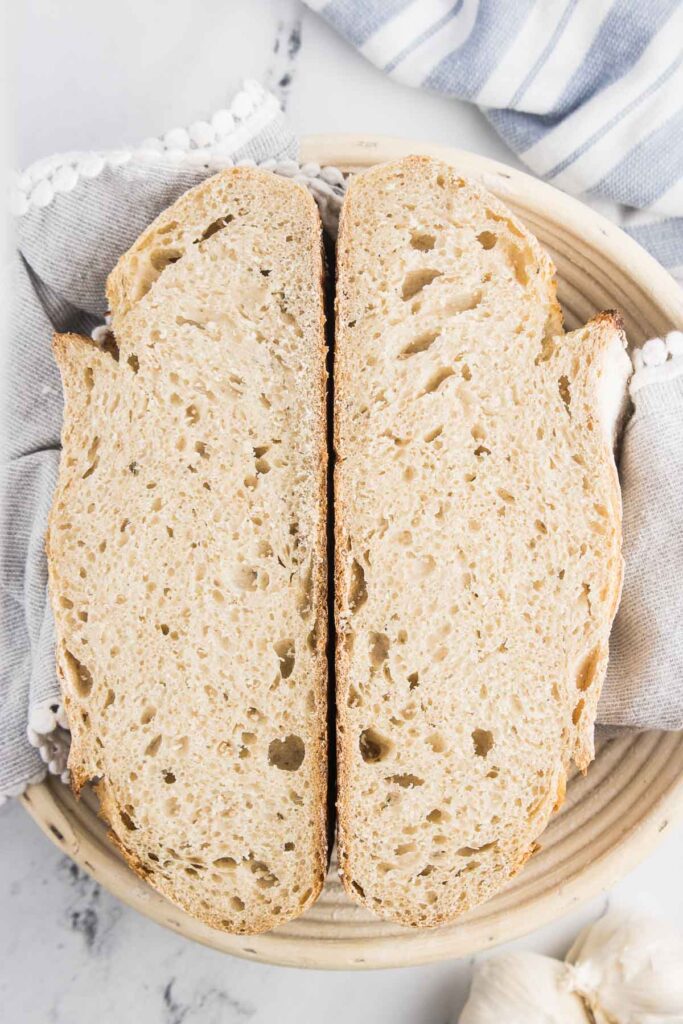
This roasted garlic sourdough bread loaf has a perfect crumb and great garlic flavor. This bread is a show stopper and an easy beginner sourdough loaf for beginner bakers.
This easy sourdough bread recipe is a great simple recipe to follow. If you are new to baking bread with sourdough starter, you will love how straightforward this recipe is, and that is yields great results.
This bread recipes uses a lower hydration rate dough, which means you are using more flour than water. This means the dough will be firmer and easier to work with (which is great for beginners!), the bread is softer and denser, so there are less big airy holes, and the crust ends up being softer.
Flavored with plenty of roasted garlic and an optional bit of chopped rosemary, this sourdough loaf is flavorful, and so easy to eat!
Plus with this much garlic, no vampires will be anywhere near your house!
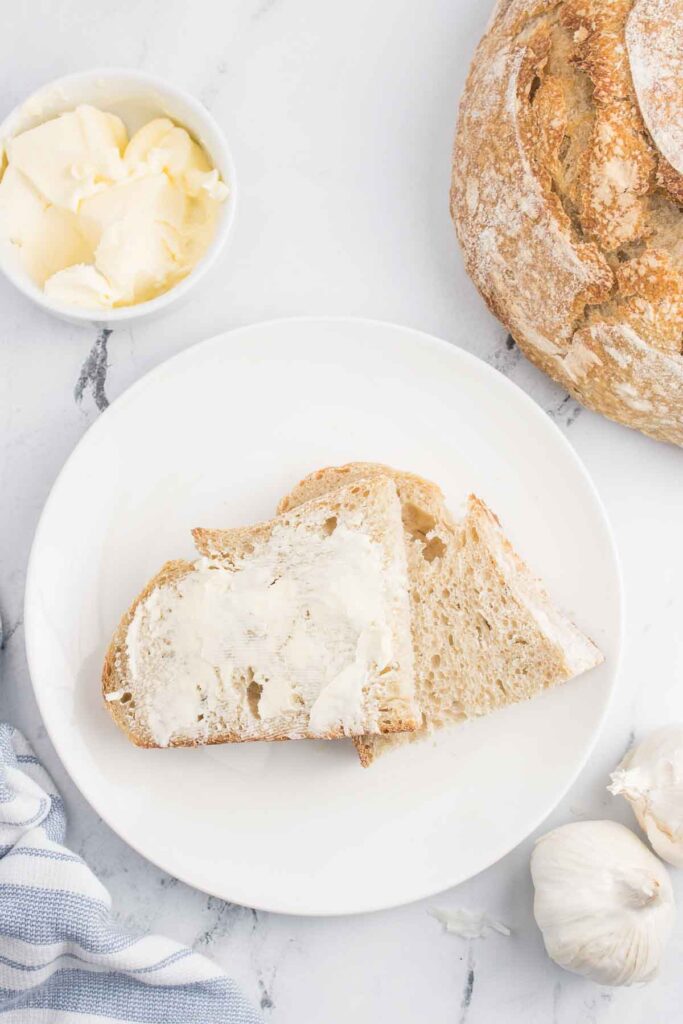
This bread is excellent for grilled cheese sandwiches, for using in a breakfast casserole, for dipping in an olive oil mixture, or eating in a sandwich! Enjoy!
Try these other delicious sourdough bread recipes:
How to make roasted garlic sourdough bread
This sourdough bread loaf is straight forward to make. For the full set of directions, please scroll down to the recipe card below.
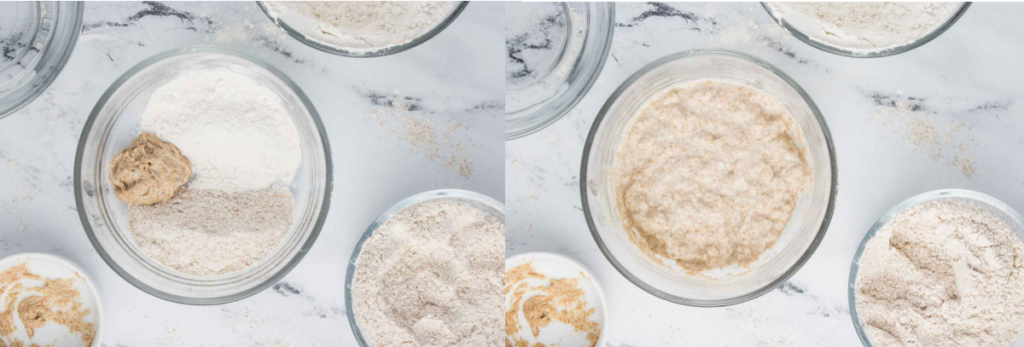
Make the levain
- In a small bowl, combine the ingredients for the levain until well incorporated.
- Cover and ferment at room temperature 8 hours.
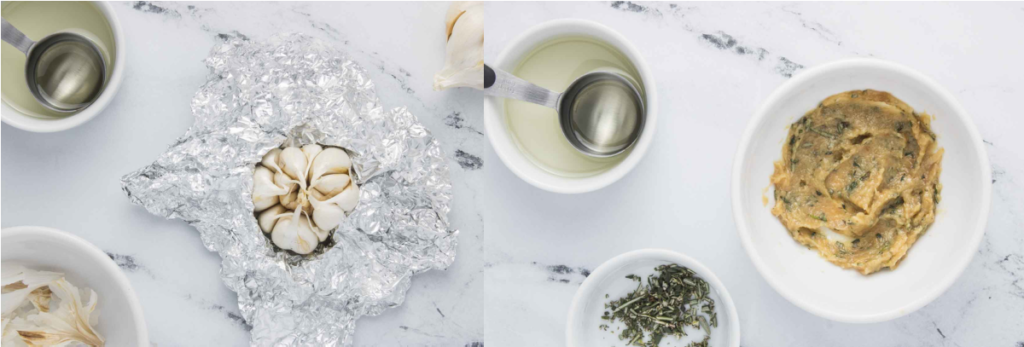
Roast the garlic
- Preheat the oven to 400 degrees and roast the garlic for 1 hour. Allow to cool.
- Mash the garlic with a fork and mix it with olive oil to create a paste.
*Optional: You can mix in 1-2 Tablespoons of fresh chopped rosemary into the garlic puree if you would like! This is super delicious, but its also good without it. Up to you!
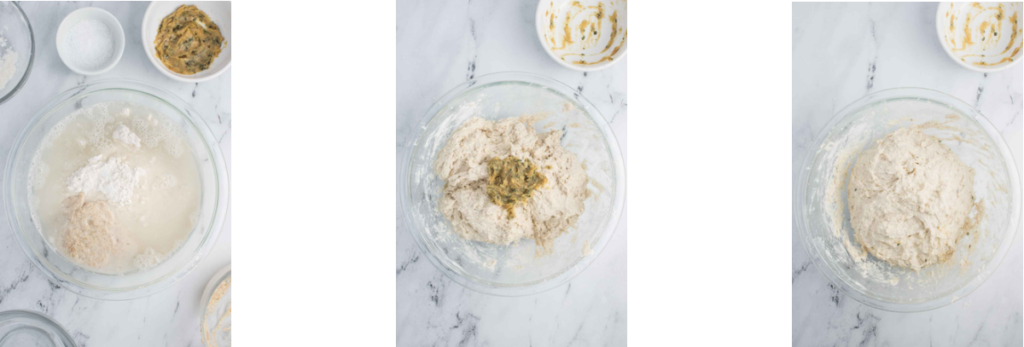
Make the dough
- In a stand mixer with a dough hook, combine the levain, flour, salt, and most of the water, mixing on low speed to create a dough.
- Increase the speed on the mixer and mix until you get a medium level of gluten development.
- Add the rest of the water and the garlic puree mixture and mix.
- The dough will be very soft at this stage, and it won’t look like it is coming together, but it should have both strength and elasticity.
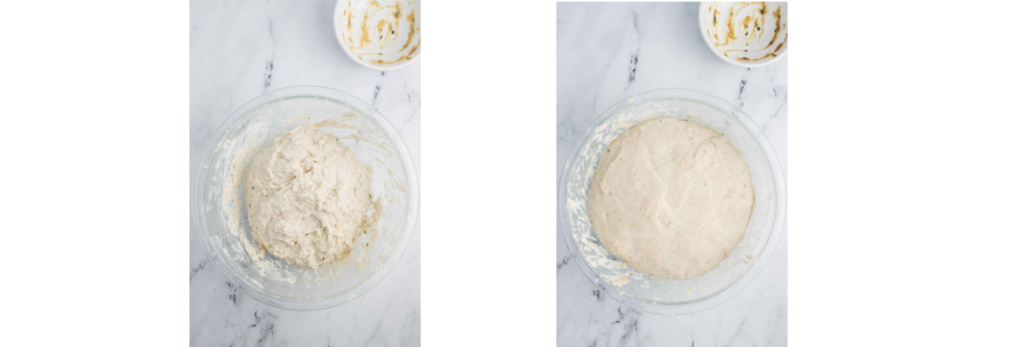
Bulk Ferment with stretch and folds
- Place in an oiled bowl and allow to ferment for 30 minutes.
- Remove the plastic covering and stretch the dough out and fold it over itself (in 3’s, like a pamphlet). You want to grab the side furthest from you and stretch it up and out away from you, then fold it back over to the center of the dough. Turn the bowl of dough 90 degrees to the right. Grab the next portion of dough that is farthest away from you and repeat the stretch the fold. Do this two more times, rotating the bowl each time, until you have stretched and folded each “edge” of the dough.
- Replace the plastic wrap and allow the dough to rest for another 30 minutes (or 1 hour total since the start of the bulk ferment), and then perform another set of stretch and folds.
- Allow the dough to rest for another 30 minutes (it should not be at the 90 minute mark since bulk ferment starter). Replace the plastic wrap.
- Allow the dough to continue bulk fermentation for another 2 hours 30 minutes, until the dough has almost doubled in size.
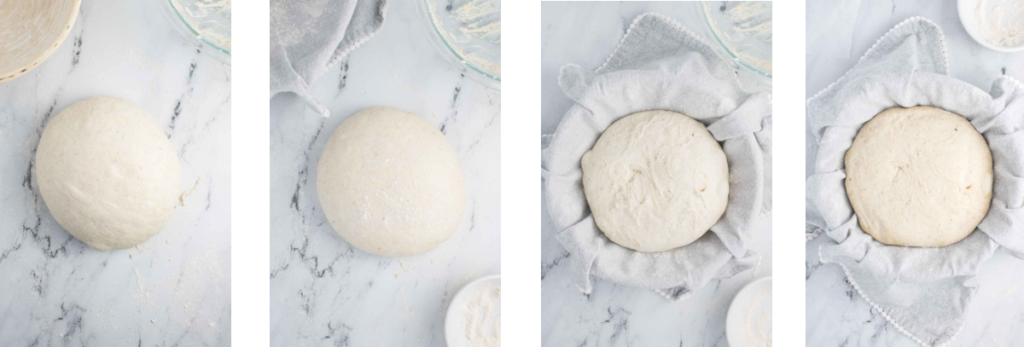
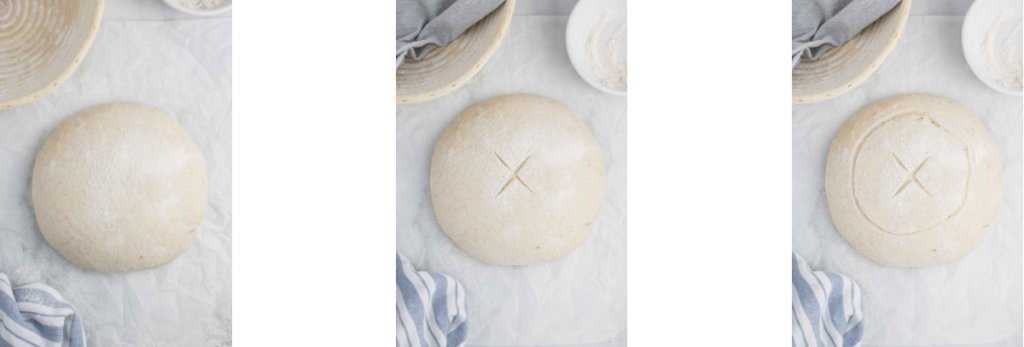
Shape the dough
- Turn the dough out onto a floured surface.
- Shape the piece into a loose ball and allow to rest for 20 minutes.
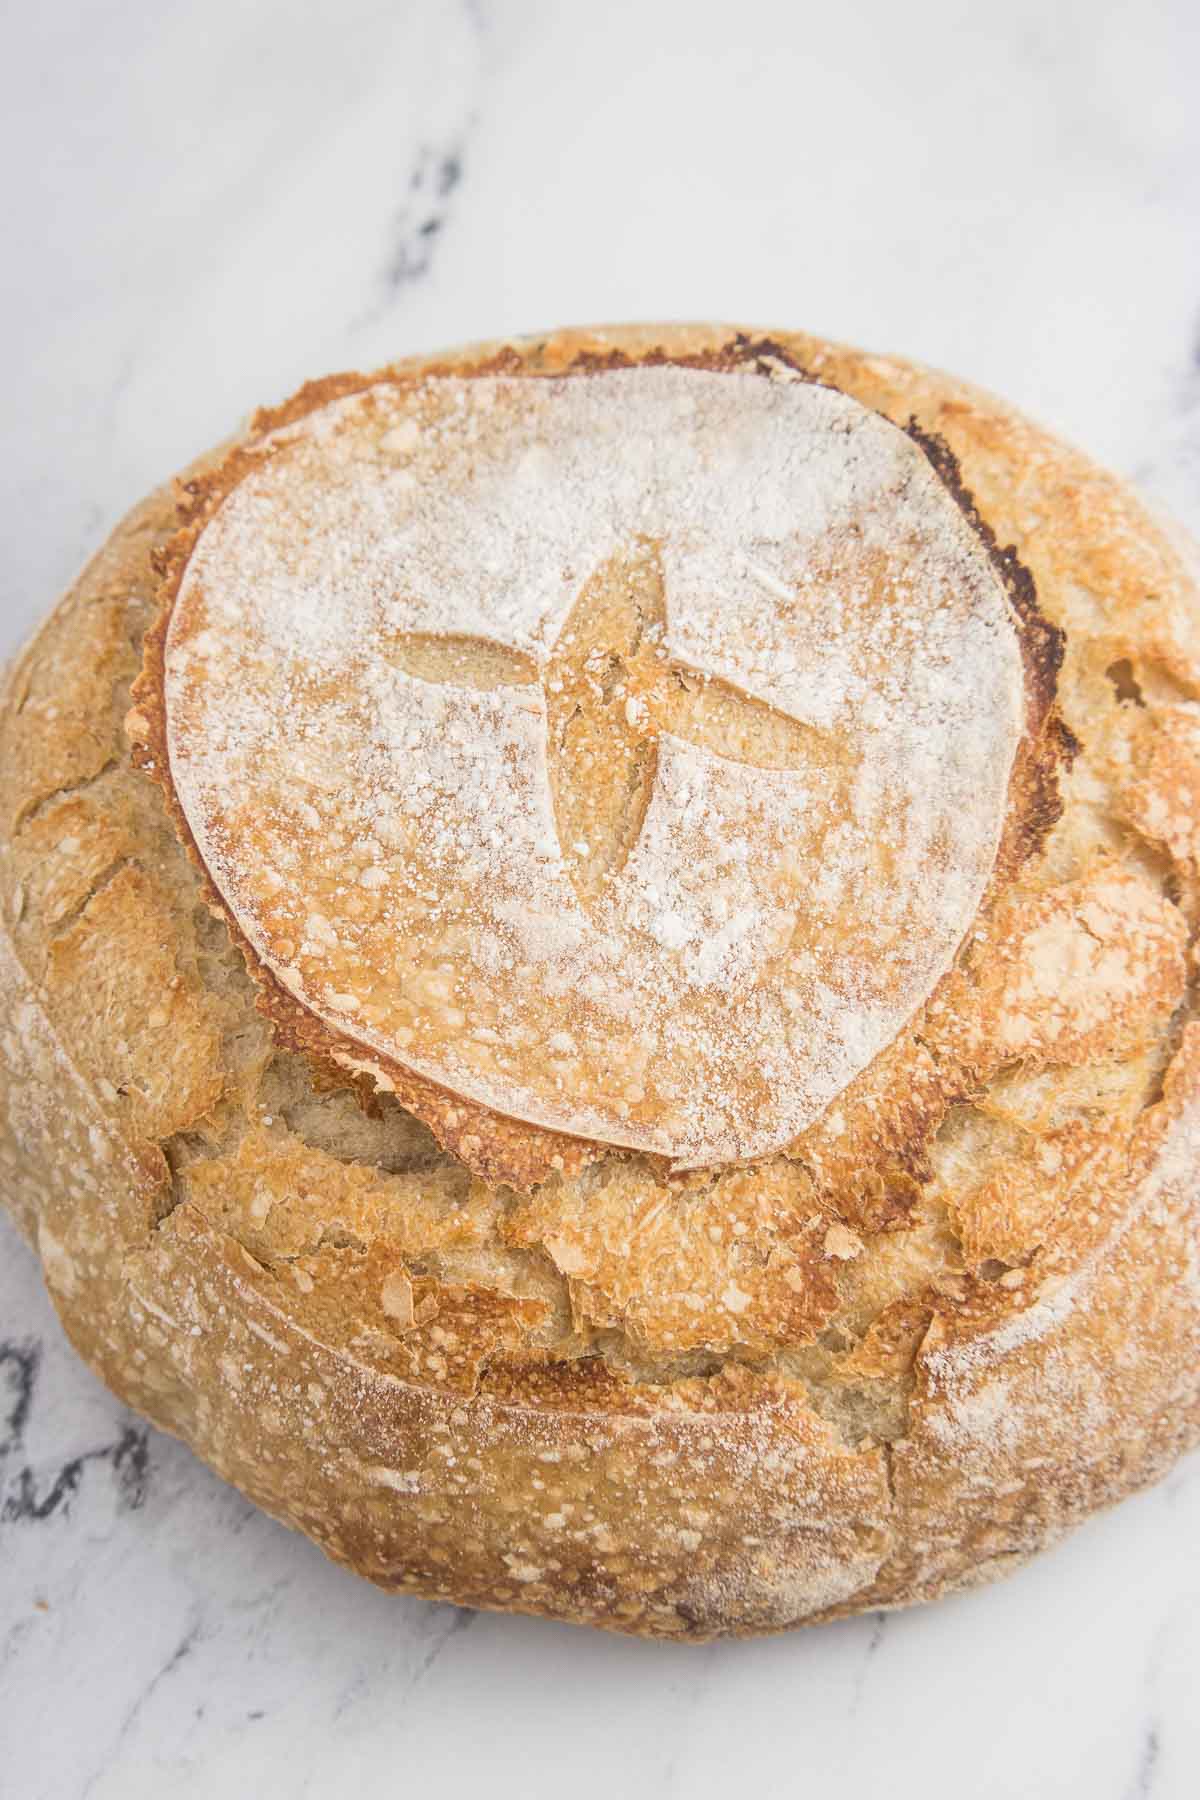
- Smooth the dough into round, smooth ball and dust the loaf with flour and place it top side down, into a lined proofing basket.
- Proof for 4 hours, or until doubled in size.
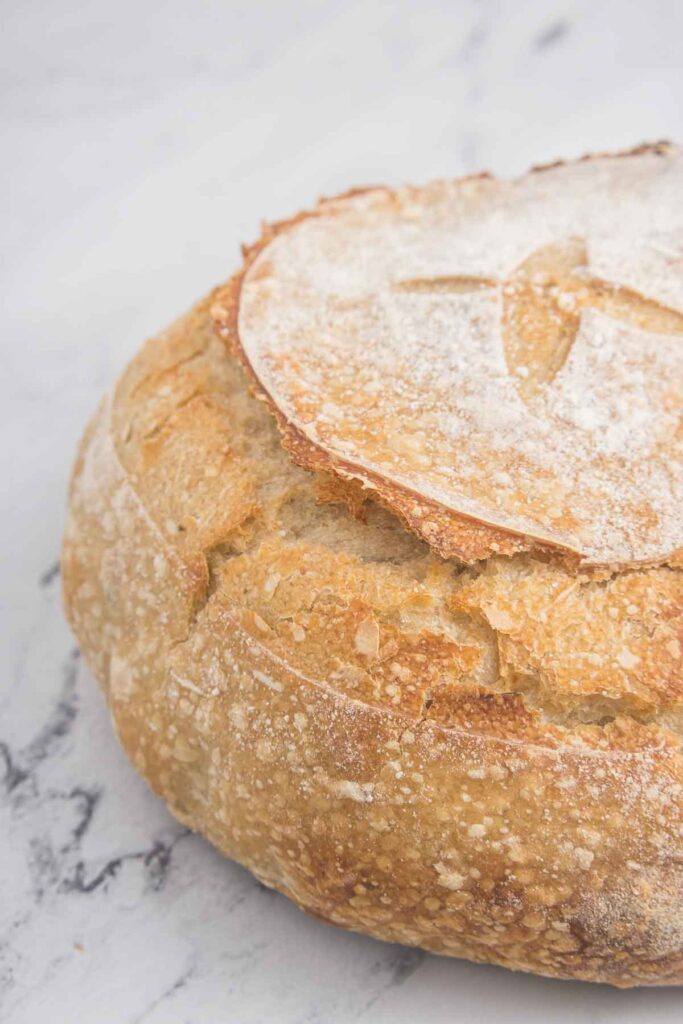
Bake
- Preheat the oven to 425 F.
- Bake in a preheated oven for 10 minutes with steam and then 25 without steam. See below for information on what to bake in and how to create steam.
How do I get a softer crust? To get a crust that is not so thick and hard, keep the lid on your dutch oven (affiliate link) for another 10 minutes. Then remove the lid and allow the crust to develop a lighter brown color.
What should I bake my loaf in?
You have two good choices for baking, and both are good, it just depends on what tools you have on hand.
- Dutch Oven (affiliate link) – You can use a nice big cast iron pot with a lid to bake it. Make sure you preheat it and the lid so they are nice and hot. The lid will help trap in any steam and create a nice hot environment for oven spring. You can add in a few ice cubes around the bread (but not on it) if you want even more steam. The only downside to this is you have to carefully transfer your dough into the hot pan and carefully remove the hot lid to crisp the crust.
- Baking stone + baking dish – You can use a baking stone instead of a pot. You will need to pair this with another kind of high temperature safe baking dish (not glass) that you can pour boiling water in to create steam. Make sure you preheat both items to be really hot. The downside to this method is you have to work quickly to add boiling water to the pan below the baking stone, and then add the dough to the baking stone without losing too much heat from the oven and without burning yourself.
Baker’s Schedule
Knowing how this bread recipe fits into your schedule is an important step for knowing when you should start to have it be done on time. I like to work backwards from when I want the bread to be done baking and figure out when I should feed my starter.
- Levain – 8 hours rest time
- Roasting Garlic – 1 hour
- Mixing Dough – 20 minutes
- Stretch and Folds – 1 hour 30 minutes
- Bulk Fermentation – 2 hours 30 minutes
- Shaping – 20 minutes
- Final Proofing – 4 hours (can also do your final proof overnight in the fridge)
- Baking – 35 minutes
*NOTE: The timing of this schedule is dependent on the temperature of your house. Dough will proof faster in a warmer house, and slower in a colder house. Watch the dough here, not the clock! For reference, the temperature of my house is 70 F.
What kind of sourdough starter do I need for this recipe?
This recipe uses a 100% hydration sourdough starter – meaning one that has been fed equal amounts of flour and water. For more reading on what that means, check out Feeding your sourdough starter.
This recipe needs a fed and active starter – so a starter that is nice and bubbly and has at least doubled in size.
New to sourdough? Read my Ultimate Guide to Sourdough for Beginners to answer all the questions you have!

How to serve this to your family
What can you use jalapeno cheddar bread for?
- Use it to create awesome sandwiches
- Serve it beside a nice bowl of soup
- Turn it into grilled cheese sandwiches
- Make an awesome breakfast strata with it
- Serve it beside homemade chili.
- Serve it beside breakfast with eggs!
How to store sourdough bread
This bread stores best at room temperature in a bread bag, or wrapped in a kitchen towel. You can also store the bread, sliced side down, on a wooden cutting board. Do not store in the fridge, the bread will become hard.
Food tastes better when its shared! If you try this recipe, let me know! Leave a comment and rate below! Love and links are always appreciated! If you’d like to share this post, please link to this post directly for the recipe, please do not copy and paste or screenshot. Thanks so much for supporting me! xoxo
Roasted Garlic Sourdough Bread
Ingredients
Levain:
- 22 g sourdough starter 100% hydration, fed and active
- 60 grams water
- 30 grams all purpose flour
- 30 grams whole wheat flour
Final Dough:
- 500 grams all purpose flour
- 390 grams water divided
- all of the above levain
- 12 g salt
Filling and Embellishment:
- 2 whole heads of garlic
- 3 Tablespoons olive oil divided
- 2 unpeeled garlic cloves
Instructions
- In a small bowl, combine the ingredients for the levain until well incorporated.
- Cover and ferment at room temperature 8 hours.
- Preheat the oven to 400F.
- Remove the outer papery layers from the garlic, but leave the skins on.
- Place the garlic in a square of foil and drizzle 1 TBSP olive oil on top.
- Wrap the foil around the garlic and place the packet in the oven.
- Roast for 1 hour, or until soft and beginning to turn golden.
- Allow the garlic to cool enough to handle, then squeeze out the garlic cloves from their skins.
- Mush the garlic with a fork, and mix together with the remaining olive oil.
- In the bowl of a stand mixer with a dough hook, combine the fermented levain, the flour, salt, and about 85% of the water to start with. Mix on low speed until combined.
- Increase the speed to medium and mix until you get a medium level of gluten development.
- Add the remaining water and the garlic puree and mix until incorporated. The dough will be very soft and will not come together around the dough hook but it should have both strength and elasticity.
- Transfer the dough to a well lightly oiled bowl.
- Cover and allow to ferment for 4 hours at room temperature, with a fold at 30, 60, and 90 minutes.
- Turn the dough out onto a lightly floured counter and shape into a loose ball and allow to rest, covered, for 20 minutes.
- Turn the ball of dough over and gently round into a smooth ball..
- Dust the loaves with flour and place them, top side down, into a linen lined basket.
- Proof at room temperature, covered, for another 4 hours.
- Preheat the oven and a baking stone to 425F, as well as prepare for your method of steam.
- Turn the proofed loaf out onto a sheet of parchment paper and slash a circle about 1" from the edge.
- Slide the parchment paper onto the baking stone and bake for 10 minutes with steam, and then 25 without, until the loaves are golden brown.
- Turn the oven off and leave the loaf in the oven, with the door cracked, for another 10 minutes.
I bet this makes an amazing grilled cheese sandwich!
Beautifully done! I love that look on bread loaves, but haven't worked up the nerve to try it yet. It's gorgeous.
Oh my gosh, my mouth is watering just reading about this bread. Looks fantastic!
Oooh, I considered this technique for the "bread fashion show" this month too – so pretty! For scoring technique, have you read the blog Tartine Bread Experiment? She makes the most GORGEOUS loaves and her scoring technique is awesome, and she just wrote a post with some tips – check it out!
I’ve tried making this recipe twice now. I can’t seem to get the levain correct. What consistency should it be? The first time I thought it was way too dry so I almost doubled the water. The dough was super watery. The second time, I followed the exact recipe and my levain was super dry. I couldn’t get it to mix with the water and flour to create the dough.
The first loaves still turned out super tasty and I’m on my second round now!
Thanks for your help!
Hi Janie! This is a low hydration levain, so it is stiff and you will need to work to get it all combined. Do not add extra water, just keep mixing! It will come together, promise! (Also this recipe was originally posted in 2013 and I recognize that it needs a good update to make it better! It is on the list to get updated soon!)
This tasted soooooo delicious! Badly wanna try this again!
This bread was worth the time doing it It was delicious and so unique with the roasted garlic flavor.