Sourdough Challah
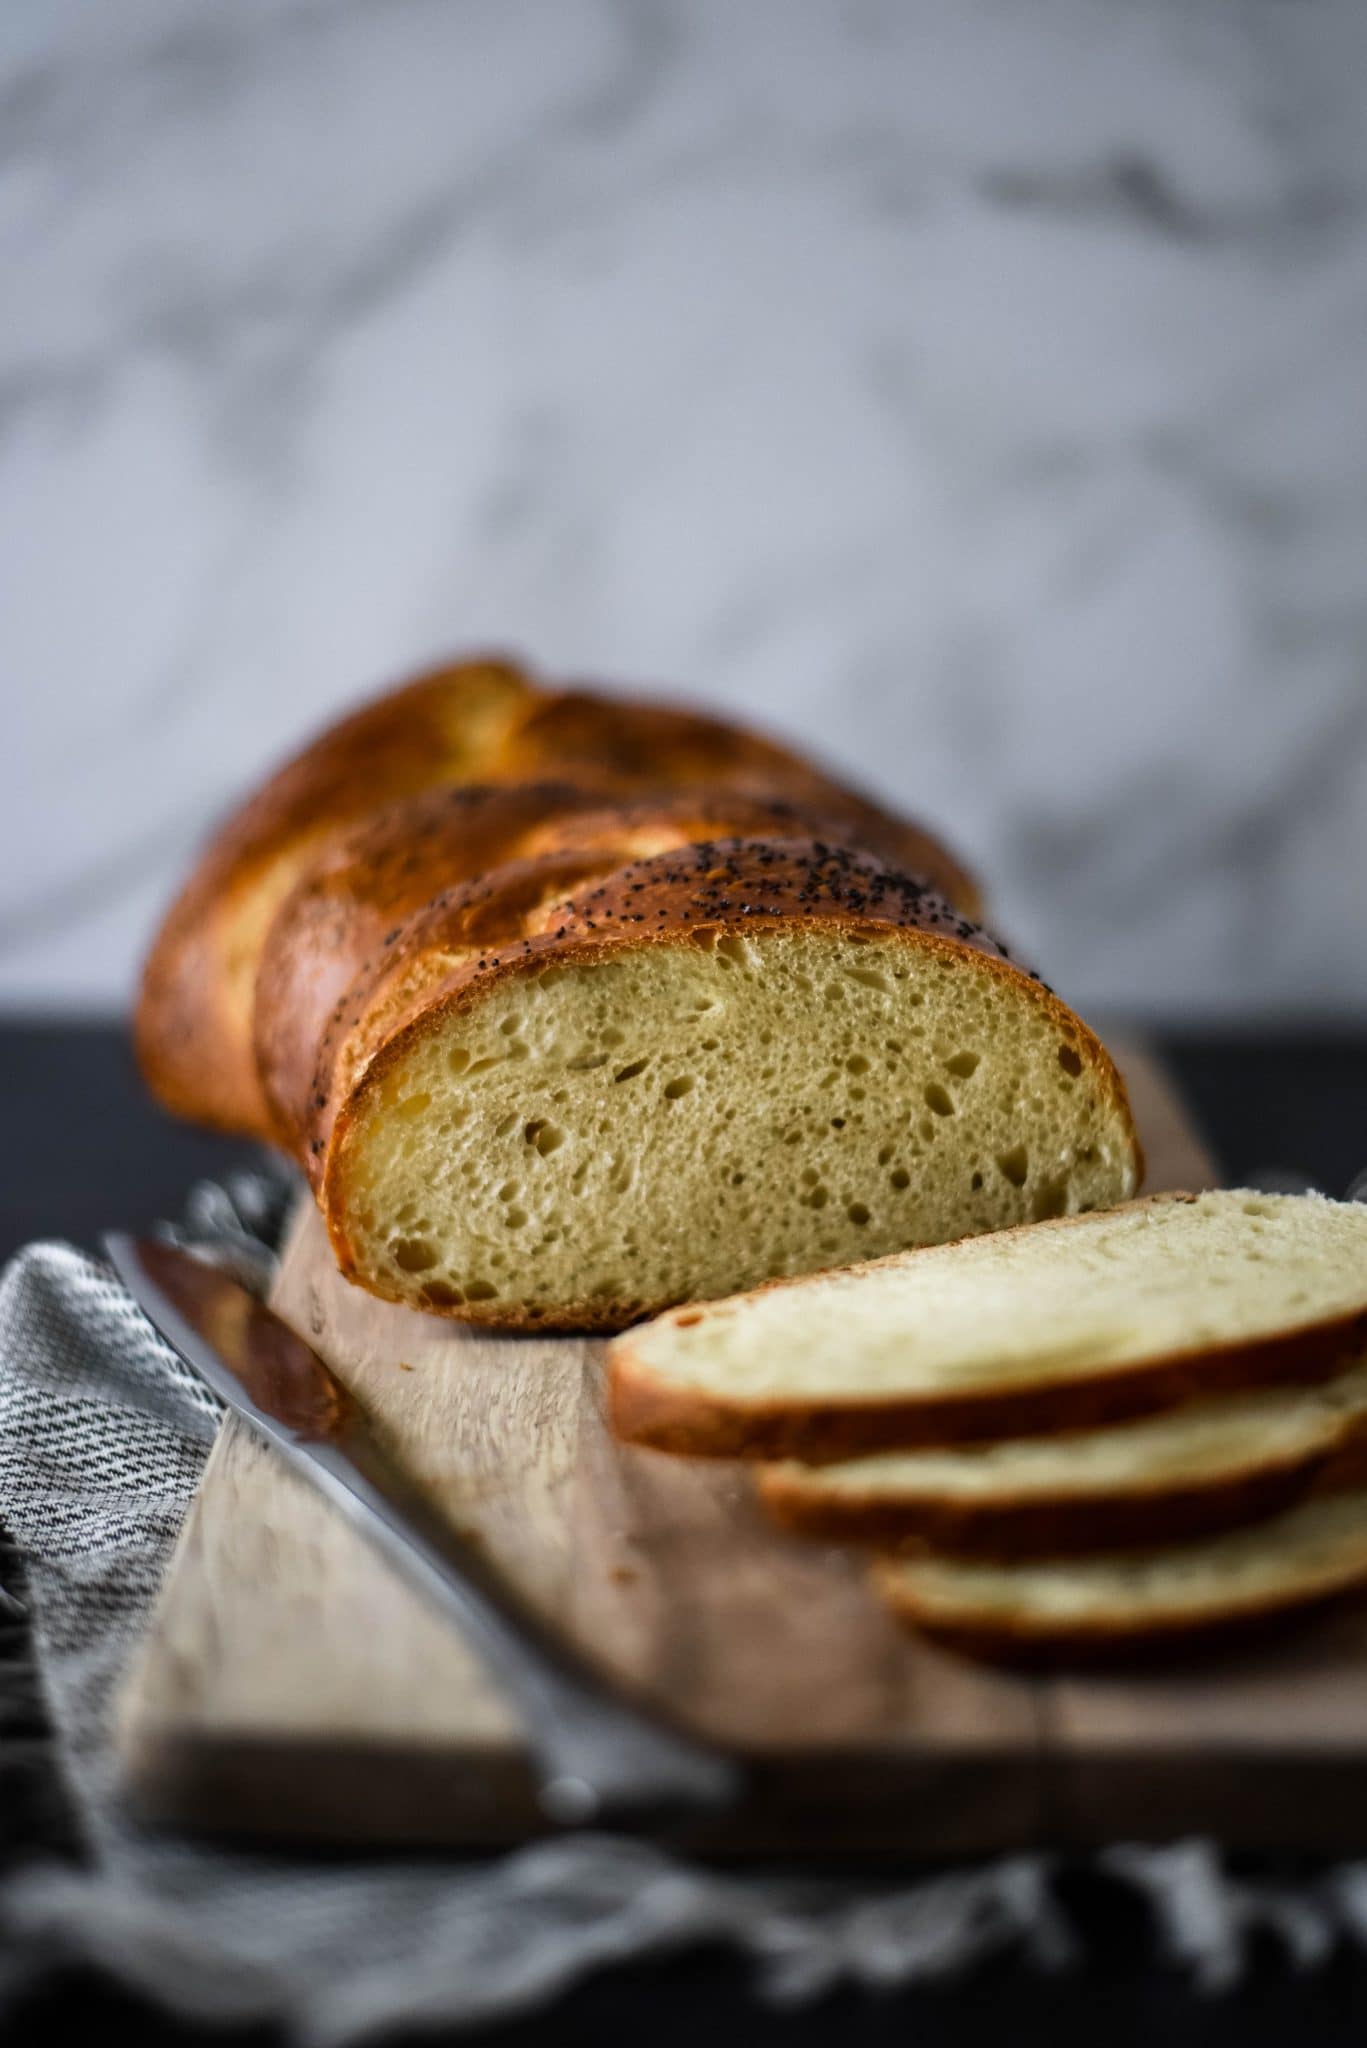
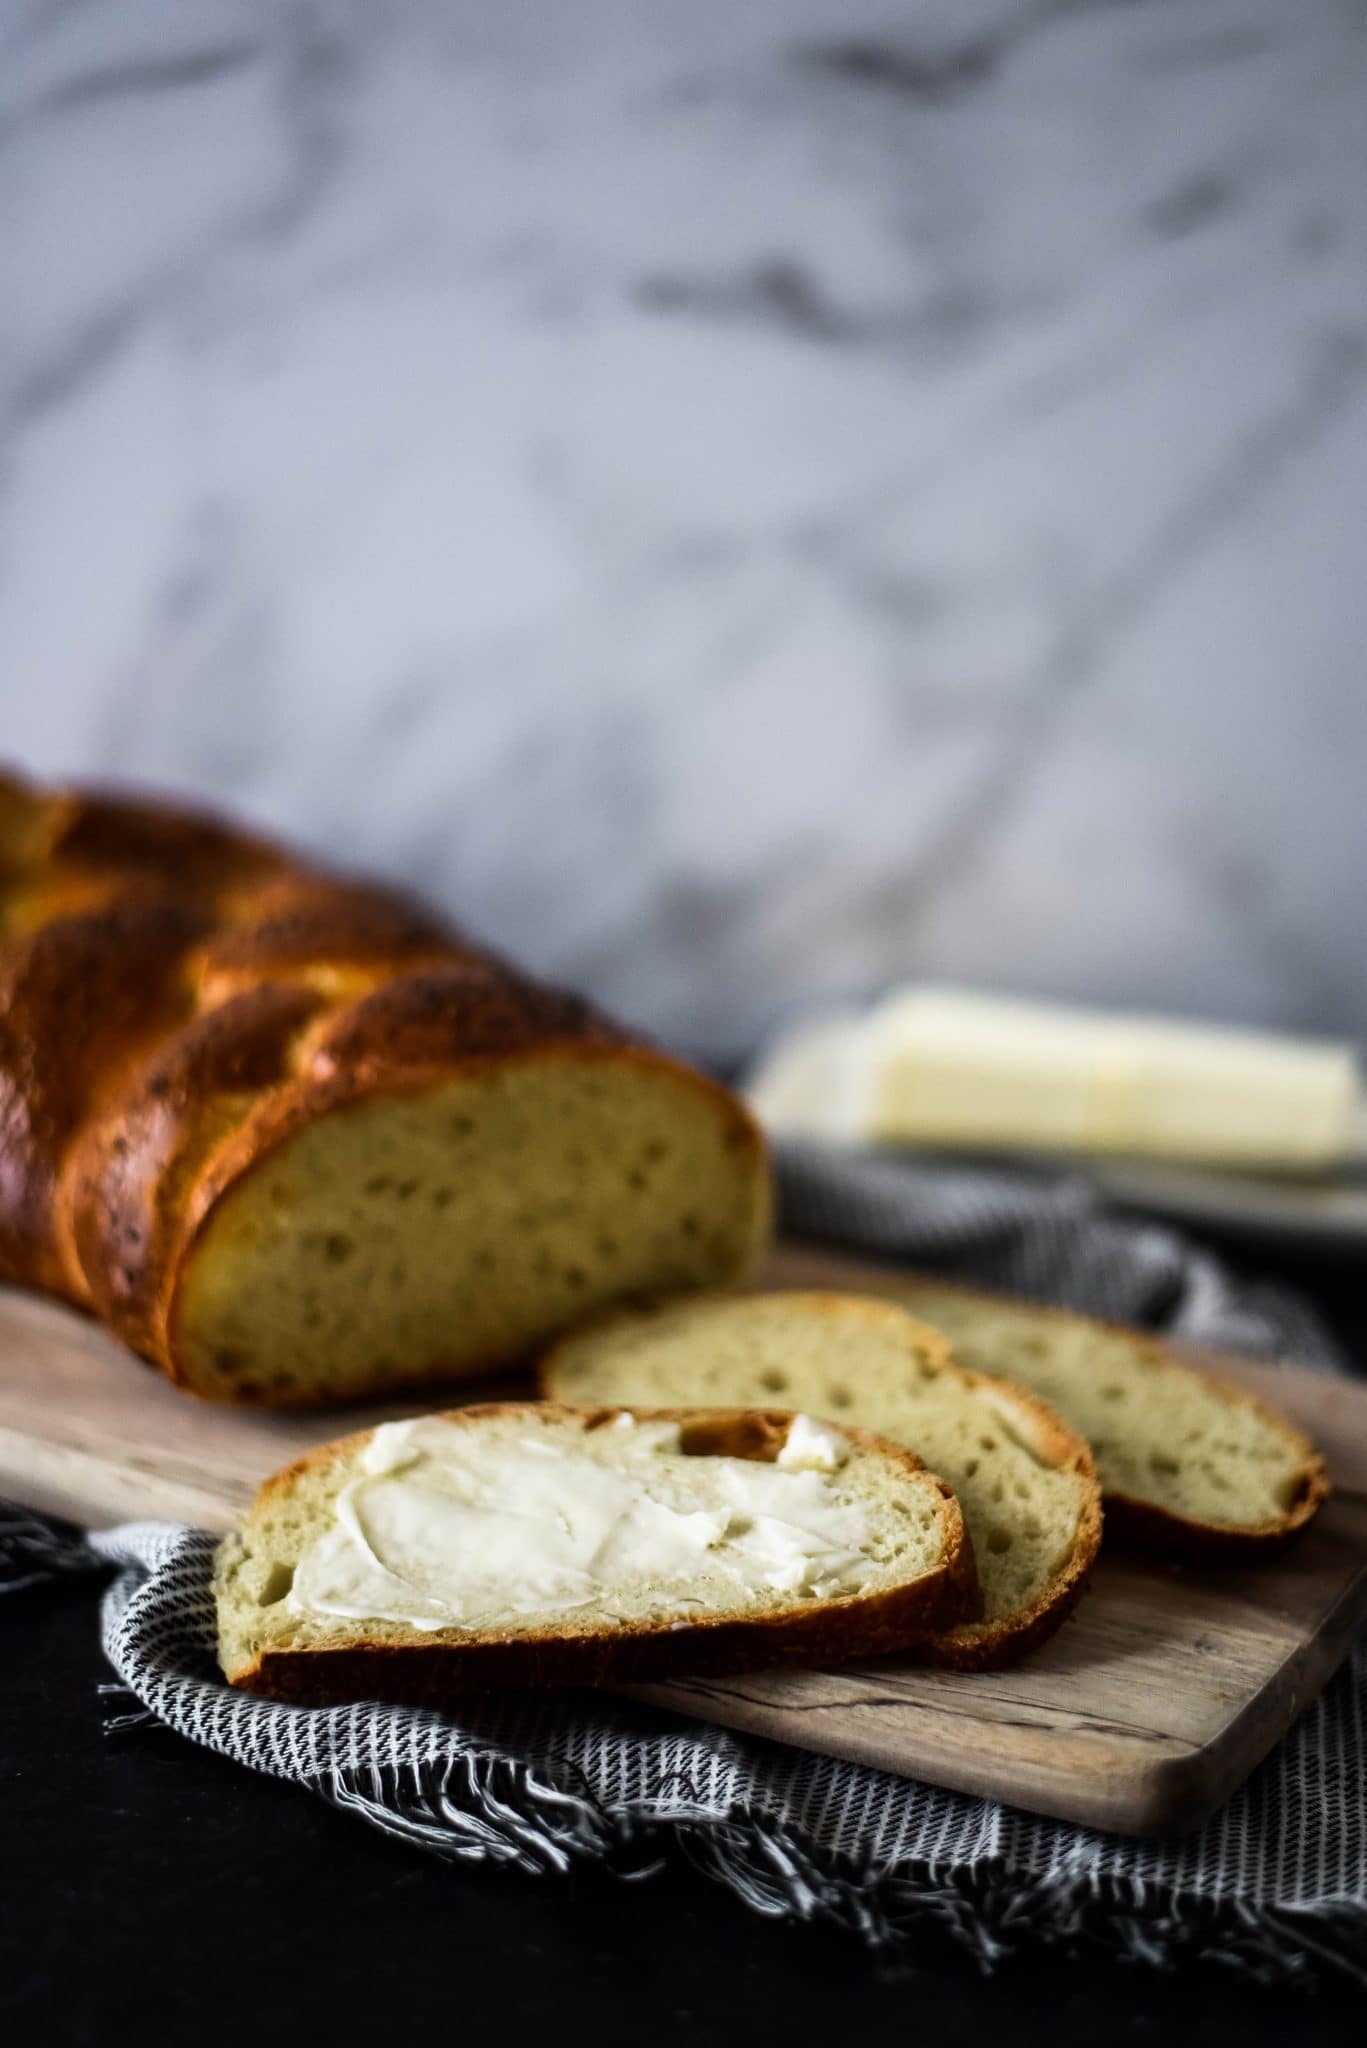
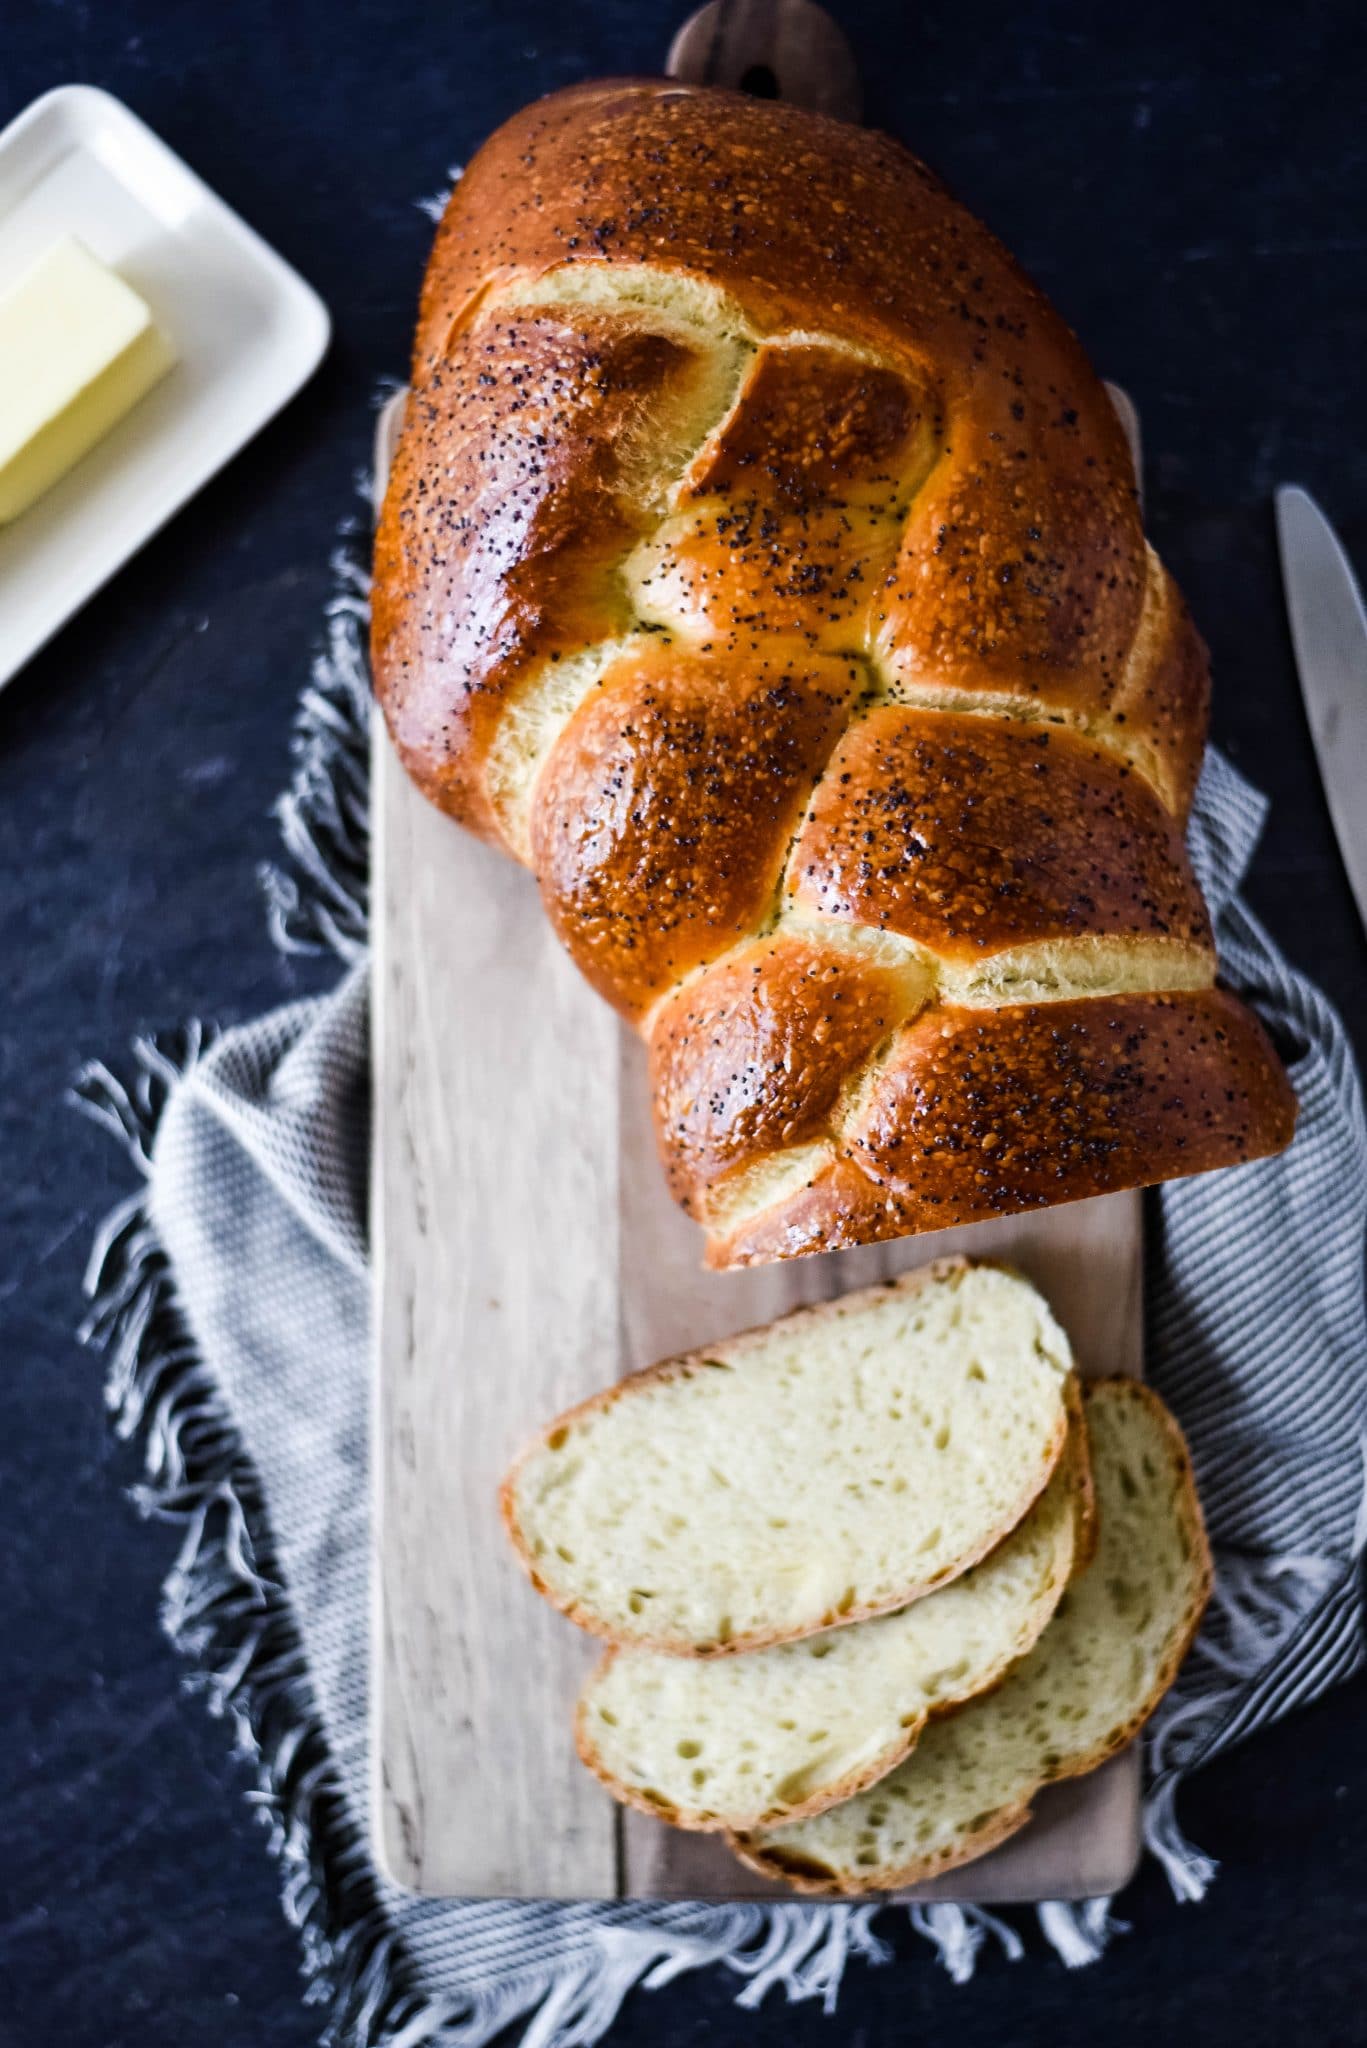
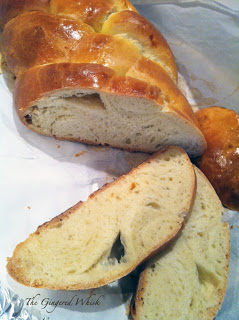
Challah is one of my favorite loaves of bread to bake. It is an enriched dough, which means that it has eggs, oil, and honey in the dough. This helps make the bread soft! It is similar to a brioche, but it does not contain any milk or butter. Its crust is thin, the crumb is light, and its a perfect bread for snacking, french toast, and grilled cheese.
This recipe uses a sourdough starter as its leavening, with no additional yeast. To minimize the sourdough tang on this loaf, we use our starter to create a stiff levain (or a bigger starter that has more flour than water). This bread dough is a low hydration dough because there is less water than flour. This creates a dough that is easy to work with, which is just what we want for braiding it.
Other sourdough bread recipes:
How to make Challah with sourdough starter
This sourdough challah recipe is a great bread recipe to try your hand at! Because it is used with a stiff starter and a low hydration dough, it is really easy to work with!
Note: The temperature and humidity of your house will affect the timing in the bulk fermentation and proofing times. Dough in cooler houses with less humidity could take longer. Dough in warmer houses with high humidity could take less time. Watch the dough here, not the clock.
Make the Levain the night before:
The levain is like a bigger, specific hydration starter. You need to use 1/2 cup of fed and active 100% hydration starter (which weights roughly 113 grams) to make this stiff 50% hydration levain.
- In a medium mixing bowl, combine the active 100% hydration starter with the 113 grams warm water and the 226 grams bread flour. Mix until combined. This is a stiff starter, so it will take some work to get all the flour mixed in. Do not add extra water. You might need to do a little kneading to get it to all mix in. If all the flour won’t mix in, its ok, just get as much as you can.
- Cover the bowl with a lid or plastic wrap and allow to sit on the counter overnight 8-12 hours.

Mix the dough.
- In the morning, get out a large mixing bowl.
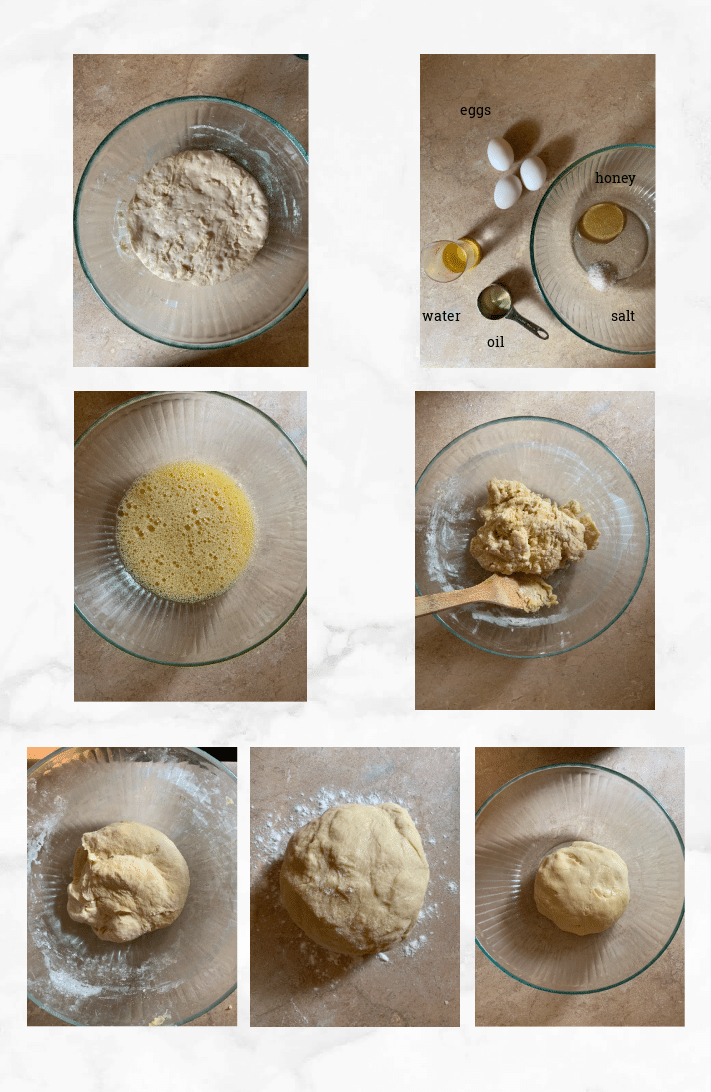
- In the large mixing bowl, whisk together the warm water, eggs, salt, vegetable oil and honey. Whisk until the salt is dissolved.
- With your hands or a wooden spoon, mix the bread flour in all at once.
- When the mixture is a shaggy ball, scrape it out onto your work surface.
- Add the levain from the night before, and knead until the dough is smooth (it should take about 10 minutes by hand). You might need to lightly sprinkle your counter with a small amount of flour as you knead to keep the dough from sticking. The dough will be firm and should feel almost like modeling clay and should be easy to work with even if a little bit sticky. If the dough is too firm to knead easily, add a tablespoon or two of water to it. If the dough is too wet, add a tablespoon or two of flour.
- Place the dough in a clean oiled bowl and cover with plastic wrap.
Bulk Ferment
- Allow the dough to ferment at room temperature for 2 hours. It will probably not rise much, if at all.
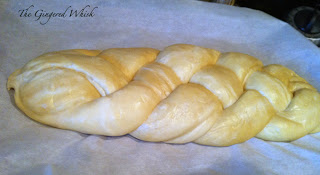
Shaping and Braiding Challah
- Line a baking sheet with parchment paper.
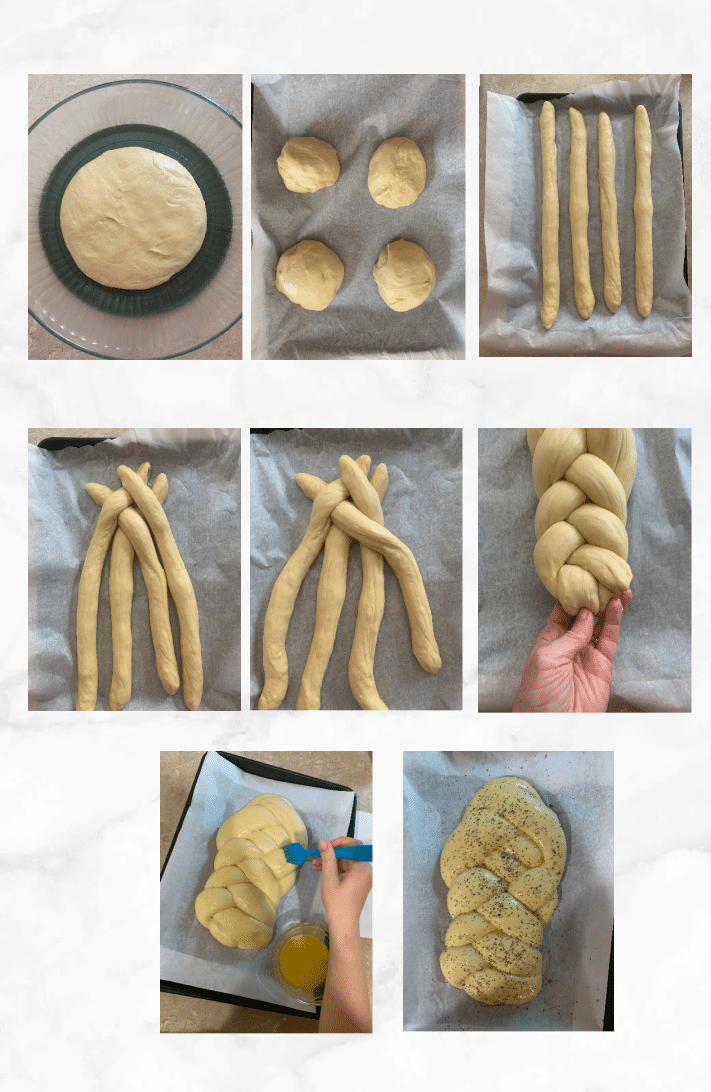
- Divide the dough into four even balls (for a four strand challah. If you want to do a 6 strange, divide the dough into 6 balls).
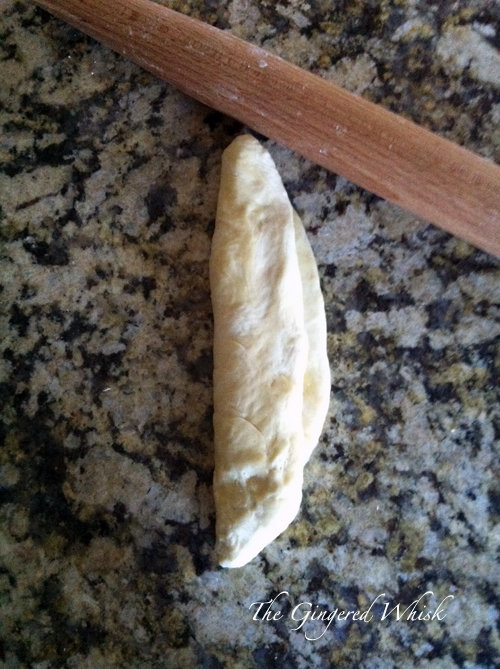
- Roll each ball into a long thin strip the same length as your baking sheet, working from the middle, out. If the dough is too elastic and keeps shrinking on you, cover the strips with a cloth and walk away for 10 minutes while the dough rests.
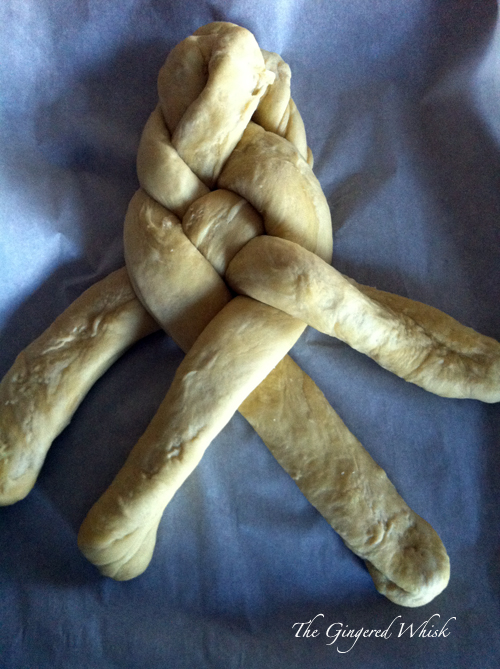
- Place the strips on the baking sheet and bring the top points together. Pinch the four strands together.
- Starting with the strand on the right, pass it over the next strand, under the third strand, and over the fourth strand on the left.
- Repeat with the strand that is now on the right, passing it over, under, and over the other strands.
- Continue braiding until you reach the end.
- Pinch the ends together and tuck both the top and bottom under the loaf a little so you don’t see the pinched ends.
Proofing
- Cover the baking sheet with plastic wrap and allow the loaf to proof until tripled in size, about 5 hours. The time it takes will depend on the temperature and humidity level in your house, if it is cooler it could take longer, and if it is warmer it could take less time. Watch the dough, not the clock. It will be fully proofed when you can gently dent it with your knuckle and the dough springs back.
Baking the challah
- Arrange the oven racks so you have one in the upper third of your oven, with nothing above it.
- Preheat your oven to 350 F and let it get nice and hot – at least 15-20 minutes before baking.
- In a small bowl, beat the remaining egg with a pinch of salt.
- Brush the egg glaze over the loaf.
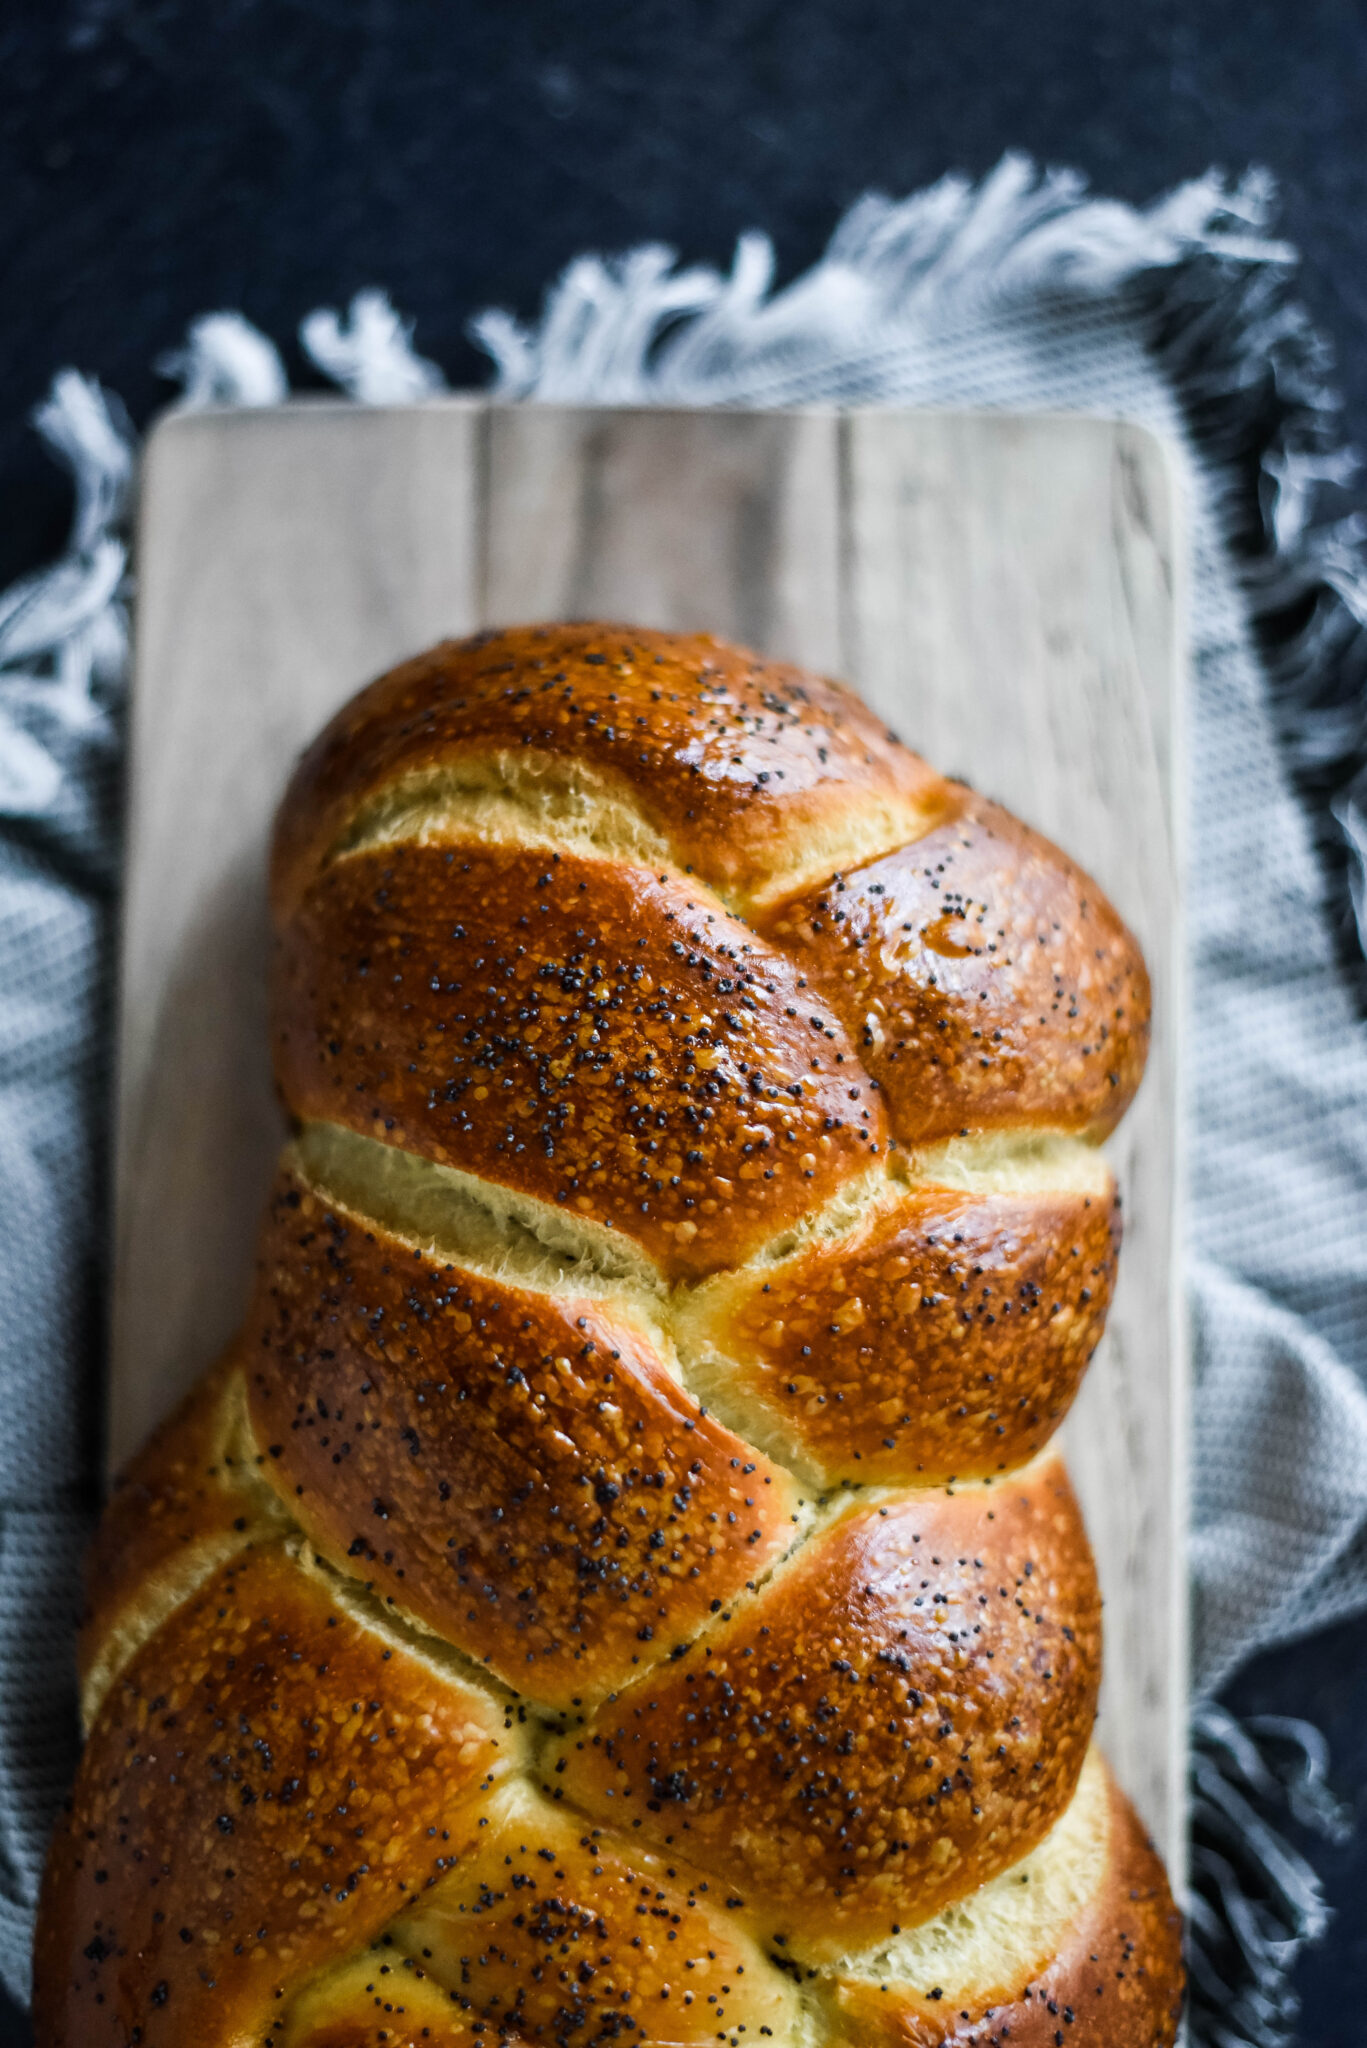
- If desired, you can sprinkle the loaf with poppy seeds or sesame seeds, or you can leave it plain.
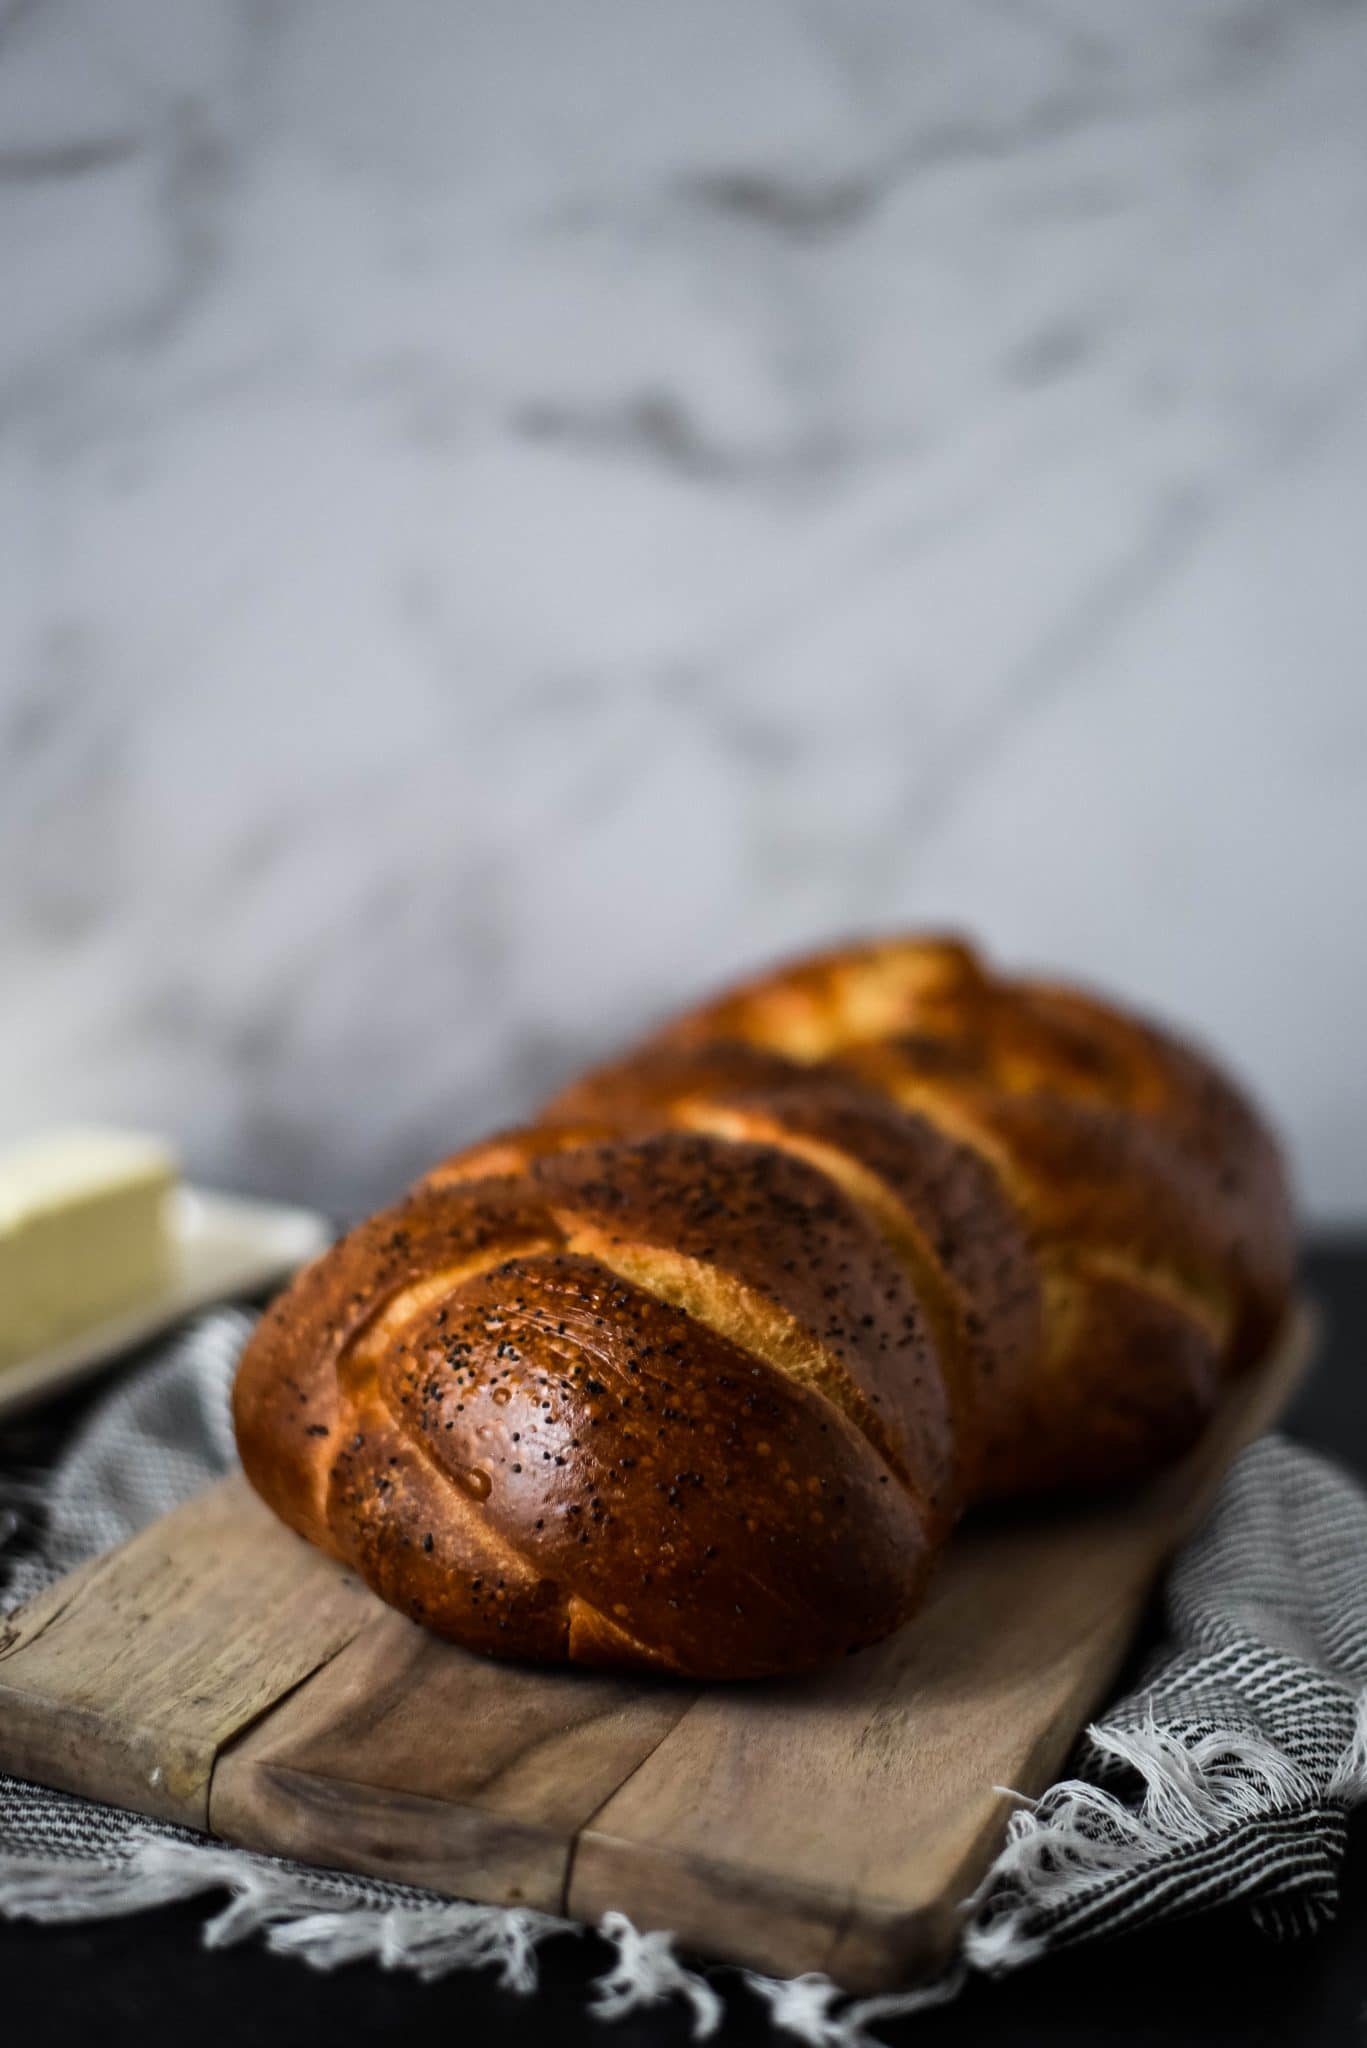
- Bake for 35 to 40 minutes, or until well browned. After the first 20 minutes of baking, rotate the baking sheet in the oven to promote even browning. If the bread is browning too fast, tent it with foil.
- Remove the bread from the baking sheet and cool completely on a wire rack. Some baking still happens while it is cooling, so make sure you wait until it is completely and totally cool before slicing it.
Frequently asked questions.
Can I mix this in a stand mixer instead of kneading by hand?
You can, however, make sure your stand mixer is heavy duty and can handle it. It should take about 5 full minutes of mixing on low in the mixer, and the dough should not stick to the bottom of the bowl.
Can I use this recipe to create different shapes of challah?
Yes, You can use this same recipe to create a 3 strand challah braid, a 6 strand challah braid, or a round challah. Just shape it according to what design you want.
Use this challah to make:
- Strawberry Bread Pudding
- French Toast
- Grilled Cheese Sandwiches
Food tastes better when its shared! If you try this recipe, let me know! Leave a comment and rate below! Love and links are always appreciated! If you’d like to share this post, please link to this post directly for the recipe, please do not copy and paste or screenshot. Thanks so much for supporting me! xoxo

[mailerlite_form form_id=11]
Sourdough Challah
Ingredients
Levain:
- 113 grams very active fully fermented sourdough starter at 100% hydration
- 113 grams warm water
- 226 grams bread flour
Final Dough:
- ¼ cup 60 grams warm water
- 3 large eggs plus 1 for glazing
- 1 ½ tsp 8 grams salt
- ¼ cup 55 grams vegetable oil
- 3 TBSP 65 grams mild honey OR 1/3 cup (60 grams) sugar
- about 3 cups 400 grams bread flour
- Optional Toppings: sesame seeds or poppy seeds
Instructions
Make the Levain the night before:
- The levain is like a bigger, specific hydration starter. You need to use 1/2 cup of fed and active 100% hydration starter to make this stiff 50% hydration levain.
- In a medium mixing bowl, combine the active 100% hydration starter with the 113 grams warm water and the 226 grams bread flour. Mix until combined. This is a stiff starter, so it will take some work to get all the flour mixed in. Do not add extra water. You might need to do a little kneading to get it to all mix in. If all the flour won’t mix in, its ok, just get as much as you can.
- Cover the bowl with a lid or plastic wrap and allow to sit on the counter overnight 8-12 hours.
- Mix the dough.
- In the morning, get out a large mixing bowl.
- In the large mixing bowl, whisk together the 60 grams warm water, eggs, salt, vegetable oil and honey. Whisk until the salt is dissolved.
- With your hands or a wooden spoon, mix the bread flour in all at once.
- When the mixture is a shaggy ball, scrape it out onto your work surface.
- Add the levain from the night before, and knead until the dough is smooth (it should take about 10 minutes by hand). You might need to lightly sprinkle your counter with a small amount of flour as you knead to keep the dough from sticking. The dough will be firm and should feel almost like modeling clay and should be easy to work with even if a little bit sticky. If the dough is too firm to knead easily, add a tablespoon or two of water to it. If the dough is too wet, add a tablespoon or two of flour.
- Place the dough in a clean oiled bowl and cover with plastic wrap.
- Bulk Ferment
- Allow the dough to ferment at room temperature for 2 hours. It will probably not rise much, if at all.
- Shaping and Braiding Challah
- Line a baking sheet with parchment paper.
- Divide the dough into four even balls (for a four strand challah. If you want to do a 6 strange, divide the dough into 6 balls).
- Roll each ball into a long thin strip the same length as your baking sheet, working from the middle, out. If the dough is too elastic and keeps shrinking on you, cover the strips with a cloth and walk away for 10 minutes while the dough rests.
- Place the strips on the baking sheet and bring the top points together. Pinch the four strands together.
- Starting with the strand on the right, pass it over the next strand, under the third strand, and over the fourth strand on the left.
- Repeat with the strand that is now on the right, passing it over, under, and over the other strands.
- Continue braiding until you reach the end.
- Pinch the ends together and tuck both the top and bottom under the loaf a little so you don’t see the pinched ends.
- Proofing
Cover the baking sheet with plastic wrap and allow the loaf to proof until tripled in size, about 5 hours. The time it takes will depend on the temperature and humidity level in your house, if it is cooler it could take longer, and if it is warmer it could take less time. Watch the dough, not the clock. It will be fully proofed when you can gently dent it with your knuckle and the dough springs back.- Baking the challah
- Arrange the oven racks so you have one in the upper third of your oven, with nothing above it.
- Preheat your oven to 350 F and let it get nice and hot - at least 15-20 minutes before baking.
- In a small bowl, beat the remaining egg with a pinch of salt.
- Brush the egg glaze over the loaf.
- If desired, you can sprinkle the loaf with poppy seeds or sesame seeds, or you can leave it plain.
- Bake for 35 to 40 minutes, or until well browned. After the first 20 minutes of baking, rotate the baking sheet in the oven to promote even browning. If the bread is browning too fast, tent it with foil.
- Remove the bread from the baking sheet and cool completely on a wire rack. Some baking still happens while it is cooling, so make sure you wait until it is completely and totally cool before slicing it.
Notes
You can, however, make sure your stand mixer is heavy duty and can handle it. It should take about 5 full minutes of mixing on low in the mixer, and the dough should not stick to the bottom of the bowl. Can I use this recipe to create different shapes of challah?
Yes, You can use this same recipe to create a 3 strand challah braid, a 6 strand challah braid, or a round challah. Just shape it according to what design you want.
Nutrition
This Sourdough Challah recipe is based off of (Maggie Glezer, A Blessing of Bread, recipe found via The Fresh Loaf) with a few adaptations.
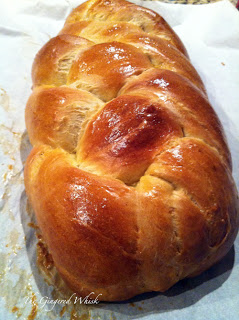
I’ve been wanting to try a challah recipe for a while now. I’d never actually eaten a challah before, but I honestly think it is one of the most beautiful loaves of bread I have ever seen. But I have heard they were difficult and complicated to do, and so I always kept it on the “someday I’ll make this but not quite yet” list.
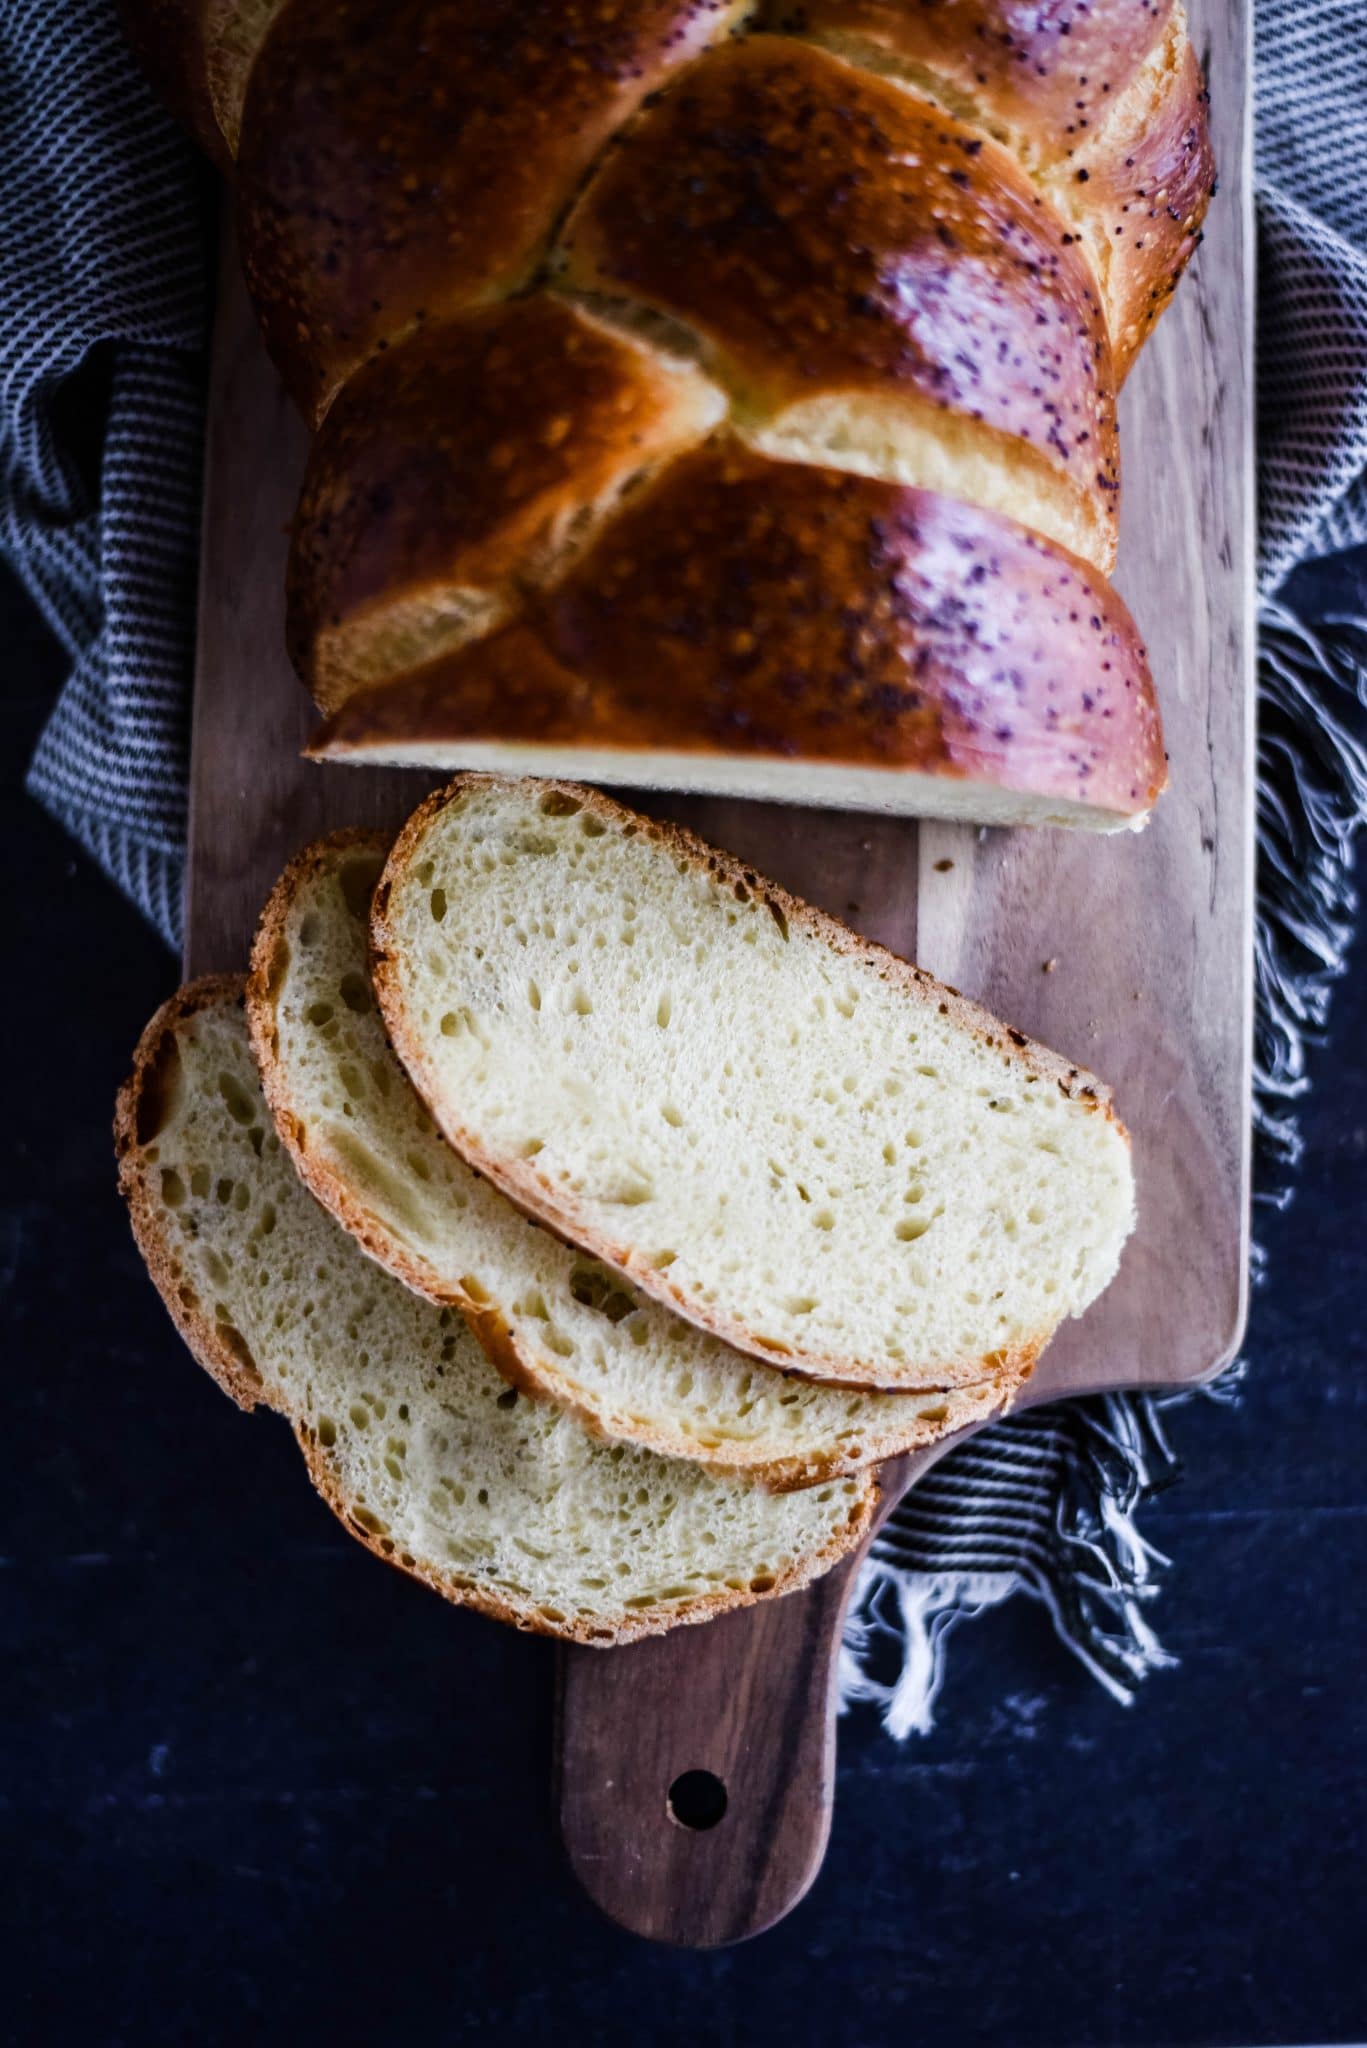
This loaf was beautiful, too, and totally erased my “challah fear”. This bread is no more complicated than any other bread I’ve made, it was not hard at all! The most difficult part for me was my momentary freak out when I couldn’t remember how to do a four stranded braid, haha. The finished loaf is a gorgeous thing, I almost didn’t want to cut into it. When I finally persuaded myself to break out the bread knife, I was rewarded with a super soft and rich slice. I will definitely be making this again, and again!
I made challah once.
I accidently added in an extra egg (I misread that it was for brushing on top) and so I had to add in extra flour too. It was awesome. I've never had such good challah.
It was so eggy, and soft. Yum!
Yours looks great 🙂
Hope to see you around hehe!
Nice work. It looks very pretty (and I'm sure it's tasty, too).
I'm so glad you tackled Maggie Glazer's SD challah – it looks beautiful! Don't you love how it stays moist for days? BTW, I have a link to a video for a 4 strand braid in my salted caramel apple SD challah post. Let me know if you want a vid for a 6 braid too 🙂
That said..I usually don't like chocolate and orange or any orange pieces in my desserts in general, but the orange was a request, and the way the oranges candied made it much better than I thought it would be.
@Lisa,
would you mind letting me know what recipe you are referring to with the orange… I love candied orange.
Stacey
Gorgeous!!! This makes me want to finally tackle challah bread too!
These directions are extremely difficult to understand! The night before baking, you have me create a small dough ball, and measure out a cup of starter. On baking day, what becomes of the leaving dough ball I created the day before???
Sorry that the recipe directions were confusing for you! You add in the levain starter from the night before after you have mixed together the rest of the ingredients in the morning – at the same time that you mix in the bread flour! I hope that clarifies it for you!
Hi we love this recipe! Made it a few times already. I’m trying to figure out – why do you make a levain that is 250g, if you only need 200g of it? Why not just lessen each ingredient to 4/5 of itself and you’ll end up with 200g?
Hi Sarah! You could totally do that! I have found that most people making this recipe are using the volume measurements (cup, teaspoon, etc) instead of weighting the ingredients out. Its a lot easier to measure out the whole numbers and then just use what you need, and I also wanted to make sure that I took into account the differences in people’s scooping and measuring. Bread baking is definitely a lot more precise when using weights, but I wanted to make sure that people who didn’t have a kitchen scale could make this as well!
Hi Jenn… – can the Challah rest in the fridge overnight in stead of just 5 hours ?
Hi Alan! I haven’t tried it myself, but I don’t see why it wouldn’t! If you try it, let me know how it works!
Hi, can you bulk ferment this in the fridge? When do you know the bulk ferment is over?
This recipe is from Meggie Glezer Book, I think you should mention it. It’s a beautiful recipe and works every time.
Hi Tanya! You are right, it is Maggie’s recipe! And it is a great one! I did give Maggie credit for the recipe, and its down below the recipe card, you just have to scroll a little bit further! But you are right, it should be more prominent! I will move it up to before the recipe card.
Wonderful, made two delightful challahs glazed with an assortment of seeds. Nice treat before Passover. Instead of Levain, I used a cup of sourdough starter with 1/3 c warm water and a cup of bread flower and left it overnight. My only other change was to use maple syrup in p/o honey. We’ve finished off one challah and have frozen the other one.
Is it possible to post pictures. If so how, I couldn’t figure it out. Delicious, will definitely make again!
Ah, thank you for sharing! There isn’t currently a way to share pictures on this site, but if you wanted to share on Facebook, Twitter, or Instagram, I would love that! Don’t forget to tag me in it (@gingeredwhisk) so I can see! If you don’t have social media, you can always email me at [email protected] so I can see your lovely bake, too!
Just to clarify – you leave the dough, with eggs mixed in, proofing at room temperature for a total of 7 hours? Is it okay to leave eggs at room temperature that long? Thanks!
That is correct, Rachel! It is ok!
Braids fell. Bread was yum. Only thing is the braids didn’t hold up and it just ended up being a loaf of bread. Any idea why this would happen / how I would prevent that next time?
Hi Maya! I am sorry to hear your loaf fell apart! There are three possible problems areas – make sure when you kneading that you knead it until the dough is smooth. You also want to make sure when you proof the final loaf of bread that it is only until the bread is ready – over or under proofing could cause the bread to loose its structure. And finally, make sure when you are braiding your strands that you get the twists nice and tight. Let me know how the next loaf turns out!
Twist and tuck the braids under each end to prevent them from unbraiding while baking.
Thanks! But it the braids didn’t come apart (I make regular challah weekly), they just all joined together and ended up looking like one big loaf.
I had this problem too. Looks like a massive, diamond scored sourdough batard! I’m sure it will still taste great but think I need to roll the braids for longer next time…
My solution to this problem is dust each braid strand with a little flour just before braiding them together. I tend to braid pretty loosely and avoid pulling the braid tight because that can result in a blown-apart or stretched look
Thanks for this. I’m going to start making it tonight as I’ve been looking for a good sourdough challah recipe for awhile. And with the current shortage of yeast, well, I like putting my starter to work… 🙂
You’ve listed a starter that is 50% hydrated. Aren’t most recipes for a 100% hydrated starter? If it really needs 50%, I will have to adjust my starter. The original recipe linked under the recipe card doesn’t mention a hydration level.
Hi Dana! Yes, this recipe requires a 50% hydration starter, also known as a stiff starter. This gets fed 1 part starter, 1 part water and 2 parts flour.
If that’s the case why not just start with regular starter which is fed 1:1:2 by volume starter:water:flour?
Hi Tamara! starter comes in many different hydrations. The standard is a 100% hydration which is fed a 1:1:1 ratio, so equal amounts of starter, flour, and water. This recipe needs a stiff starter, or 50% starter, which is fed at a ratio of 2 parts flour and 1 part water.
@Dana,
The way I read the recipe, that levain you make as the initial step IS how you make the 50% hydration starter out of a 100% hydration is starter.
I’ve been baking challah with active yeast for years but this is my first batch of sourdough challah. My starter is extremely active at 50% hydration, and the Levain rose overnight, however after braiding it has been left to proof for 5.5 hours and it didn’t rise. I put it in the oven (off) with the light on, I even placed a bowl of warm water in as well. Like i said i have experience successfully proofing dough. But I’m not sure why this didn’t work. Hoping to get some rise in the oven.
Hi! Would you recommend to refresh the starter before making the levain or can I use a leftover ? I look forward to trying this recipe over the weekend.
You do need to use an active starter when building the levain.
Hi Jenni. Looking forward to trying this. Thank you for posting. Two notes:
In the ingredients list on baking day, it says you need “fully fermented sourdough starter”. I assume you mean the Levain from the night before? If so, you may want to clarify that.
Further to that note and another person’s comment re: confusion, You may want to be explicit about adding the Levain in with the rest of the flour. The instructions never mention doing anything with the Levain you made. 🙂
Thanks again to you and Maggie!
Hello! Just wanted to clarify: is there starter in this recipe other than what’s in the levain? Thanks
Hi! You use the starter to build the levain, and then you use the levain to build the dough!
i don’t think my starter is strong enough. the levain is not triple the size and it’s getting close to 12 hrs…. 🙁
Can you leave the levain out for longer than 12 hours? How do I know the levain is done?
I am pretty new to sourdough and have plenty of discards from my starter. Can I use 200g of that instead of making a levain?
You do need to build the levain as directed in the recipe so that you get the correct hydration rate for the dough.
This worked wonderfully – we can’t get yeast right now, but had sourdough starter. It was even better than other recipes I’ve made with yeast. My 14-yr. old son now makes this every Friday! Thank you!
I only have 100% hydration starter, usually kept in the fridge and fed after taking it out back to room temperature the previous night. Can I just feed it at 50% hydration and then bring the starter back to 100% after I use it for this recipe?
You could! You only need a small amount of starter in this recipe, so I would actually just feed your discard portion at 50% hydration and leave your mother starter at 100%. Either way will work, so whatever is easiest for you!
I let my leaving ferment for 7 hrs, but it only double in size. The final dough after proofing did not rise to triple its size either. After baking the challah is kind of on the dense side. Why is this?
Hi Vanda! Sorry to hear this! Is your house really cold? Sometimes if the AC is really kicking out cold air, that can affect how a dough rises.
Hi, your recipe is good and the challah came out tasty and quite airy and soft. However, the single strings of the braid eventually flattened, so they are almost not distinguishable in the final product and the challah has a sort of flat surface.. Could 5 hours be too many? Should perhaps the final dough rise more and the challoth less long? (when I used to do the challah with yeast that’s actually what I did.) I am not sure that is the cause though.
I am sorry your challah looked flat! Sometimes that happens if you don’t braid them tight enough, but it could be from over proofing, too! Its always best to watch the dough and not the clock with sourdough.
Hi Jenn!
If my starter is currently at 100% hydration, how should I use it for the recipe? Also, can i let it sit overnight for a littler longer than 12 hours?
Thank you!
Hi! First you need to switch to a 50% hydration starter – so feed it twice as much flour than water. Longer than 12 hours really depends on the temperature of your house. If you have your air conditioning really going and its nice and cold in your house, it will probably be ok! Its better to watch the dough than the clock, though!
Hi! If I’ve already used 100% hydration starter for the recipe, do I adjust the other ingredients? My starter is best at 100% hydration and I struggle with getting it to 50%. And using the 100%, I always get a flatter loaf and barely any rise on the levain and while it’s proofing for 5 hours. Should I use yeast?
can this be made with 50% white whole wheat flour? Or whole wheat?
this was a great experiment! the dough was definitely really sticky when I was combining the levain and the mix the next day. I had to add quite a bit of flour to get it kneadable and even then it was sticking. I probably could have done a bit more before stopping because I lost the braid definition later and I saw the earlier comments about under kneading. My oven may run hot because at 20 minutes the top was already pretty dark and I had to make a tin foil hat to protect it. Overall, the bread was nice and soft and moist and I love that I used my starter to make it! PS I was really precise and used weights for everything. the reality is starter varies so that may have accounted for my sticky dough.
Hi Sarah! You want to make sure that you knead the dough until it is silky and smooth to build good elastic gluten strands. You also want to make sure that when you do the final proof that you don’t over proof. Watch the dough, here, not the clock, as the temperature and humidity level of your house could affect the rate at which it proofs.
There seems to be a mismatch in the leaving ingredients. In the description it calls for a half-cup of starter, but in the recipe box, it says about one-quarter cup. Which is more accurate? Is the 60 gram measurement the best to go by?
Hello, yes, there was a typo here. Please use a 1/2 cup of active 100% hydration starter to build your stiff starter.
I’m new to sour dough baking. And I’m very confused right now. In the list of ingredients, you say 1/4 cup, but in the directions, you say 1/2 cup of starter…???
Hi Liz! This was definitely a typo, thanks for bringing it to my attention. You need to use 120 grams or about 1/2 cup of very active 100% hydration starter to create the stiff levain. Hope this helps!
For those of us rare folks who didn’t start Covid isolation with sourdough starter, is it possible to make the starter?
Thanks!
Alright, lifelong yeasted challah maker here, recent sourdough convert — this is the easiest challah i’ve made and i’m never going back to the yeast. thank you!
Hi. I love this challah recipe and have made it several times. Since it’s quite a big loaf, I’m considering making it into two smaller loaves. Have you ever done this before? I’m unsure of how it affects the length of last rise and baking time.
Thank you for your detailed post. You’re challah looks gorgeous. I’d like to try this recipe but a bit confused about the amount of levain you use in your final dough. Previous comments suggest that only 200gms of the levain is to be used ( I’ve read Maggie Gleezer’s recipe and this calls for a similar amount) but the recipe in your description and recipe card seems to suggest to use the entire amount of still starter I.e. 452g. Is this correct or am I missing something ?
Thanks.
Hi, I have updated this recipe to make it simpler. It seemed silly and confusing to only use part of the levain, and so I have changed the recipe. Please follow the recipe as written and ignore the old comments.
Hi Jenni!
I tried this recipe yesterday and will be trying it again in the future because it did not come out the way I wanted. There were probably proofing issues, but I think my first problem was overworking the stiff starter in the beginning because I was trying to get all the flour. How is it supposed to feel before and after the 8-12 hours? Before leaving it overnight, mine looked similar to yours, but when I checked it in the morning, it did grow in size, but it was very difficult to mix into my dough because it was so stiff (more like its own playdough and not a starter) and there seemed to be too much. Maybe I should have added it in parts? I’m trying to figure out where I went wrong for next time.
Thanks!
I baked this last night and missed the note about not adding all the levain. It turned out awesome anyway! Might have let it rise too much, but it’s still delicious. Pic: https://twitter.com/ladyinabox/status/1349176548046360581
I tried this yesterday and the loaf looked beautiful (was superfun to braid) but tasted a little bland. I am wondering what I am doing wrong. I used canola oil. Should I use something more flavorful? Maybe add an extra egg (the loaf came out looking fairly white, not eggy)? I used King Arthur bread flour and table salt. Thanks!
Love this recipe!! Have made it twice, and I found it easy as both a challah and a sourdough bread. I add 3/4 cup of golden raisins, as that is how we like challah. We freeze half, and the defrosted bread is just as good as the fresh.
This recipe was amazing. Worked perfectly the first time. My question: as there are only two of us I’d rather make a much smaller loaf. Should I just halve the recipe? Anyone have any experience with that? And I would have liked for the challah not to have spread as much as it did. Is there any such thing as a challah mold?
WOW! I make challah every week and this one was FANTASTIC!
This will definitely be in regular rotation from now on!
Great recipe, and easy to follow instructions. Just wonderful, Thank you!
Hi Jenni! I was wondering how I could change the grams to cups, teaspoons, Tablespoons etc.??
Hi Delaney! I do provide measurements in cups and tablespoons for my easier discard recipes, but because this is a more technical bread recipe where the amount of ingredients really does matter for the best outcome, I only provide grams. I hope that it doesn’t deter you away, though! A scale is really worth it, and this bread is a great recipe to try!
I made this challah yesterday (well, the levain the night before). It is a delicious loaf of bread and I enjoyed making it. Better yet, my family loved it. I’ll be making this challah very often. Thanks for the great recipe and the very easy to follow instructions..
So is the total amount of leaving 452g? Seems like a lot. I’ve never made challah. I misread the recipe while mixing the levain last night so I’m using 200g of 100% hydration starter. I know I’ve probably botched this from the beginning, but any tips on proceeding. I figure I will just watch it and see when it feels ready.
Could you make two smaller loaves instead of one big one? If so, would I need to adjust the bake time?
Do I add all the fermented levian to the dough in the morning? My levian has tripled in size
Help?
Yup, all of the levain!
Love this recipe! Have been a sourdough baker for years, but never made sourdough challah until now and will not turn back. This is is definitely more time-consuming, but was worth it in terms of both better flavor and texture than yeast-based challah’s I’ve tried.
I want to know if i can double this recipe. 1 lots is not enough:)
DO i have to double the levain?
If I need to leave levain for more than 12 hours, should I refrigerate?
I think that depends on how much past 12 hours you are going to leave it. If you need to leave it for a lot longer, then I would just not make the levain and wait until you have more time. If you need to leave it not much longer than 12 hours, I wouldn’t refrigerate it, but maybe place it a slightly colder part of your home so that it slows down the time it takes to reach its peak fermentation.