Whole Wheat Sourdough Bread
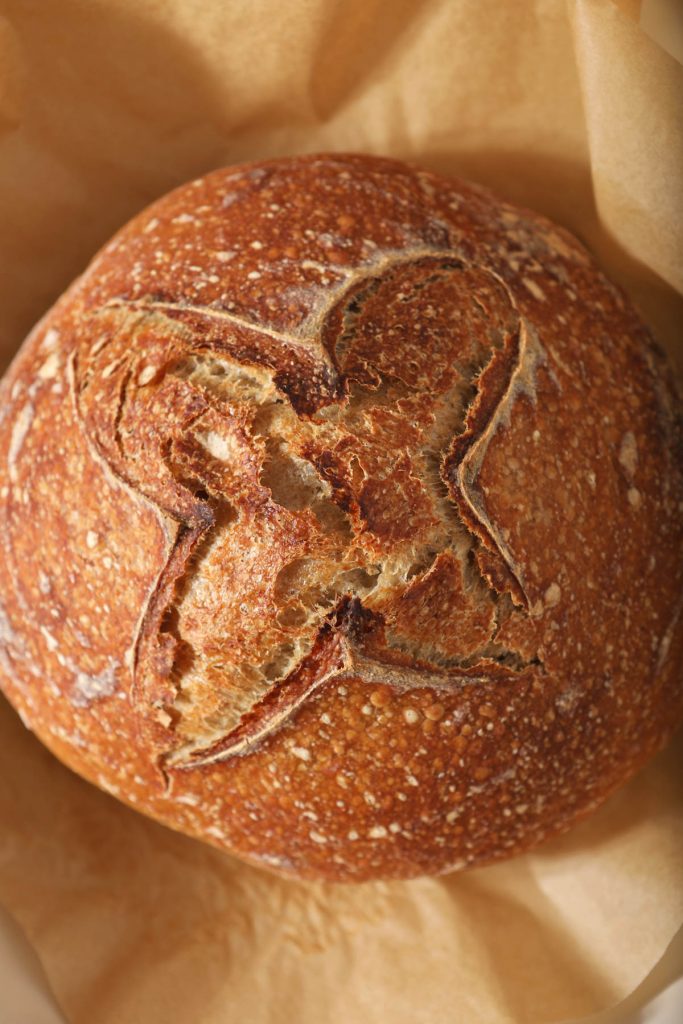
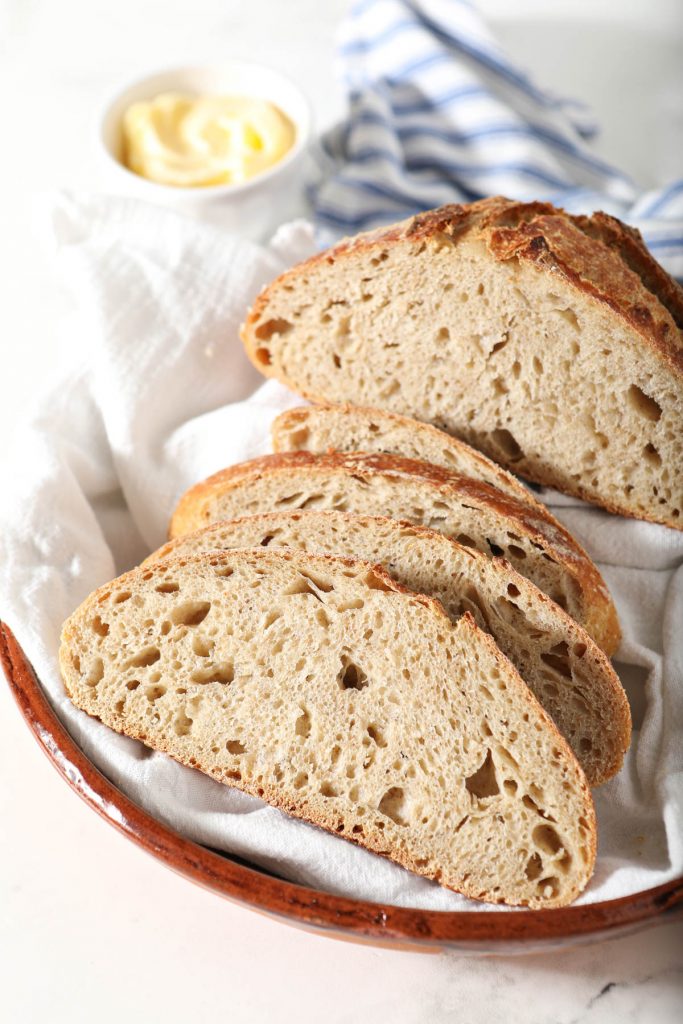
This whole wheat sourdough bread recipe is a lovely loaf of bread to make. Beautiful sourdough tang with just a touch of whole wheat and gorgeous crumb. A great beginner bread recipe, you will love this loaf of bread!

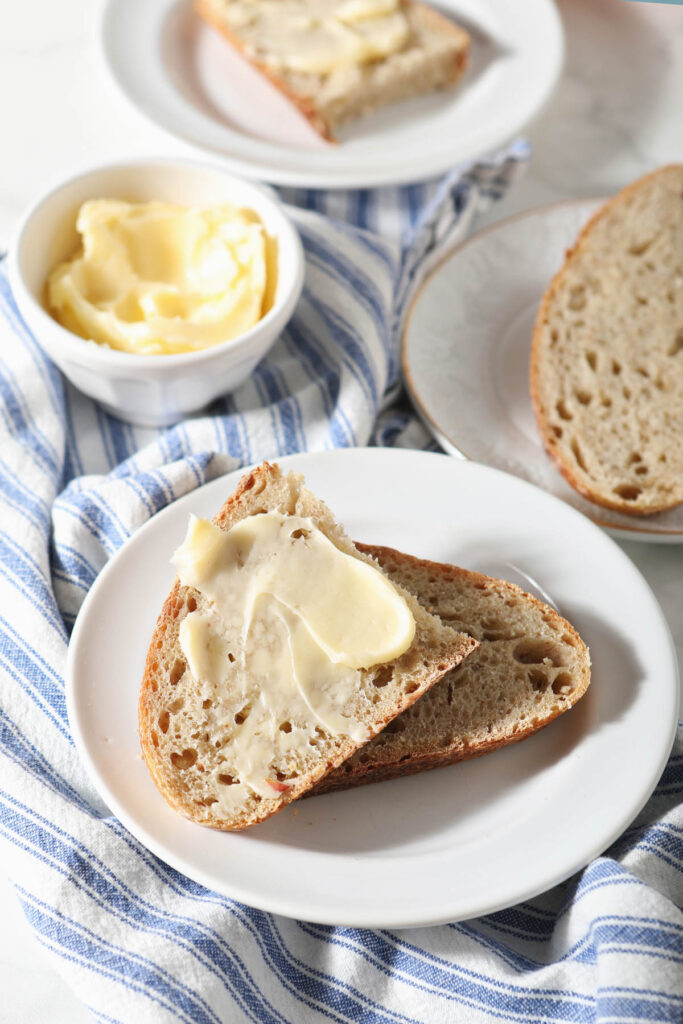
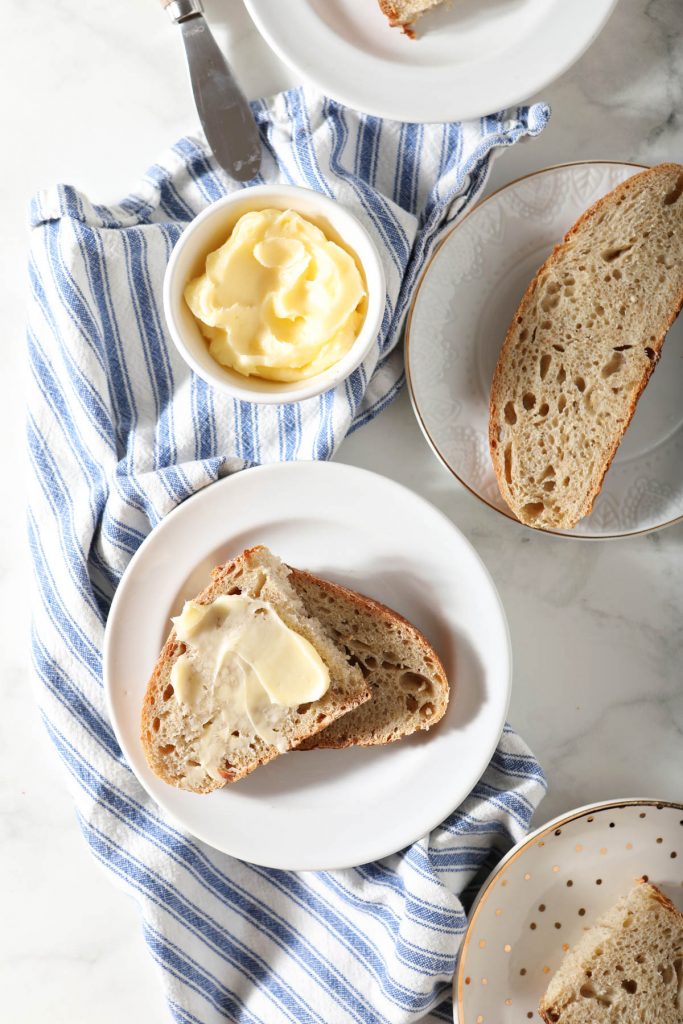
This was a beautiful loaf of bread to make, super simple – a little bit of work split over three days. It was a lovely loaf to eat, too, soft and chewy at the same time! I’ve become convinced that this loaf makes one killer grilled cheese sandwich, too!
New to the world of sourdough? Get all the information you need to know here:
Besides just eating this straight up with butter, try using this sourdough bread for:
- Make sourdough french toast
- Use it in bread pudding
- Make breadcrumbs or croutons
- Use it in a grilled cheese sandwich
How to make whole wheat sourdough bread
This is a great beginner bread recipe to make because it isn’t too complicated. For the full set of directions, please make sure you scroll down to the recipe card below, but here is a brief overview:
Baker’s Schedule
The total time to make this recipe is quite a bit, almost 30 hours! But there is a lot of hands off time (and two overnight rests!). While this bread does take time to make, it is not difficult to create. Use a baker’s schedule to figure out how to fit this recipe into your life.To decide when to start your dough, work backwards based on when you want to be done baking.
- Cooling – 2 hours
- Baking – 45 minutes
- Final Proof – 8-12 hours overnight in the fridge
- Shaping – 10 minutes
- Bulk Ferment with Stretch and Fold – 3 hours
- Mixing Dough – 20 minutes
- Poolish – 12 hours
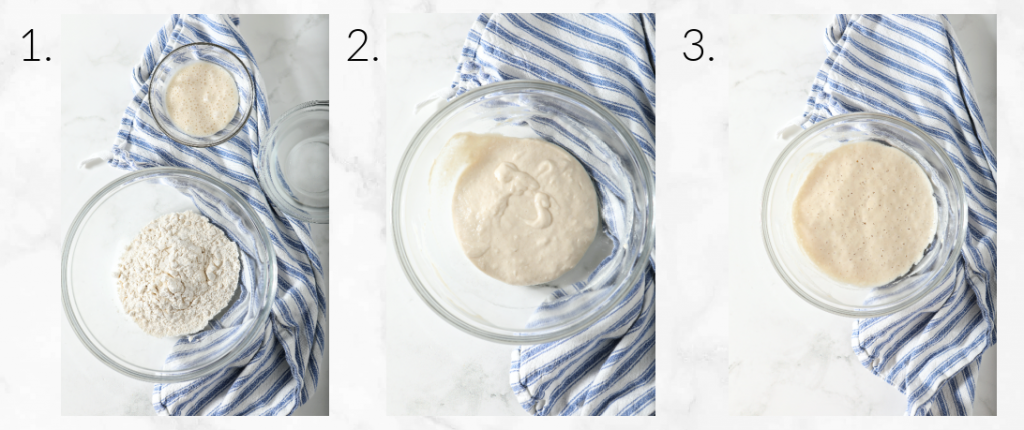
Make the liquid levain.
A levain is like a bigger, more specific version of a starter. Creating this helps us to increase the sourdough flavor in the bread, but also to have a bigger amount of active starter for our bread. We are also creating a specific hydration here. Do not skip this step.
- In a large bowl, mix together the ingredients for the liquid levain – the bread flour, water, and sourdough starter.
- Cover loosely and allow to stand at room temperature for 12 to 16 hours before preparing the final dough.
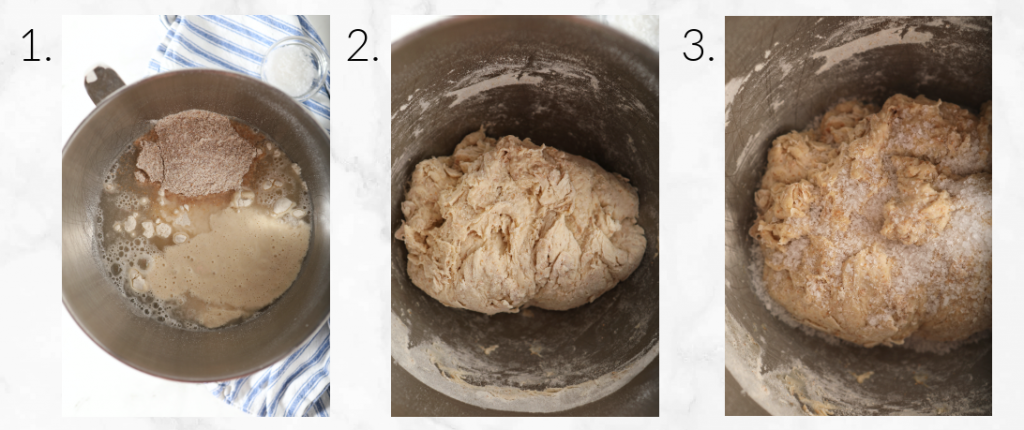
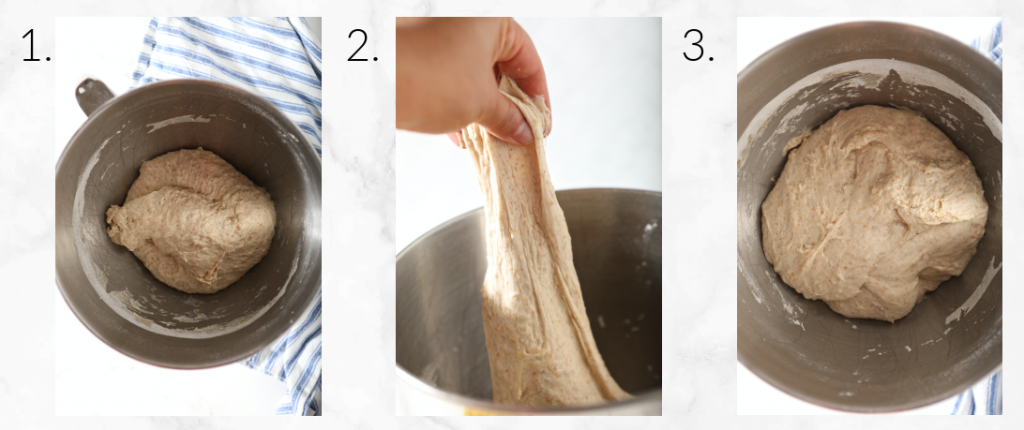
Make the dough:
- Add all the ingredients for the dough (except the salt) in the bowl of an electric mixer.
- Mix on low speed just until the ingredients are combined into a shaggy mass.
- Cover the bowl with plastic wrap and let it sit at room temperature for 30 minutes. This is called the autolyse phase and helps with early gluten development and flavor building.
- Sprinkle the salt all over and mix the dough with the dough hook of your stand mixer on second speed for 1 to 2 minutes (or knead by hand about 4 minutes).
Bulk Proof:
- Cover the bowl with plastic wrap.
- Let the dough rise at room temperature (in a warm spot) for 50 minutes.
- Remove the plastic covering and stretch the dough out and fold it over itself (in 3’s, like a pamphlet). You want to grab the side furthest from you and stretch it up and out away from you, then fold it back over to the center of the dough. Turn the bowl of dough 90 degrees to the right. Grab the next portion of dough that is farthest away from you and repeat the stretch the fold. Do this two more times, rotating the bowl each time, until you have stretched and folded each “edge” of the dough.
- Let it rise for another 50 minutes.
- Stretch and fold the dough again, repeating the above steps.
- Let it rise for 50 more minutes.
*Note: An ideal place to allow your dough to proof is a warm spot in your house, ideally 70-75 degrees F. If your house is warmer or colder than this, know that this can affect the timing on your bulk proof. Watch the dough, here, not the clock!
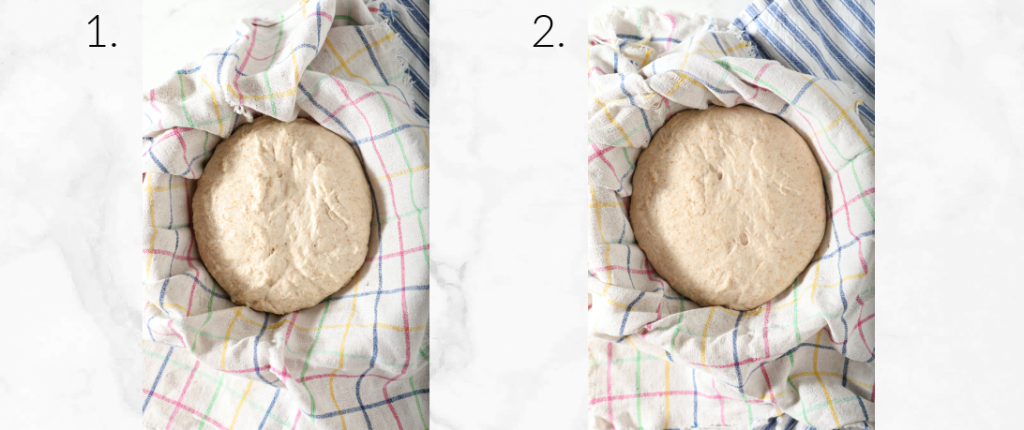
When is bulk proof over? Your dough has finished its bulk proof when the dough has doubled, the top has formed a slightly domed surface with the sides pulling away from the bowl. The dough should feel light and airy like a pillow. There could be some bubbles forming in the dough, and it might look like a sponge if you can see underneath the bowl.
Shaping and Overnight Proof:
- Shape the dough into a ball, place it with the seam up in a round container (bannetons are your best option) lined with a fine cloth and transfer to the refrigerator for 8 to 12 hours.
- Remove from the fridge an hour before baking to warm up. You want it to warm up but not get too warm and start rising again, so keep an eye on it. When it is almost room temperature its time to bake.
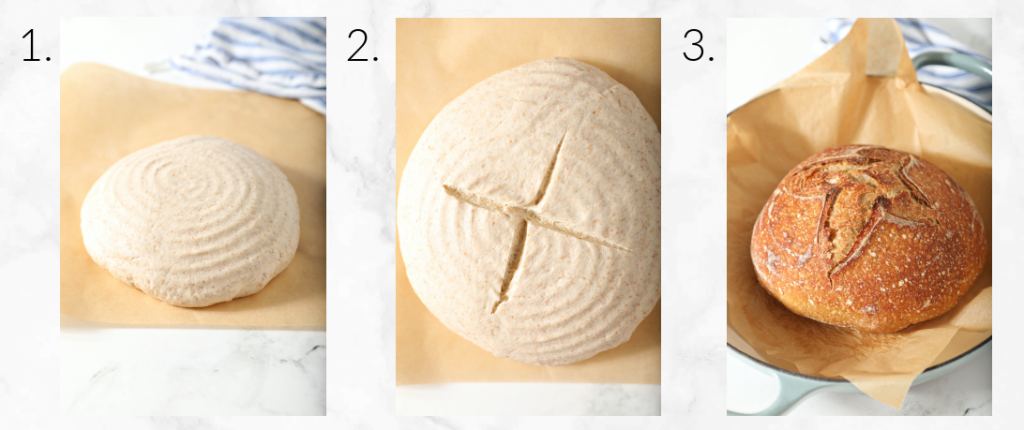
Bake:
- Arrange your oven racks so one rack is at the bottom (for the bread) and one rack is at the top (for the steam). Place a stone baking sheet in the cold oven and then turn the oven on to 440 Degrees. Let the oven heat for an additional ten minutes after the pre-heat goes off (you want it nice and hot in there!) During this time get your steam ready. I do this by filling the lid of a roaster pan with boiling water to heat up.
- Carefully transfer the dough onto a piece of parchment paper. Use your lame to score the top of the bread. You can do whatever design you want.
- Place the parchment paper with bread on the preheated stone and quickly pour out the boiling water from the roasting pan lid and place the lid over the bread on the baking stone. (Remember to use oven mitts for the hot lid!)
- Bake covered for 30 minutes, then carefully remove the lid (don’t forget the mittens).
- Bake for an additional 15 more minutes to develop a golden brown color. You want a dark crust and internal temperature of at least 200F.
- Allow it to completely cool on a rack before cutting the bread (2 hours should be enough).
How to store your sourdough bread
When stored correctly, your sourdough loaf will last 4-5 days (if you don’t eat it all before then!). Here is how to properly store it.
The best way to store your sourdough bread is to loosely wrap it in a large tea towel and keep it in a cool place so that the bread can “breathe” while maintaining normal moisture levels. You can also store it in a paper bag, or wrap it in a piece of beeswax cloth.
Once you cut into it, store it cut side down on a wooden cutting board, and drape a teatowel, or piece of beeswax cloth over the crust part.
Not Recommended:
- Do not store in the fridge, as this is a really dry environment and will harden your bread quickly.
- Do not wrap in a plastic bag, as this doesn’t allow the bread to “breathe” properly, and the warm, extra moist air encourages bacteria.
Love a good Sourdough Bread recipe? Try these easy sourdough bread recipes:
- Simple Sourdough Sandwich Bread – This sourdough sandwich bread recipe is the perfect recipe for soft sliceable bread – It has a tender crumb and great flavor. This white sandwich bread is perfect for french toast, sandwiches, and more! This is a great beginner sourdough recipe.
- San Francisco Sourdough Loaf – This sourdough loaf is extra tangy and has great texture!
- Toasted Wheat Germ Sourdough Loaf with Rosemary – Soft on the inside and crunchy on the outside, this beautiful sourdough loaf
- Sourdough Ciabatta – This sourdough Ciabatta Recipe is a simple recipe for chewy, tender ciabatta that is perfect for sandwiches or eating plain.
- Sourdough Focaccia – Sourdough focaccia is a golden bread with a chewy crumb and a subtle tang. An easy high hydration dough to make, this will be one of your favorite go-to bread recipes for your sourdough starter!
Food tastes better when its shared! If you try this recipe, let me know! Leave a comment and rate below! Love and links are always appreciated! If you’d like to share this post, please link to this post directly for the recipe, please do not copy and paste or screenshot. Thanks so much for supporting me! xoxo


Whole Wheat Sourdough Bread
Equipment
Ingredients
Liquid Levain
- 2.4 oz bread flour
- 3 oz water
- 1 oz sourdough starter 100% hydration
Final dough
- 12 oz bread flour
- 1.6 oz whole-wheat flour
- 7.4 oz water
- 5.4 oz Liquid Levain
- 0.6 oz salt
Instructions
- Make the Liquid Levain.
- In a large bowl, mix together the ingredients for the liquid levain – the bread flour, water, and sourdough starter.
- Cover loosely and allow to stand at room temperature for 12 to 16 hours before preparing the final dough.
- To Make the Final Dough
- Add all the ingredients for the dough (except the salt) in the bowl of an electric mixer.
- Mix on low speed (or by hand) just until they are combined into a shaggy mass.
- Cover the bowl and let it sit at room temperature for 30 minutes.
- Sprinkle salt all over and mix with the dough hook on second speed for 1 to 2 minutes (or knead by hand about 4 minutes).
- Let it rise at room temperature for 50 minutes, and stretch and fold the dough over on itself. Cover the dough back up.
- Let it rise for another 50 minutes.
- Stretch and fold the dough again.
- Let it rise for 50 more minutes.
To Shape the Loaf:
- Shape the dough into a ball, place it with the seam up in a round container (bannetons are your best option) lined with a fine cloth.
- Transfer to the refrigerator for 8 to 12 hours for a final proof.
- Remove from the fridge an hour before baking to warm up. You want it to warm up but not get too warm and start rising again, so keep an eye on it.
- When it is almost room temperature its time to bake.
To Bake:
- Arrange your oven racks so one rack is at the bottom (for the bread) and one rack is at the top (for the steam). Place a stone baking sheet in the cold oven and then turn the oven on to 440 Degrees. Let the oven heat for an additional ten minutes after the pre-heat goes off (you want it nice and hot in there!)
- During this time get your steam ready. I do this by filling the lid of a roaster pan with boiling water to heat up.
- Carefully transfer the dough onto a piece of parchment paper. Use your lame to score the top of the bread. You can do whatever design you want.
- Place the parchment paper with bread on the preheated stone and quickly pour out the boiling water from the roasting pan lid and place the lid over the bread on the baking stone. (Remember to use oven mitts for the hot lid!)
- Bake covered for 30 minutes, then carefully remove the lid (don’t forget the mittens).
- Bake for an additional 15 more minutes to develop a golden brown color. You want a dark crust and internal temperature of at least 200F.
- Allow it to completely cool on a rack before cutting the bread (2 hours should be enough).
Notes
Nutrition
Want to save this for later? PIN THIS TO YOUR SOURDOUGH BOARD on Pinterest!
I love how excited you are about cooking with Ladybug! It makes my heart happy. 🙂
your bread looks great- love sourdough! and whata cutie helper!
Gorgeous bread! And adorable helper…so sweet!
Wonderful recipe thanks. Possibly my favourite sourdough to date!