Onigiri

Learn how to make simple onigiri (Japanese rice balls) at home! This easy, kid-friendly recipe is perfect for exploring global flavors together.
If you’re looking for a way to turn dinner into a hands-on, curiosity-filled experience, onigiri is the perfect place to start.
These simple Japanese rice balls are soft, salty, and incredibly satisfying, but more than that, they’re an invitation. An invitation to explore a new food culture, to try something different, and to let your kids play with their food in the best possible way.
Onigiri have been part of Japanese food culture for centuries. Often tucked into lunchboxes, enjoyed on the go, or made fresh at home, they’re a staple built on simplicity and care. Traditionally, they’re shaped by hand and sometimes filled with ingredients like salted salmon, pickled plum, or tuna.
And the best part? They’re wonderfully simple and nearly impossible to mess up, making them the perfect starting point for families who want to explore how people around the world eat, one small (and delicious) step at a time.
Why you’ll love this recipe
- A hands-on dinner your kids will actually get excited about — Shaping their own rice balls makes this feel like play, not pressure
- A simple way to explore Japanese cuisine together without complicated ingredients or techniques
- Soft, salty, and satisfying — with endless ways to customize so everyone at the table finds something they love
How to make onigiri at home
Here is a brief overview of how to make this recipe. For the full set of written directions, please scroll down to the recipe card below.
Step One: Make the rice
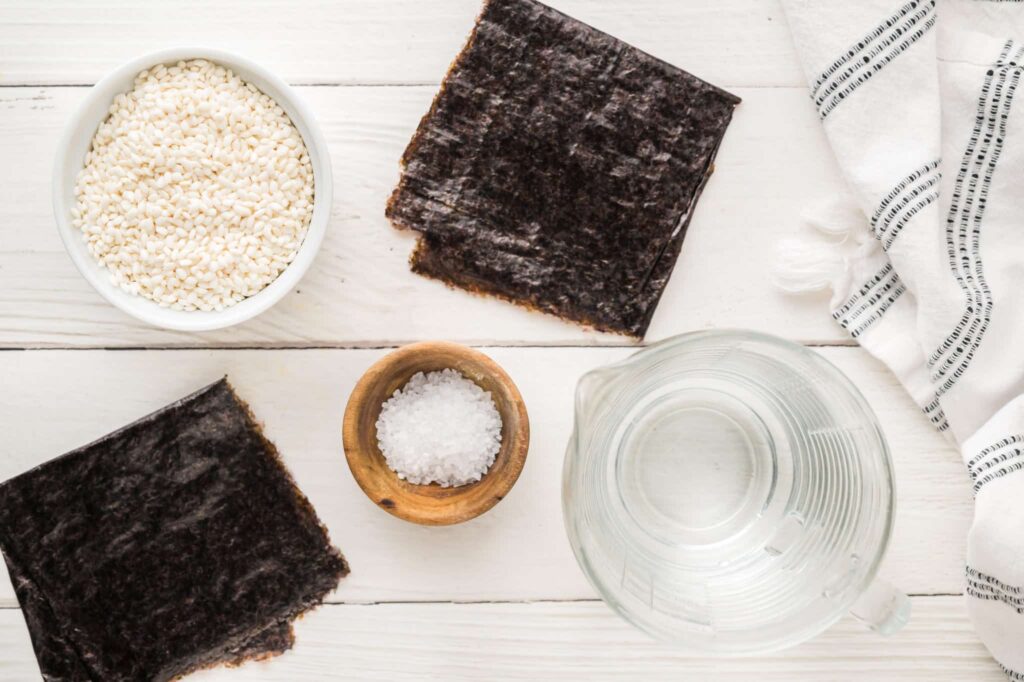
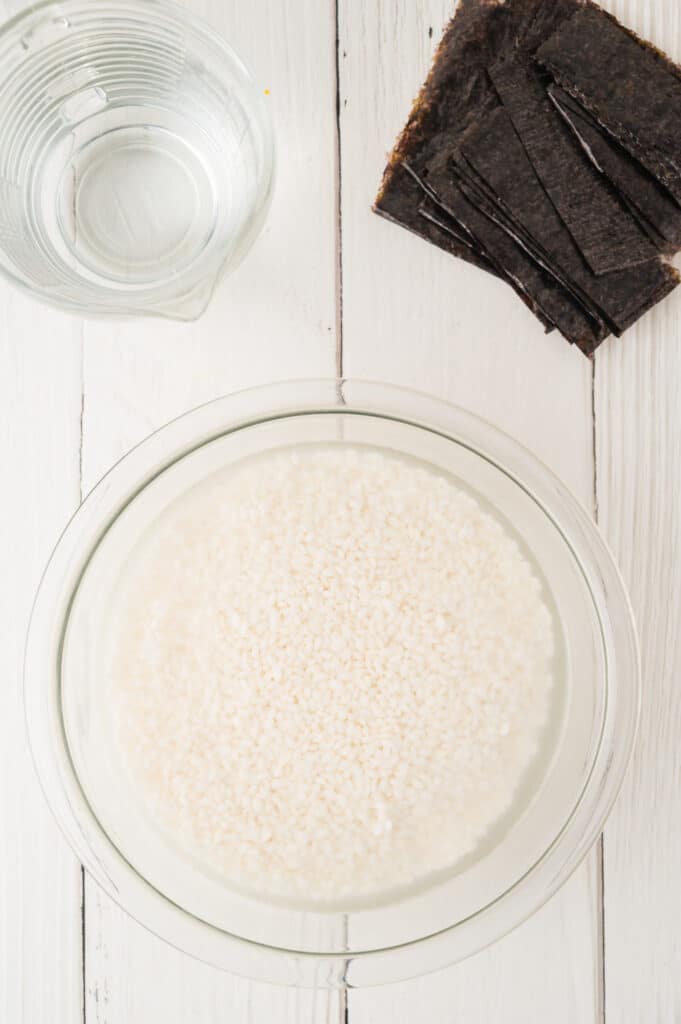
Start by placing the rice in a bowl and covering it with water. Let it soak for 20 minutes (this helps the rice cook evenly and gives it the right texture). Drain the soaking water and rinse the rice until the water runs mostly clear.
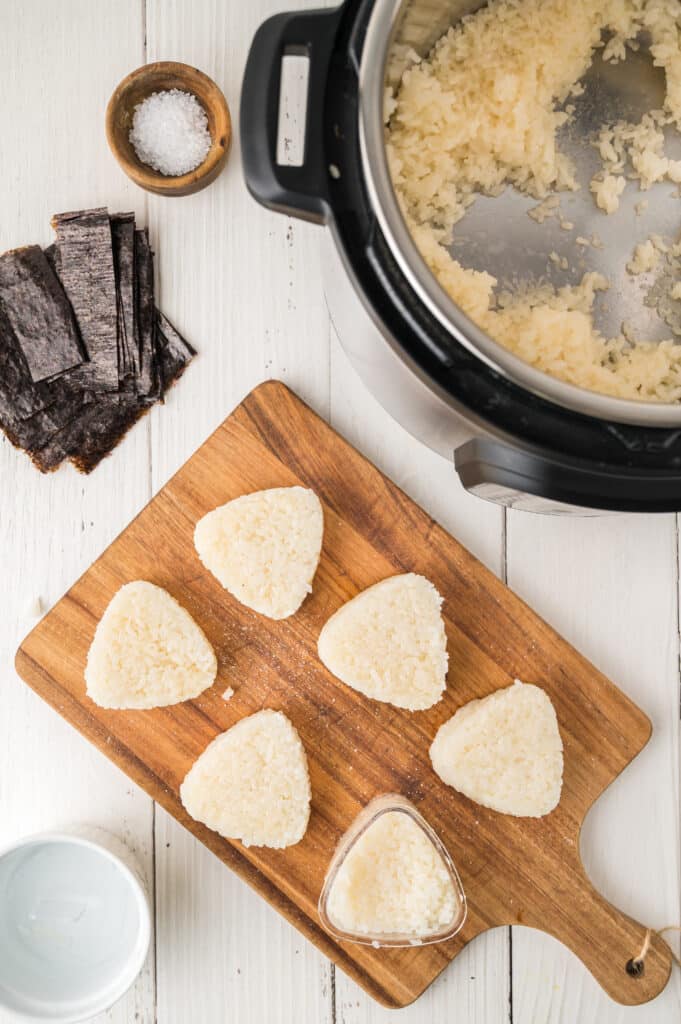
Add the rice and 2 cups of water to your Instant Pot. Cook on high pressure for 2 minutes, then allow a natural release. Once the rice is done, carefully remove the lid and let it cool slightly until it’s safe to handle.
Step Two: Shape and Assemble
Fill a small bowl with water (this will be your best friend while shaping the rice).
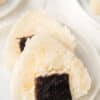
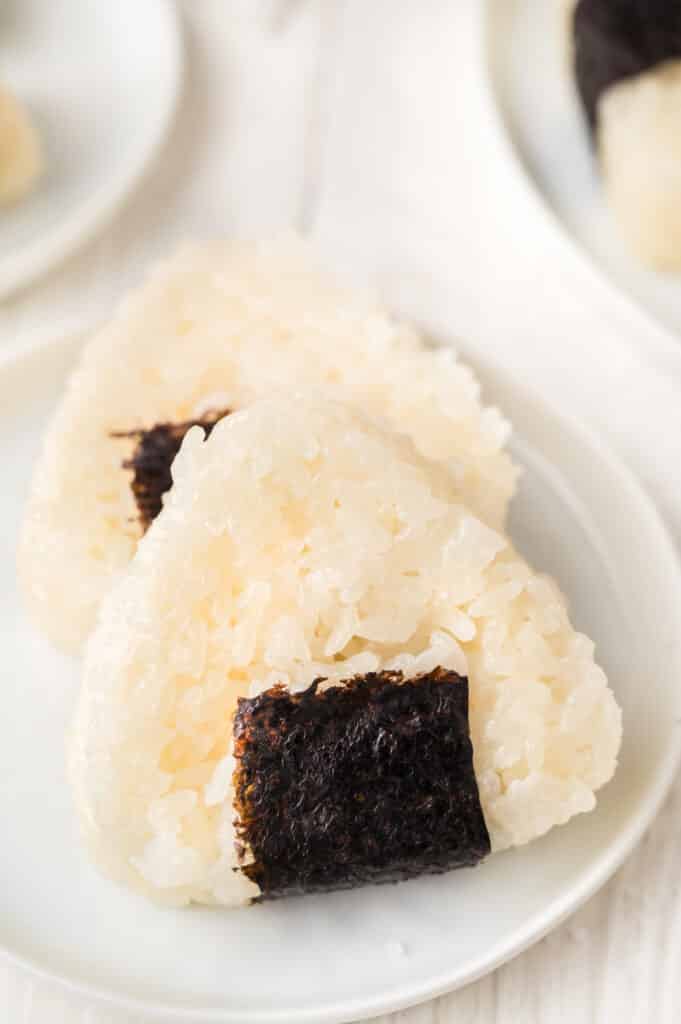
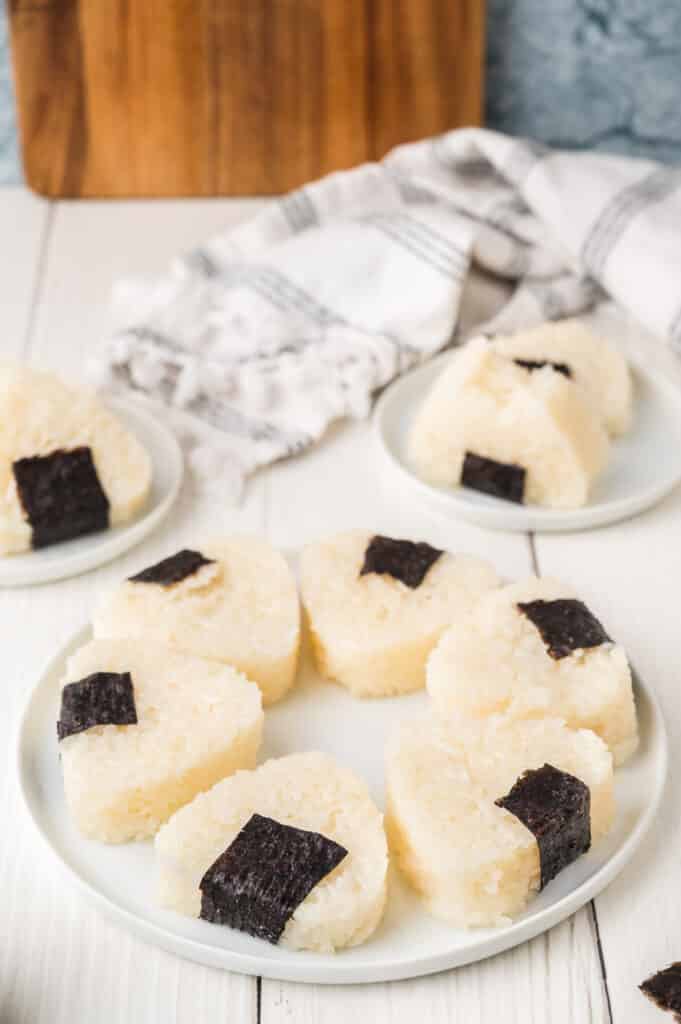
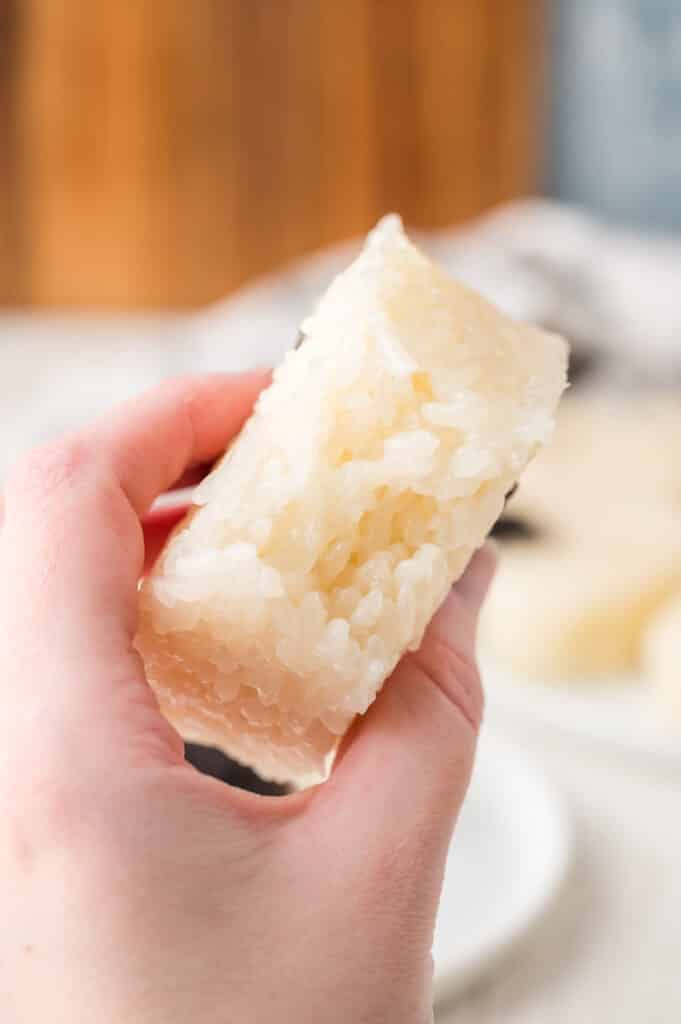
Wet your hands, then scoop about ½ cup of rice. Gently press and shape it into a triangle (or any shape your family likes). If you’re using an onigiri mold, wet it first and follow the package directions.
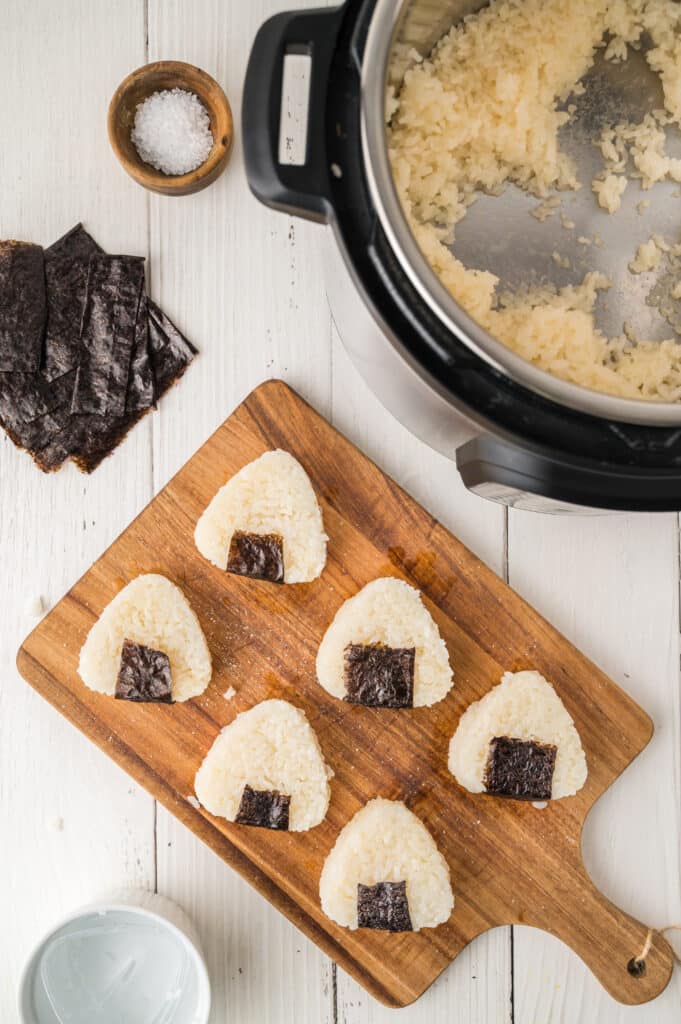
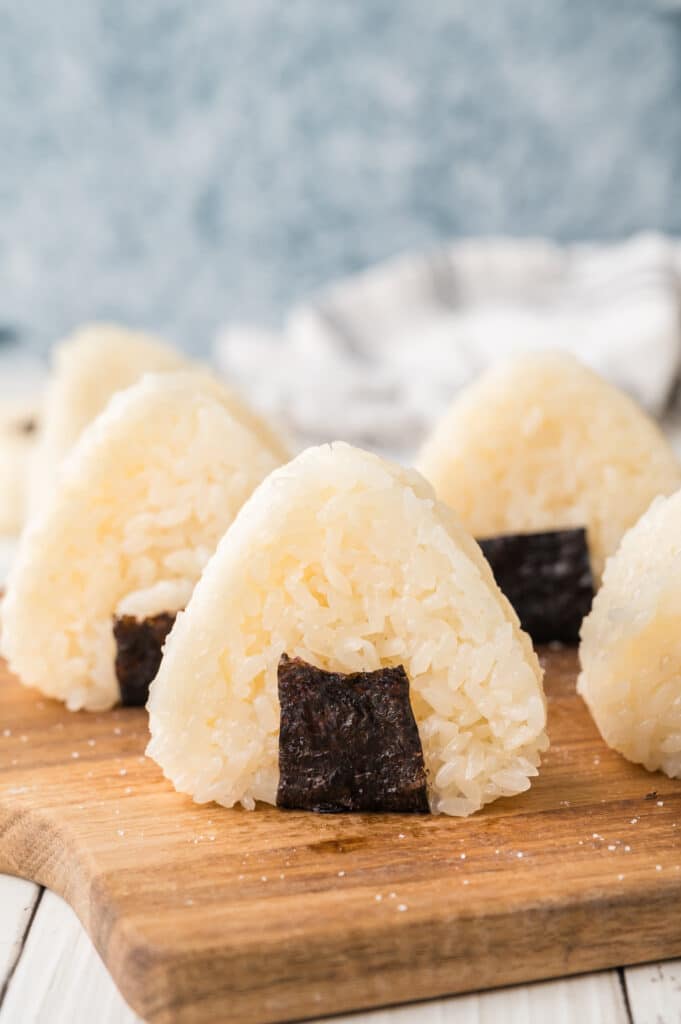
Sprinkle a little sea salt on both sides of the rice ball, if using. Wrap a strip of nori around the rice ball, on the side, underneath, or across the top, so it’s easy to hold and adds extra flavor.
Repeat with the remaining rice, keeping your hands wet as you go to prevent sticking.
Tips for making Japanese rice balls
- Do not substitute long grain rice in this recipe. You must use sushi rice.
- Keep your hands wet at all times to prevent sticking
- Use a rubber spatula or silicone spoon to handle the hot rice
- Don’t over-pack the rice, gentle pressure works best
- If using a mold, wet it before each use
Make it a family food adventure
This is where onigiri really shines, not just as a recipe, but as an experience.
Instead of shaping all the rice balls yourself, set up a simple “onigiri station” and invite your kids to be part of the process. Give everyone a small portion of rice, a bowl of water for their hands, and let them create their own.
How kids can help
- Shape the rice into triangles, circles, or fun designs
- Sprinkle on salt or wrap the nori strips
- Choose and add their own fillings
- Help scoop and portion the rice (with a spoon or scoop)
It might get a little messy and that’s part of the fun.
As your family gets more comfortable, you can turn this into a mini taste adventure by offering a few filling options and letting everyone build their own combinations.
Fun filling ideas to try
- Tuna salad
- Cooked salmon
- Teriyaki chicken
- Avocado slices
- Pickled vegetables
To add a filling, place about ¼ cup of rice in your hands or mold, add a small spoonful of filling in the center, then top with another ¼ cup of rice and gently press to seal.
You can keep it simple with familiar flavors, or try something new together and talk about how these kinds of fillings are used in Japanese cooking.
Either way, you’re doing more than making dinner, you’re helping your kids explore the world through food, one rice ball at a time.
Food tastes better when its shared! If you try this recipe, let me know! Leave a comment and rate below!
Love and links are always appreciated! If you’d like to share this post, please link to this post directly for the recipe, please do not copy and paste or screenshot. Thanks so much for supporting me! xoxo

Onigiri
Ingredients
Equipment
Method
- Start by soaking the rice for 20 minutes in enough water to cover it.
- Then drain the water and rinse the rice until the water runs clear.
- Add the rice into your Instant Pot with the 2 cups of water.
- Cook the rice for 2 minutes on high pressure in the Instant Pot with a natural release.
- Once the Instant Pot is done releasing the steam, remove the lid, scoop out about ½ cup of rice and shape into a triangle with wet hands. If you have an onigiri mold, use that according to its directions.
- Repeat shaping ½ cup portions into triangles, then sprinkle sea salt on both sides.
- Place a nori strip under, on the side, and on top of the onigiri, as shown in the pictures, then enjoy!
Nutrition
Nutrition information is provided as a general estimate and may vary based on ingredients, brands, and substitutions. For specific dietary needs, we recommend calculating nutrition using your preferred tool.