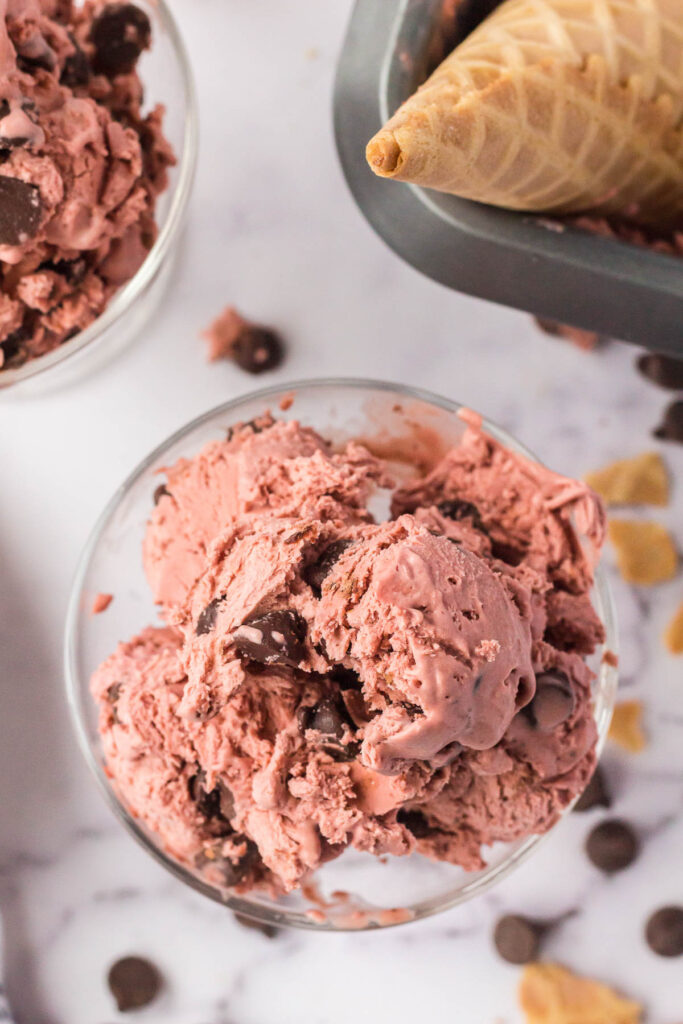
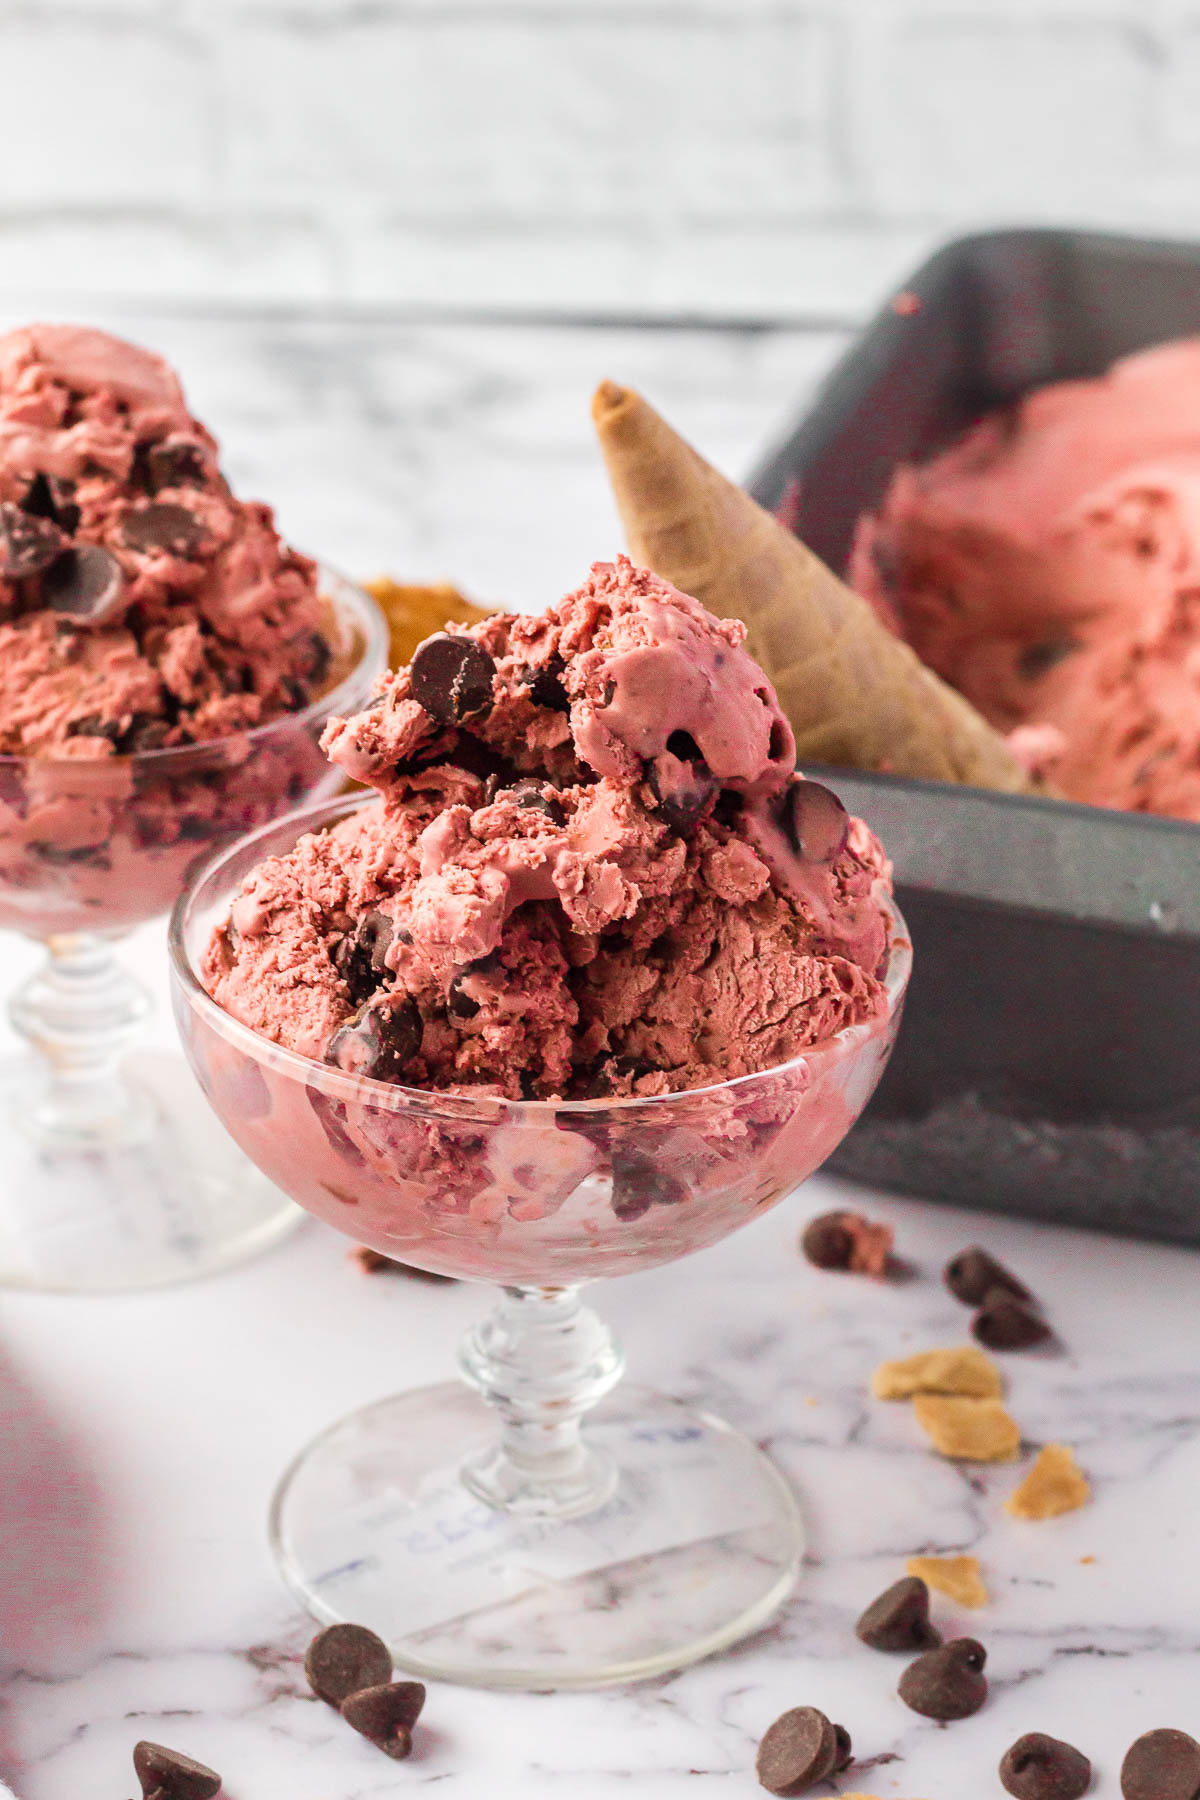
No Churn Red Velvet Ice Cream

Red velvet ice cream is a gorgeously colored no churn ice cream recipe. If you love the cake, you will love this easy ice cream with a rich cocoa taste and vibrant color.


Red velvet cake is one of my favorite cakes – rich cocoa, with a vibrant red color and that texture! So good! This simple no churn ice cream recipe takes everything you love about the cake and turns it into a sweet and cold treat.
Try serving this with some hot fudge sauce drizzled on top!
Perfect for any special day where you need a decadent and easy treat! Can you stop at just one scoop?
Try your hand at these other no churn ice cream recipes:
Recipe Ingredients
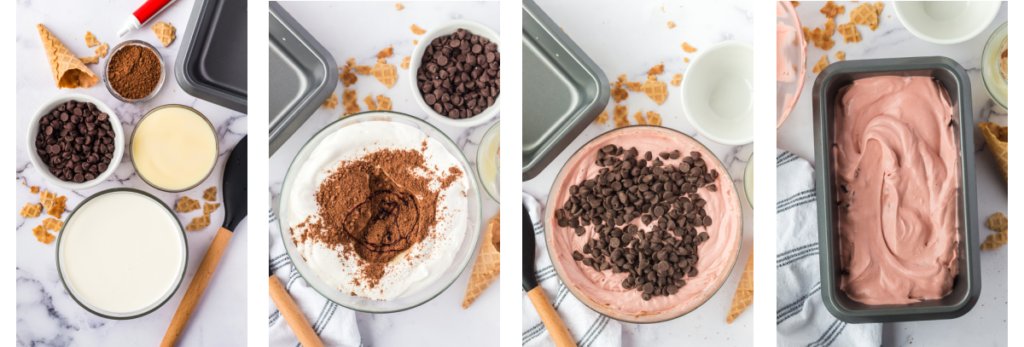
You only need a few ingredients to make this ice cream:
- Heavy cream – Creates a rich and flavorful ice cream! Use a fresh, good quality heavy cream with plenty of milk fat.
- Sweetened condensed milk – This helps add sweetness to the ice cream without additional sugar, and also helps to make a soft and smooth ice cream. Do not substitute with evaporated milk.
- Cocoa Powder – For that great chocolatey taste use a high quality unsweetened dutch processed cocoa powder.
- Red Food Coloring Gel – Using a gel food coloring ensures you get a nice red color without adding extra liquid to the ice cream, which could change the texture.
- Semi Sweet Chocolate Chips – You can use regular size or mini.
How to make this recipe
Make sure you scroll down to the recipe card below for the full set of instructions:
- Beat the heavy cream in a medium sized bowl until the cream forms into soft peaks.
- Slowly mix in the sweetened condensed milk, cocoa powder, and food coloring. Be careful not to overmix the ingredients or it will knock the air out of the heavy cream.
- Gently fold in the chocolate chips.
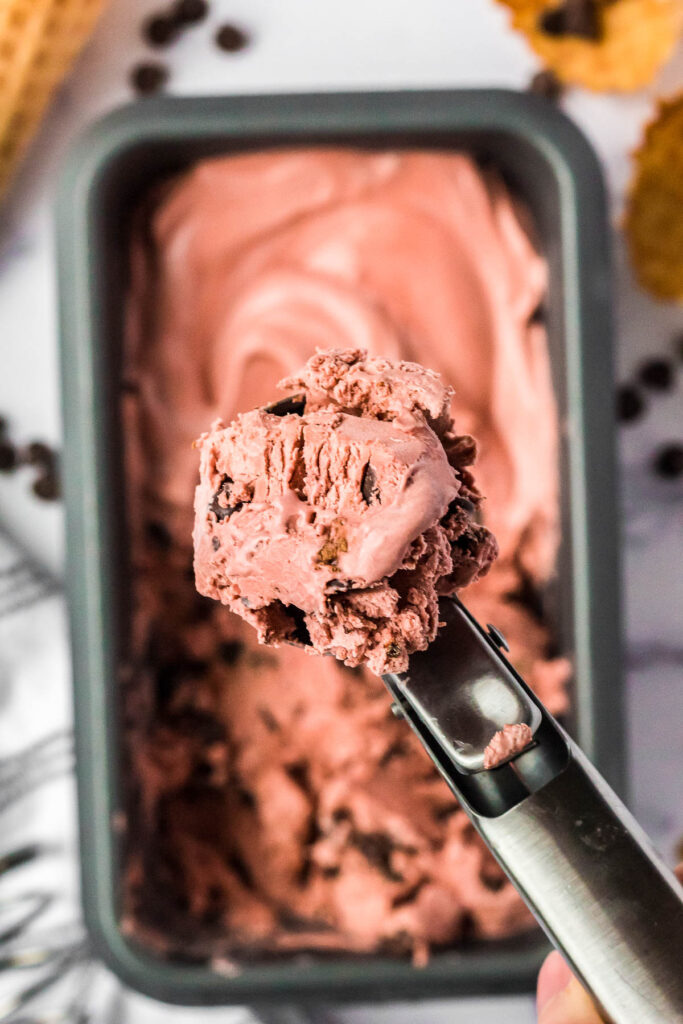
- Pour the mixture into a 9×5 loaf pan.
- Cover tightly with plastic wrap.
- Allow the ice cream to set for 4-6 hours, or until solid in the middle.
- Serve and enjoy!
Storage Information
This ice cream will last in the freezer anywhere from 3 to 6 months if stored properly.
Place it in an airtight container in the back of the freezer for best results.
Recipe Tips
- For a fun twist, you can melt the chocolate chips before mixing them in, this will create a sort of marbling effect throughout the ice cream as it sets.
- Like the other no churn ice creams, this is good for up to two months when stored in the freezer covered with plastic wrap.
- Allow to sit on the counter for 10 minutes to soften before serving.
Love and links are always appreciated! If you’d like to share this post, please link to this post directly for the recipe, please do not copy and paste or screenshot. Thanks so much for supporting me! xoxo
No Churn Red Velvet Ice Cream
Ingredients
Equipment
Method
- Beat the heavy cream in a medium sized bowl until the cream forms into soft peaks.
- Slowly mix in the sweetened condensed milk, cocoa powder, and food coloring. Be careful not to overmix the ingredients or it will knock the air out of the heavy cream.
- Gently fold in the chocolate chips.
- Pour the mixture into a 9×5 loaf pan.
- Cover with saran wrap tightly.
- Allow the ice cream to set for 4-6 hours, or until solid in the middle.
- Serve and enjoy!
Nutrition
Nutrition information is provided as a general estimate and may vary based on ingredients, brands, and substitutions. For specific dietary needs, we recommend calculating nutrition using your preferred tool.