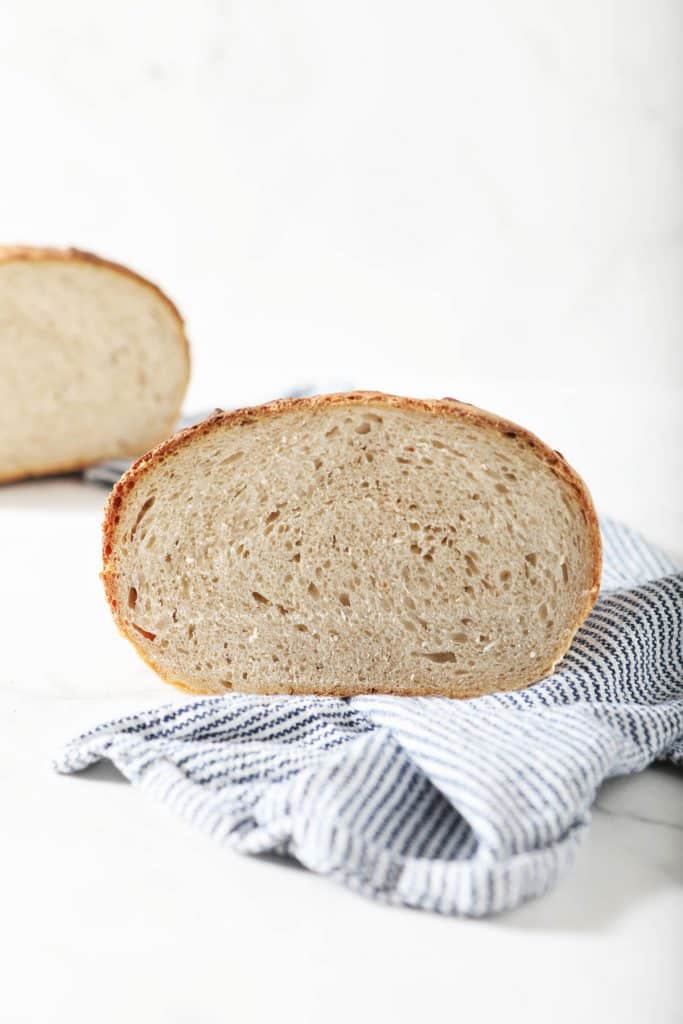
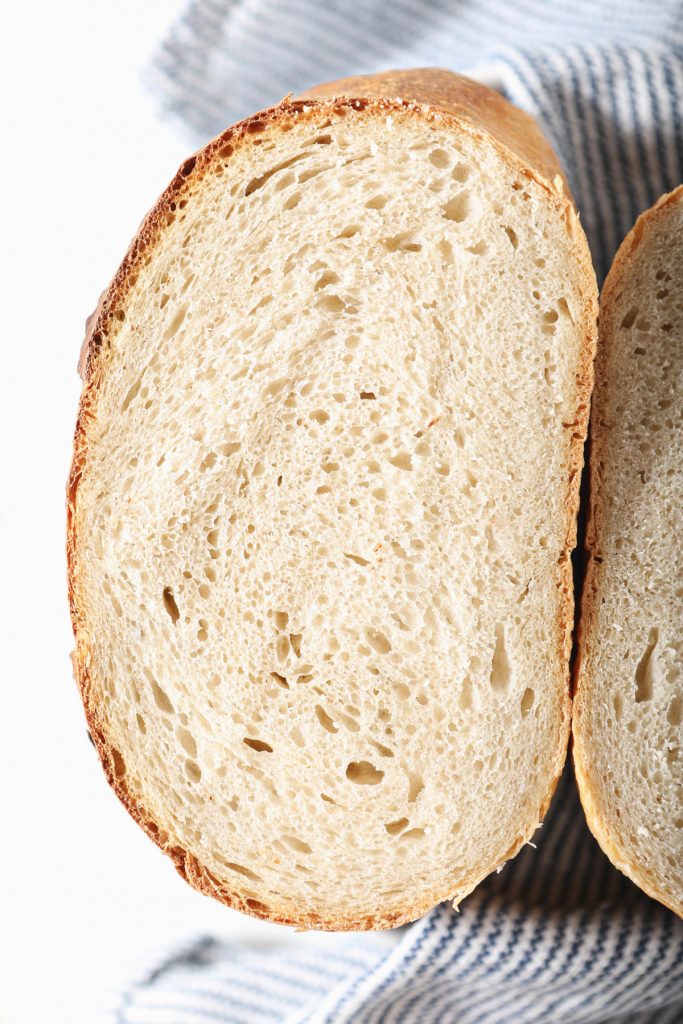
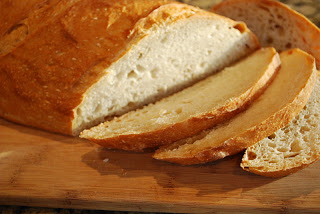
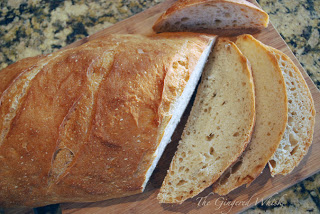
San Francisco Sourdough Bread Recipe
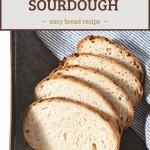

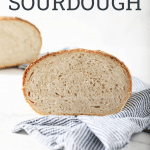
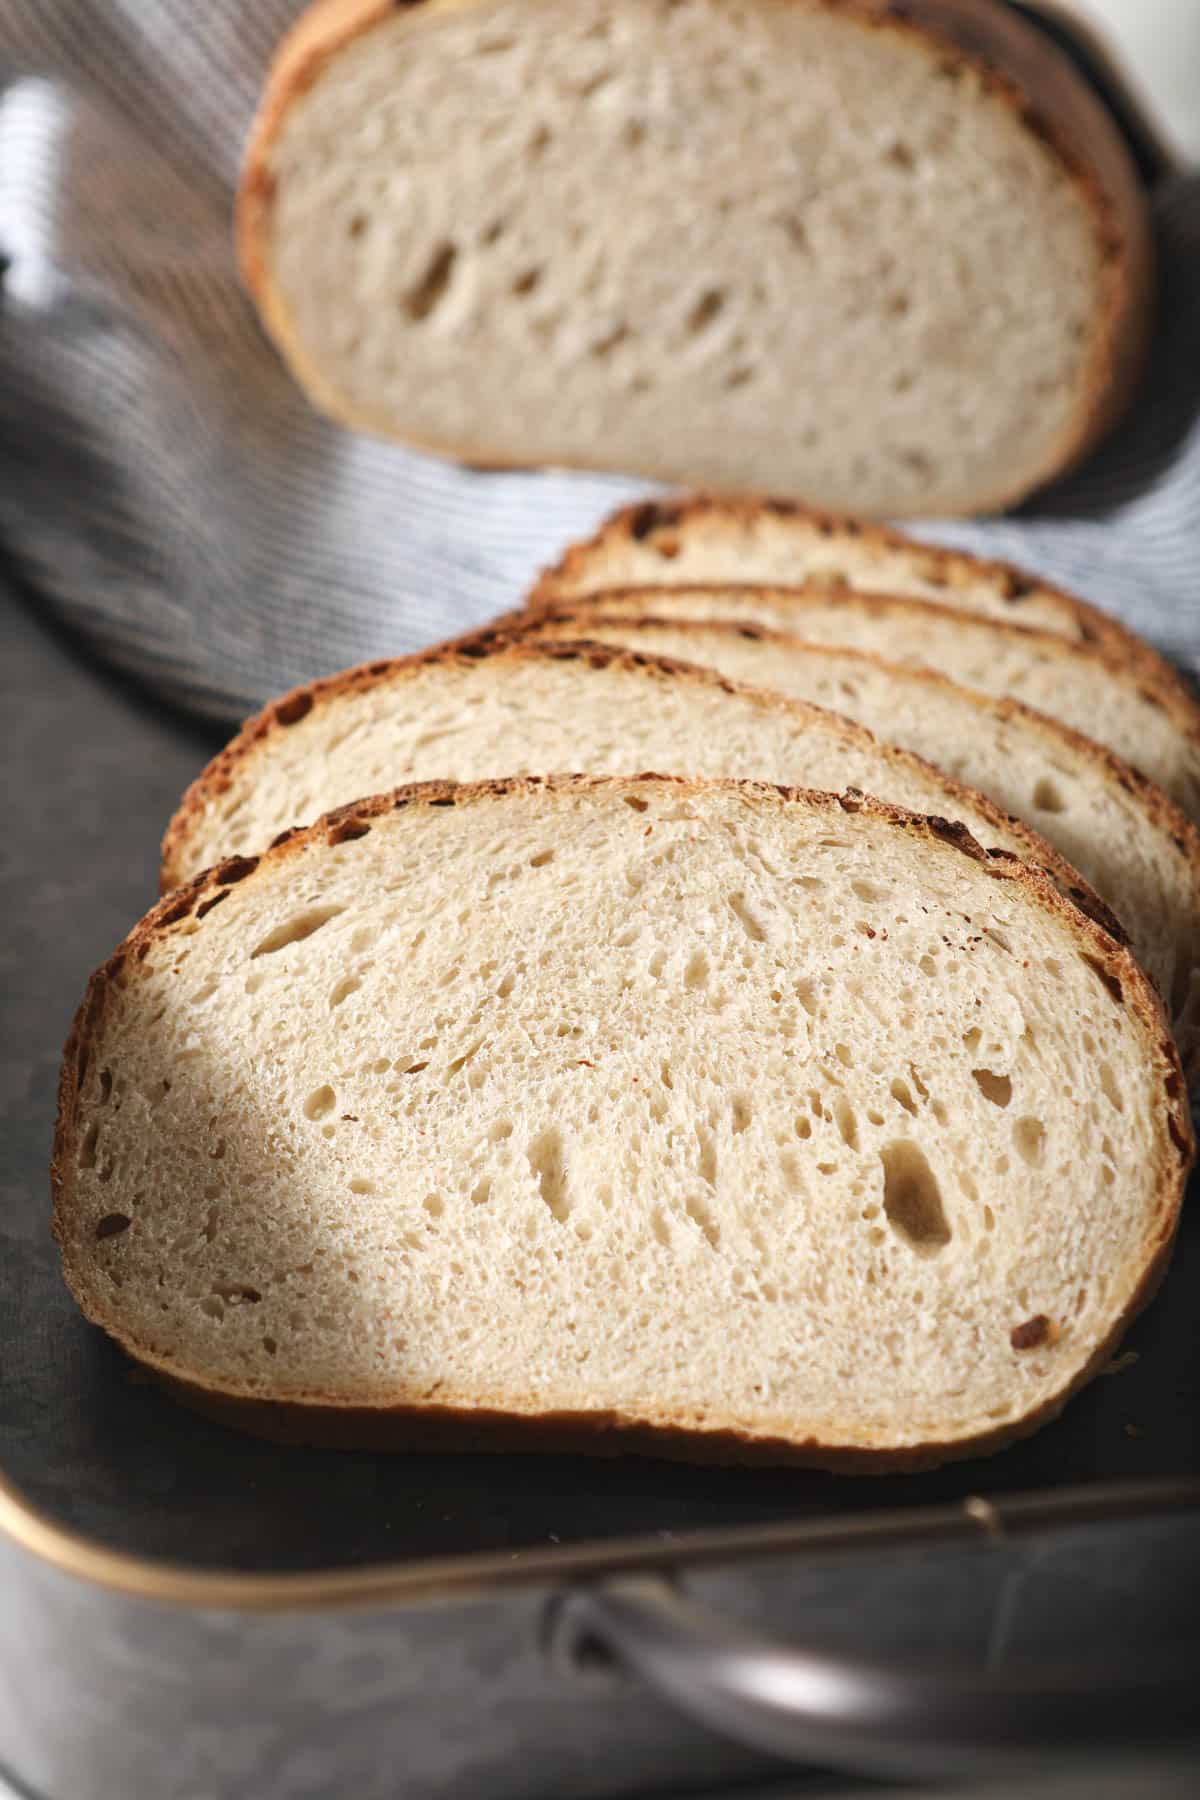
This San Francisco sourdough bread recipe is packed with awesome sourdough flavor, has a thick chewy texture and is perfect for sandwiches, french toast, grilled cheese and more!

What is San Francisco style Sourdough Bread?
Love a good Sourdough Bread recipe? Try these simple sourdough bread recipes:
- Whole Wheat Sourdough Bread – Soft and chewy, with a lovey crust, this sourdough loaf is a treat!
- Soft Sourdough Sandwich Loaf – Perfect for sandwiches, this is a great beginner sourdough bread recipe!
- Toasted Wheat Germ Sourdough Loaf with Rosemary – Soft on the inside and crunchy on the outside, this beautiful sourdough loaf
New to sourdough? Read my Ultimate Guide to Sourdough for Beginners to answer all the questions you have!
Making San Francisco sourdough bread
This San Francisco Sourdough bread recipe seems a bit ridiculous to make. It is quite time consuming, but its not hard! Here is a brief overview of making this recipe. For the full set of directions, please make sure you scroll down to the recipe card below.
Baker’s Schedule
The total time to make this recipe is quite a bit, almost 29 hours! But there is a lot of hands off time, and two places where you could overnight the dough in the fridge. To decide when to start your dough, work backwards based on when you want to be done baking.
- Bake 45 minutes
- Final Proof 1 hour
- Shaping
- Bulk Ferment with Stretch and Fold – 2 hours 30 minutes
- Mixing Dough – 15 minutes
- Poolish – 24 hours
Equipment needed:
- Stand mixer
- Measuring cups and spoons
- Large mixing bowl
- Parchment paper
- Lame or bread scoring knife
- Small metal baking tray
- Baking stone
- Oven mitt
Steps to make this San Francisco sourdough bread recipe:
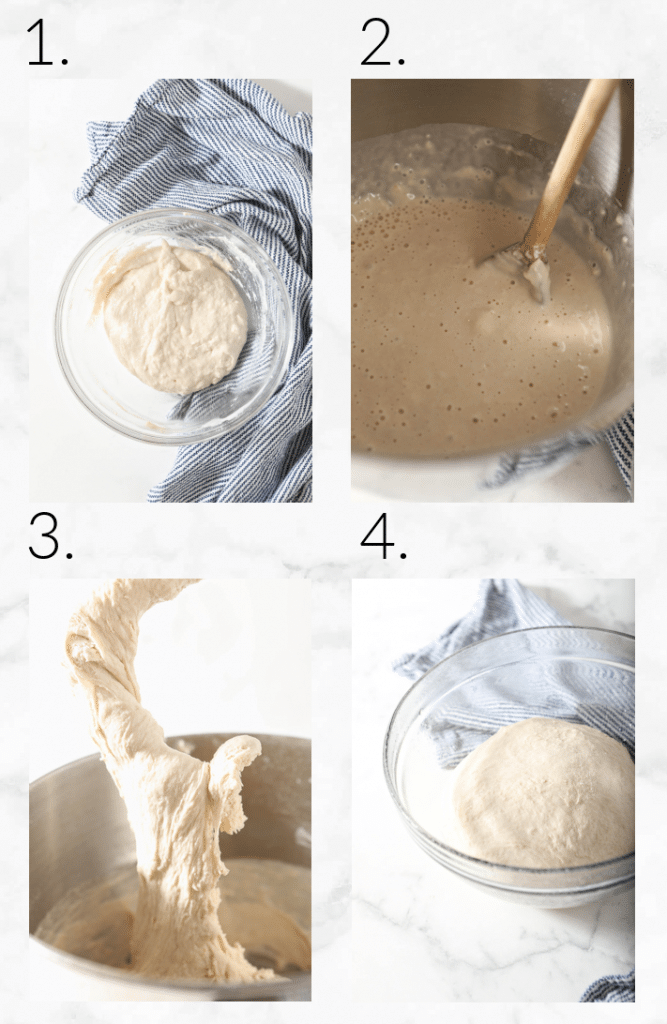
Make the poolish the day before you want to make the bread:
- Combine all the poolish ingredients in a large mixing bowl and leave at room temperature (that’s 74-80 degrees F, I had to leave mine in the laundry room!) for 24 hours, covered in plastic wrap.
Make the dough:
- The next day, pour room temperature water in the bowl of your stand mixer.
- Add the poolish and break it up with a wooden spoon (gently now!) and stir until it is dissolved.
- Add about 1 cup (5 ounces) of flour and the salt and stir until combined.
- Place the dough hook on the mixer, and slowly start to add the rest of the flour (you may not need it all) until the dough starts to come away from the sides of the bowl.
- Knead for 12 minutes at the second speed of the mixer.
- Remove the dough to a lightly floured surface and knead by hand a few times. You don’t need to knead a lot, and it won’t have any gluten structure at this point. You are just doing a final gather of the dough here.
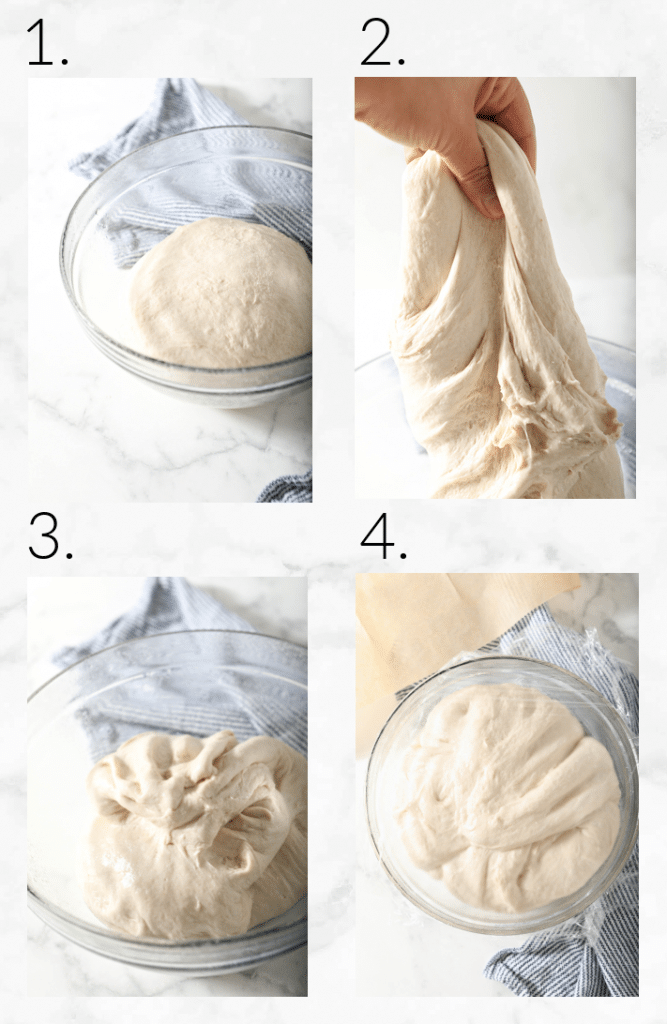
Bulk Proofing with Stretch and Folds
- Place the dough in an oiled bowl, cover with plastic wrap, and let it rise in a warm room temperature place for 45 minutes.
- Remove the plastic covering and stretch the dough out and fold it over itself (in 3’s, like a pamphlet). You want to grab the side furthest from you and stretch it up and out away from you, then fold it back over to the center of the dough. Turn the bowl of dough 90 degrees to the right. Grab the next portion of dough that is farthest away from you and repeat the stretch the fold. Do this two more times, rotating the bowl each time, until you have stretched and folded each “edge” of the dough.
- Recover the bowl with plastic wrap, and let it rise another 45 minutes.
- Repeat the stretch and fold from before, recover, and let rise for 60 minutes.
- Place the risen dough over a lightly floured piece of parchment paper, and without deflating it too much, form it into a ball.
- Let it rise for 45 minutes.
When is proofing over? When the dough has risen enough when you can carefully make a small dent in the dough with your finger, and the dent disappears and the dough springs back. Halfway through this time, prepare the oven.
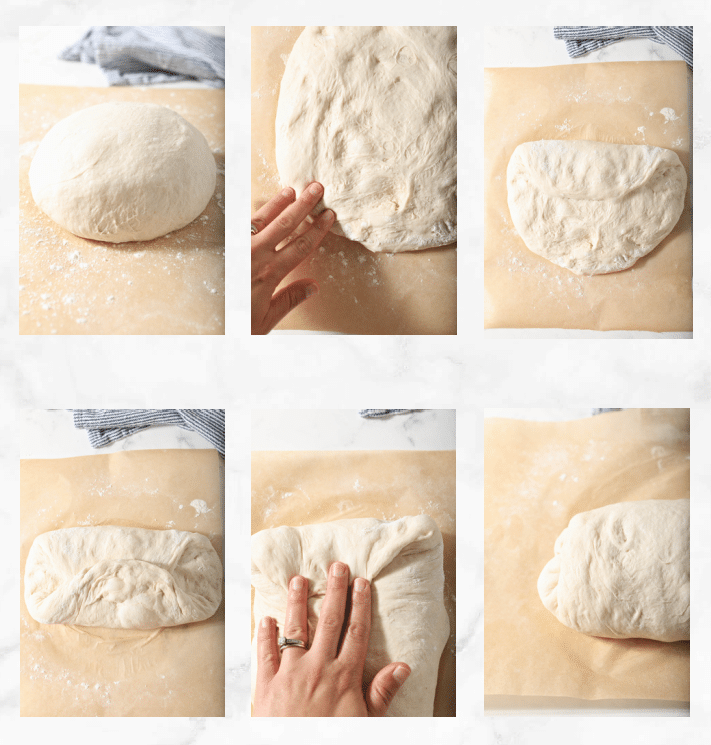
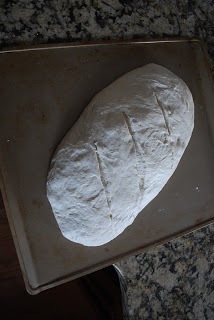
Shaping
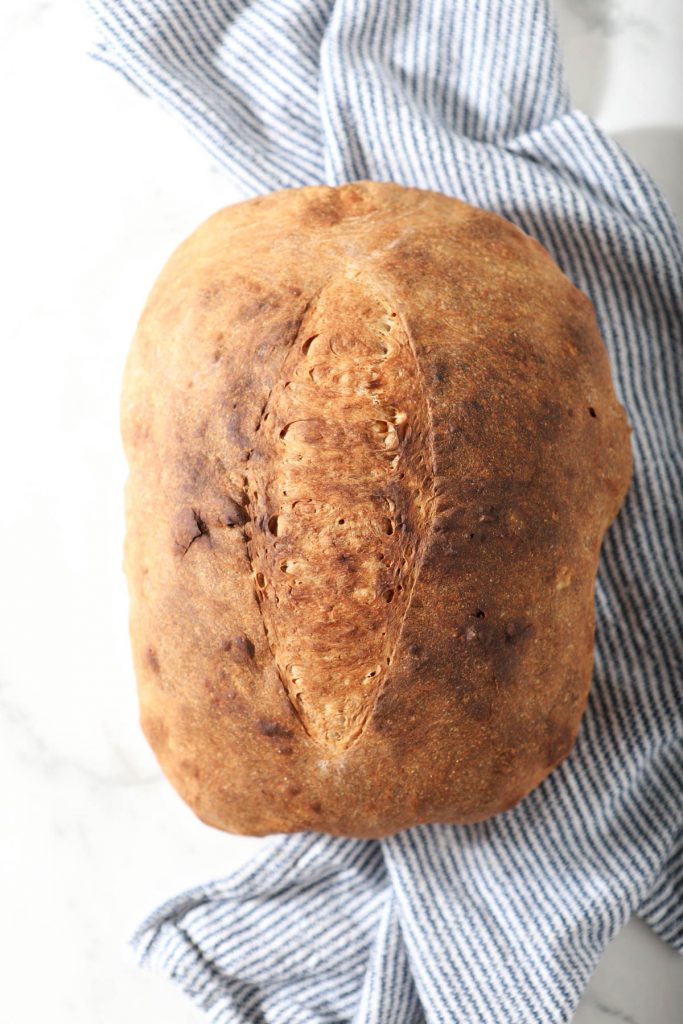
- Shape the dough into a long loaf. Use gentle, delicate hands and pick up the ball and turn it over. Stretch the dough into rounded square shape. Pick up the top two “corners” (if it was a square) and fold them into the center of the dough. Pick up the bottom two corners of the dough and fold them up into the center, overlapping the other edge. Grab the other side edge and bring it into the center. Turn the dough and carefully roll it tightly into a log, kind of pushing it tight (roll, push up, roll, push up, etc) as you roll. Tuck the ends under. Make sure that the seam side is down.
- Let it proof for 1 hour on the parchment paper, at a warm room temperature. It does not need to double in size here, but will get puffier.
Optional: At this step you can place it in the fridge overnight and bake the next day. If you do this, give it an hour or two at room temp before you bake.
To Bake:
- Place a small metal baking tray on the bottom rack of the oven (this is to help create steam while you bake. You can use like a roaster or something, as long as it can take the heat. It doesn’t need to be big) and a baking stone on the rack above it. Preheat your oven to 450 degrees.
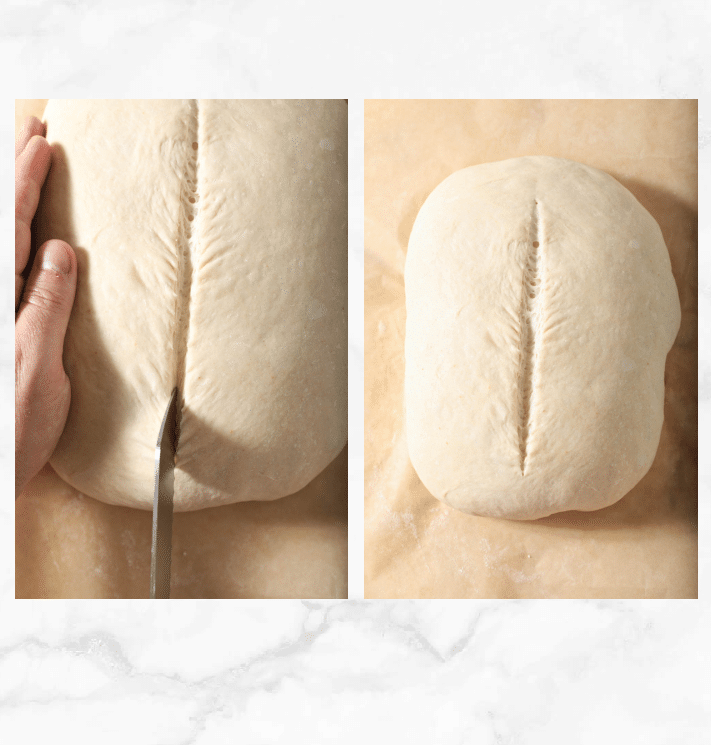
- Score your bread with a long slash down the center of your bread (or whatever pattern you would like) with a lame or bread scoring knife.
- Carefully transfer the dough with the parchment paper onto the baking stone. Toss a few ice cubes into the baking tray below to create steam.
- Bake for 10 minutes.
- Turn the oven temperature down to 425 degrees and bake for an additional 35 minutes.
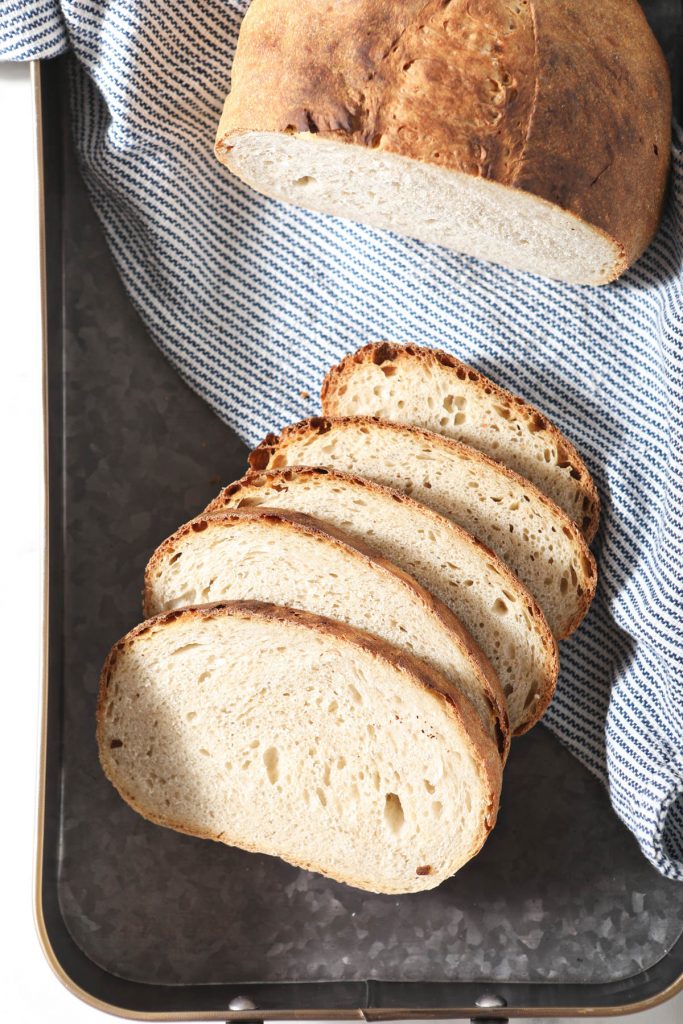
- Allow to cool on a rack for a few hours before slicing into it. It needs to be completely cool before you slice it, it still does some cooking
- Enjoy!

Ready to take your sourdough bread to the next level? Try these tasty sourdough bread recipes:
- Roasted Garlic Sourdough Bread – This roasted garlic loaf is beautifully decorated and will keep your house safe from vampires.
- Strawberry, Almond and Camembert Sourdough – with a beautiful crust, chewy texture, and loads of flavor, this loaf is perfect!
- Earl Grey Sourdough with Apricots and Cranberries – this loaf has an excellent crumb and beautiful flavor! Its definitely a fun and unique sourdough bread recipe!
Love and links are always appreciated! If you’d like to share this post, please link to this post directly for the recipe, please do not copy and paste or screenshot. Thanks so much for supporting me! xoxo
San Francisco Sourdough Bread Recipe
Ingredients
Equipment
Method
- Make the poolish the day before you want to make the bread:
Combine all the poolish ingredients in a medium bowl and leave at room temperature (that’s 74-80 degrees F, I had to leave mine in the laundry room!) for 24 hours, covered in plastic wrap.
- The next day, pour room temperature water in the bowl of your mixer.
- Add the poolish and break it up with a wooden spoon (gently now!) and stir until it is dissolved.
- Add about 1 cup (5 ounces) of flour and the salt and stir until combined.
- Place the dough hook on the mixer, and slowly start to add the rest of the flour (you may not need it all) until the dough starts to come away from the sides of the bowl.
- Knead for 12 minutes at the second speed of the mixer.
- Remove the dough to a lightly floured surface and knead by hand a few times. You don’t need to knead a lot, and it won’t have any gluten structure at this point. You are just doing a final gather of the dough, here.
- Bulk Proofing with Stretch and Folds
- Place the dough in an oiled bowl, cover with plastic wrap, and let it rise in a warm room temperature place for 45 minutes.
- Remove the plastic covering and stretch the dough out and fold it over itself (in 3’s, like a pamphlet). You want to grab the side furthest from you and stretch it up and out away from you, then fold it back over to the center of the dough.
- Turn the bowl of dough 90 degrees to the right.
- Grab the next portion of dough that is farthest away from you and repeat the stretch the fold.
- Do this two more times, rotating the bowl each time, until you have stretched and folded each “edge” of the dough.
- Recover the bowl with plastic wrap, and let it rise another 45 minutes.
- Repeat the stretch and fold from before, recover, and let rise for 60 minutes.
- Place the risen dough over a lightly floured piece of parchment paper, and without deflating it too much, form it into a ball.
- Let it rise for 45 minutes.
- Shape the dough into a long loaf. Use gentle, delicate hands and pick up the ball and turn it over.
- Stretch the dough into rounded square shape.
- Pick up the top two “corners” (if it was a square) and fold them into the center of the dough.
- Pick up the bottom two corners of the dough and fold them up into the center, overlapping the other edge.
- Grab the other side edge and bring it into the center.
- Turn the dough and carefully roll it tightly into a log, kind of pushing it tight (roll, push up, roll, push up, etc) as you roll.
- Tuck the ends under.
- Make sure that the seam side is down.
- Let it proof for 1 hour on the parchment paper, at a warm room temperature. It does not need to double in size here, but will get puffier.
Optional: At this step you can place it in the fridge overnight and bake the next day. If you do this, give it an hour or two at room temp before you bake.
- Place a small metal baking tray on the bottom rack of the oven (this is to help create steam while you bake. You can use like a roaster or something, as long as it can take the heat. It doesn’t need to be big) and a baking stone on the rack above it.
- Preheat your oven to 450 degrees.
- Score your bread with a long slash down the center of your bread (or whatever pattern you would like) with a lame or bread scoring knife.
- Carefully transfer the dough with the parchment paper onto the baking stone.
- Toss a few ice cubes into the baking tray below to create steam.
- Bake for 10 minutes.
- Turn the oven temperature down to 425 degrees and bake for an additional 35 minutes.
- Allow to cool on a rack for a few hours before slicing into it. It needs to be completely cool before you slice it, it still does some cooking
- Enjoy!
Nutrition
Nutrition information is provided as a general estimate and may vary based on ingredients, brands, and substitutions. For specific dietary needs, we recommend calculating nutrition using your preferred tool.
Notes
Tried this recipe?
Let us know how it was!adapted from San Francisco Sourdough Bread (Bewitching Kitchen and Daniel Leader’s Bread Alone)
Just wondering if the weights are fluid Oz or scale Oz for all the measurements. First time using my starter! Thanks!
Scale ounces!
Jenni, this bread looks excellent!! I have yet to make bread, littler nervous about it but I know it's not too tricky if you just follow the recipe. I am so glad you stopped by. You should enter my subscription giveaway…http://www.ahealthyjalapeno.com/2011/11/year-subscription-to-martha-stewarts.html 🙂