Sourdough Pita Bread
Sourdough pita bread is an easy and delicious way to use your sourdough starter! This homemade bread has amazing flavor and texture! A great beginner bread recipe.

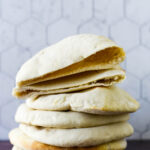
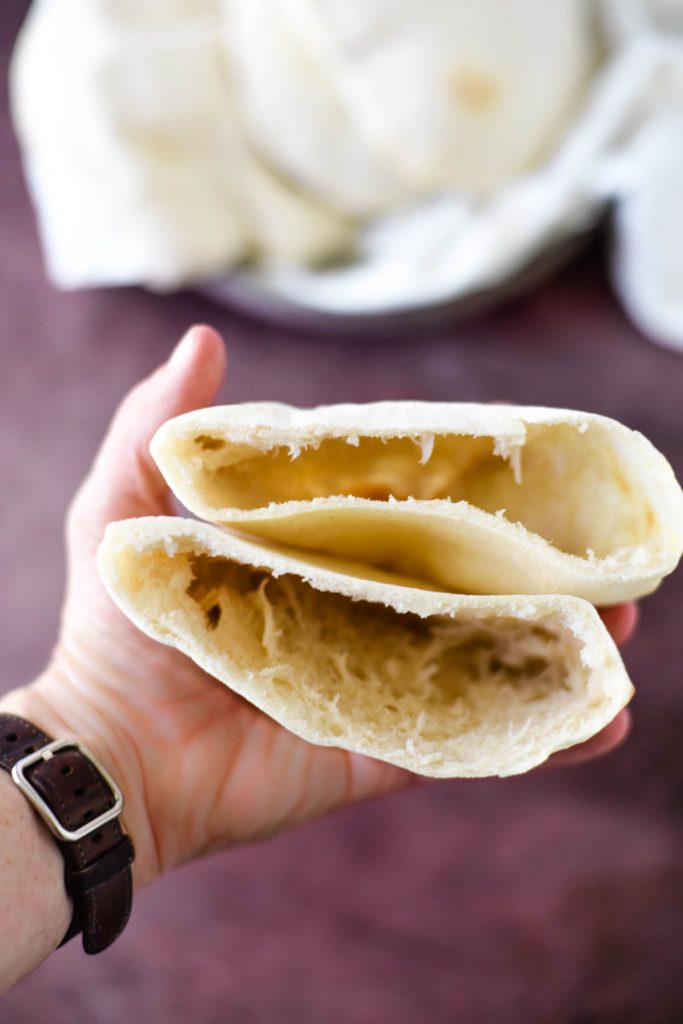
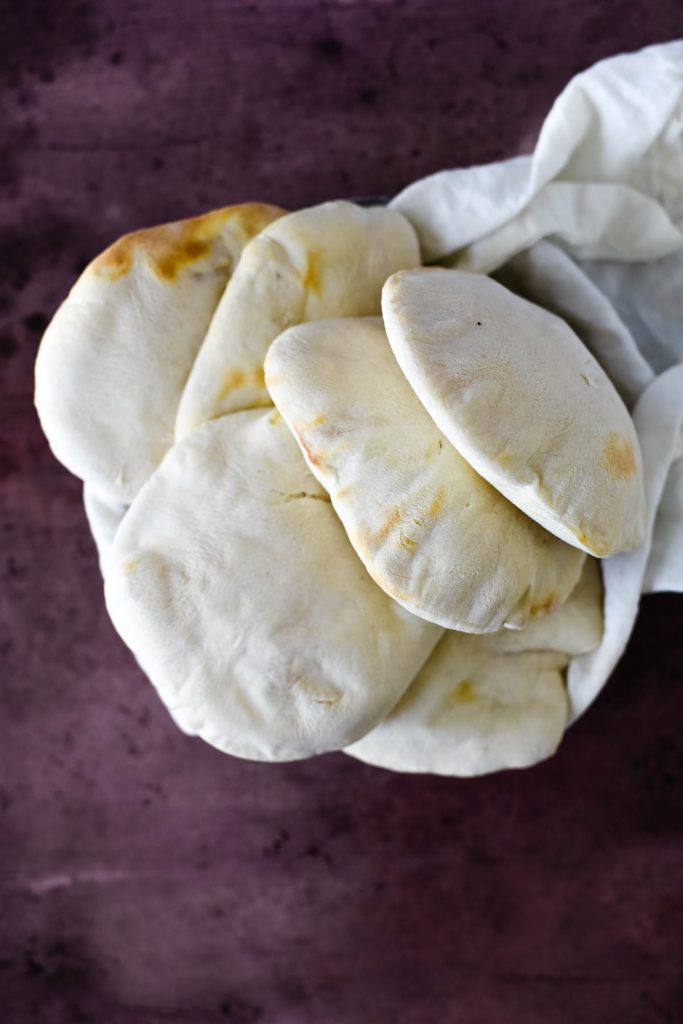
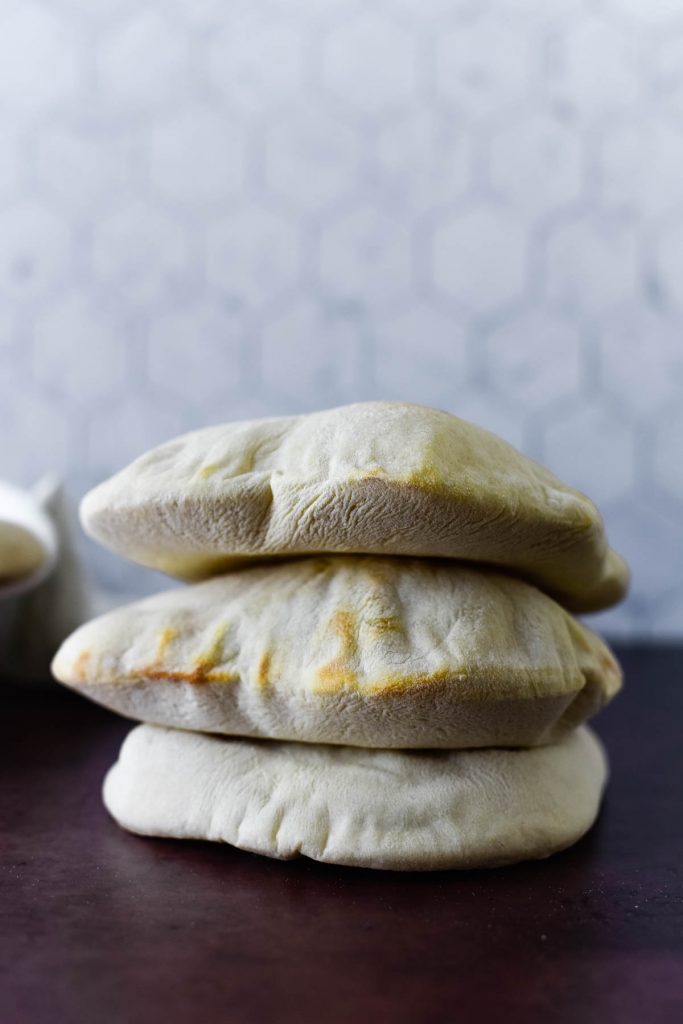
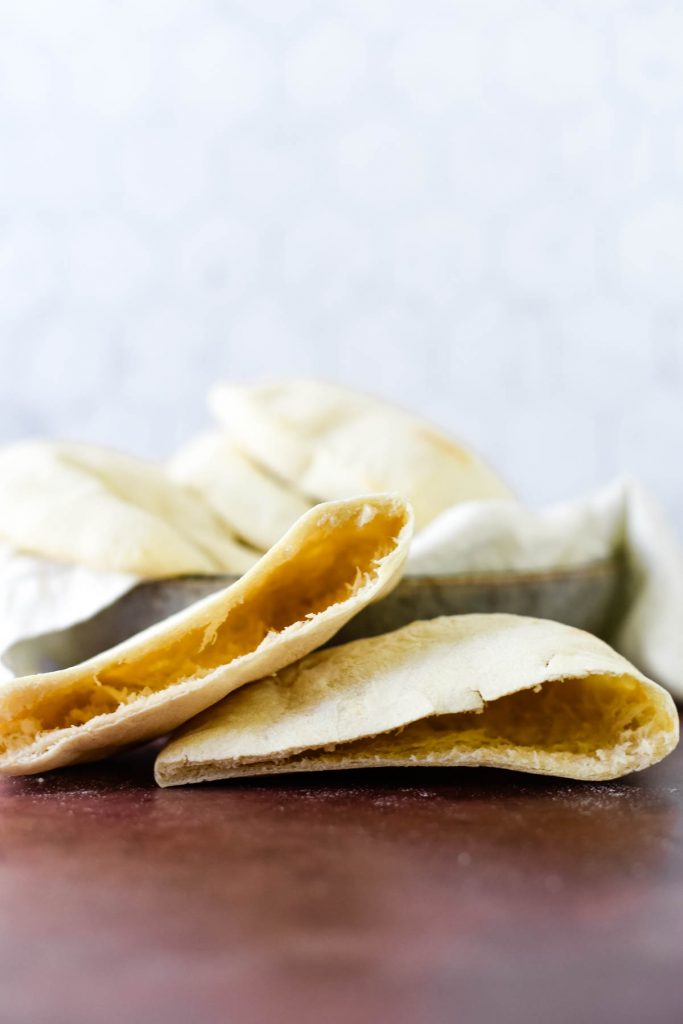
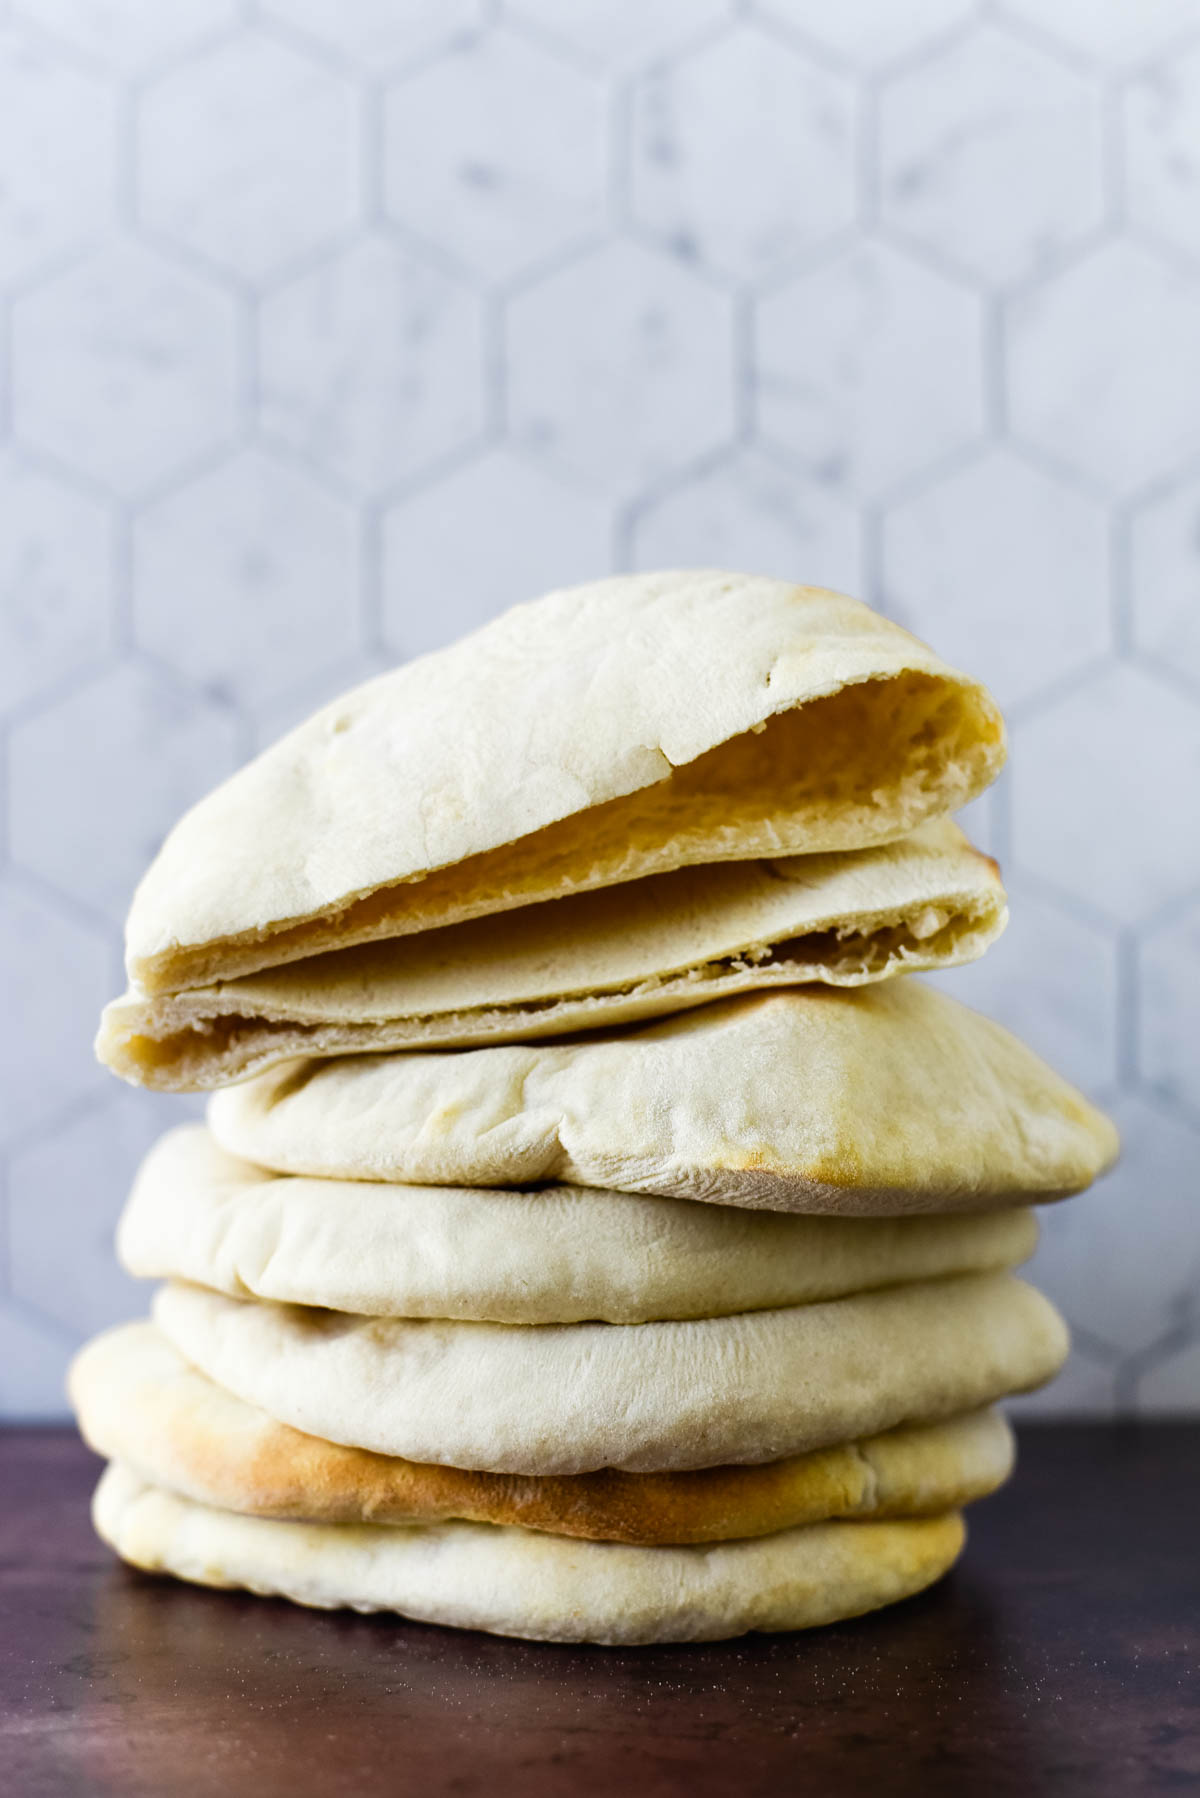
Also known as pita pockets, these versatile flatbreads puff up in the middle and create a hollow inside that is perfect for stuffing with your favorite fillings, or eaten with all the hummus you want!

Pita is such a fun bread to make at home. It is easy, and it is so much fun to watch them puff up in the oven!
This is a great recipe for beginning sourdough bakers to try their hand at and practice their stretch and folds, their bulk proofing, and check out their oven spring without baking a full loaf of bread.
You don’t have to worry about perfection, because pita is meant to be a simple and rustic bread.
Other easy sourdough flatbread recipes:
What’s the difference between pita and naan? Naan usually contains yogurt (and sometimes egg) in the dough, which thickens it and gives it a different texture after cooking. Pita bread is a leaner dough that is thinner and it puffs up
Ingredients needed
You only need a few ingredients to make this recipe at home:
- Sourdough Starter – We use a 100% hydration starter for this recipe. Don’t have one? Learn how to make a sourdough starter. It needs to be fed and active.
- Warm Water
- Bread Flour – You want to use a good quality bread flour that has a higher protein count. You can technically use all purpose flour for this recipe, although you will need to work a little harder to get the right amount of gluten development during the stretch and fold stage.
- Olive Oil – Use a good quality
- Granulated Sugar – just a small amount is all we need.
- Salt – Salt helps add extra flavor, helps to regulate the yeast activity, and helps to strengthen the gluten development. Don’t skimp or skip it!
Equipment needed
You don’t need any fancy equipment to make these at home:
- Food grade scale
- Measuring spoons
- Stand mixer with dough hook attachment
- Plastic wrap
- Large mixing bowl
- Rolling pin
- Dark colored baking sheet or baking stone
How to make homemade sourdough pita bread
This flatbread is easy to make! For the full set of directions, please scroll down to the recipe card below. Here is a brief overview of the methods used to make pita.
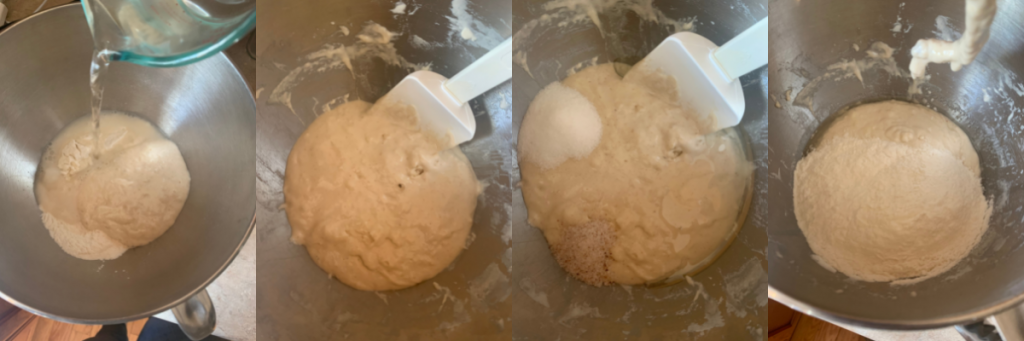
Mix the dough
- In the bowl of your electric mixer, combine the active/fed starter, water, and 210 grams of the flour to form a thick paste.
- Cover the bowl with plastic wrap and allow it to autolyse for 30 minutes.
- Switch to the dough hook.
- Add the sugar, olive oil, salt, and the rest of the flour.
- Mix until the dough begins to clear the bottom of the bowl and forms a ball around the hook.
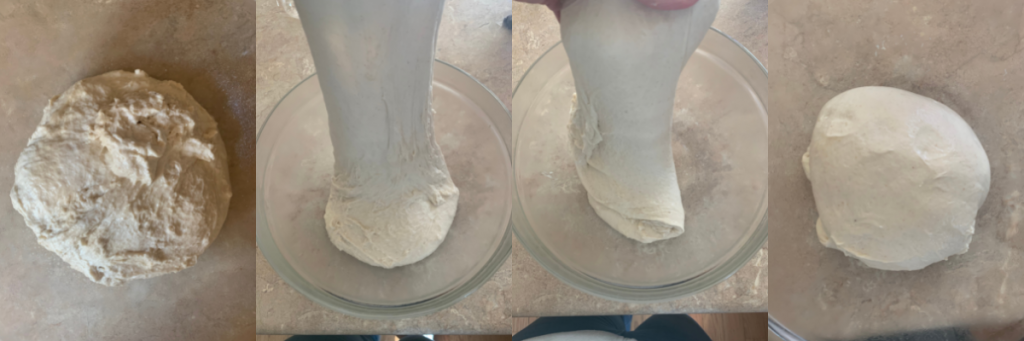
Bulk Ferment
- Place the dough in an oiled bowl, cover, and allow to rest on the counter for 30 minutes.
- Stretch and fold.
- Return the dough to the bowl, cover, and allow to rest on the counter for 30 minutes.
- Stretch and fold.
- Return the dough to the bowl, cover, and allow to rest on the counter for 60 minutes.
- Stretch and fold.
- Return the dough to the bowl, cover, and allow to rest on the counter for 60 minutes. At this point, the dough should be lively, elastic, and airy.
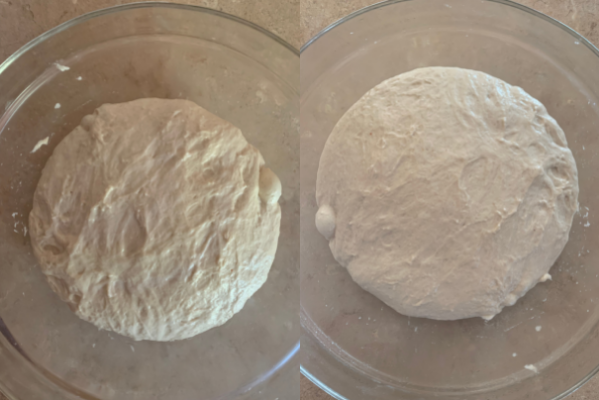
Overnight Proof
- Cover the dough tightly and place in the fridge overnight to proof. This helps the texture of the dough and improves the sourdough flavor.
Recipe Note: At this point you can leave the dough in the fridge for 2 to 3 days.
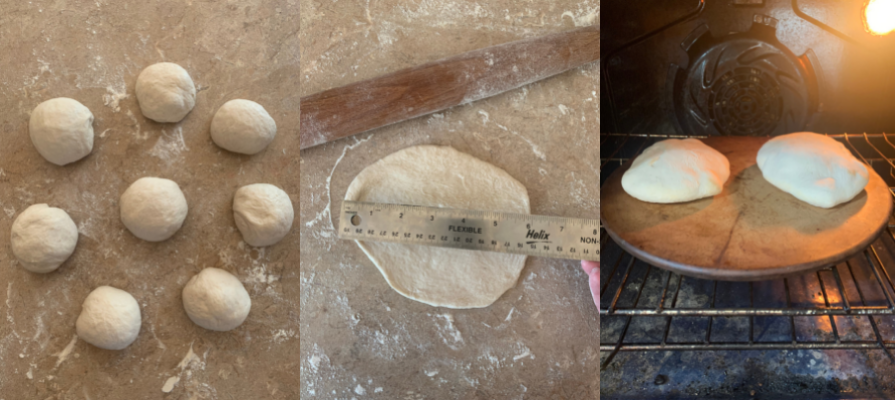
Baking
- Remove the dough from the fridge and allow it to start to come to room temperature.
- Place a baking stone or dark colored baking sheet in the lower third of the oven.
- Preheat the oven to 450 F.
- Divide the dough into 8 equal portions and roll each portion into a ball.
- Cover the balls with a towel and allow them to rest for 10 minutes.
- Roll each ball about 6-7” in diameter. If at any time the dough is really springing back a lot, cover them with a towel and allow them to rest for another 10 minutes to relax the gluten.
- Place the rolled out dough circles, one or two at a time, on the hot baking stone in the oven. Bake for 3-5 minutes. You do not need to turn them over.
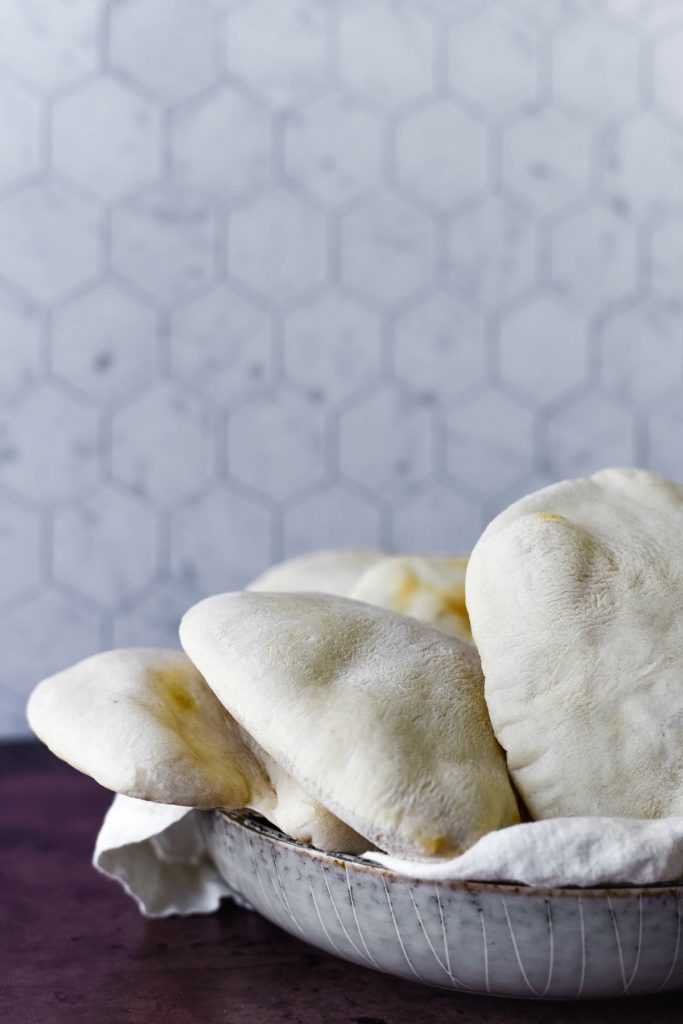
- Remove from the oven and wrap in a kitchen towel to keep warm.
- Repeat with remaining dough.
Baker’s Schedule
Knowing how to make this recipe fit into your daily life is an important part of keeping a sourdough starter. This is a two day process, so plan accordingly.
Early Morning
- Feed starter – Your starter needs to be doubled and active, so however long it takes your starter to do this on average. Remember it takes less time in a warm/humid house, and more time in a cold house. I like to feed mine first thing in the morning and its ready to go by the afternoon.
Afternoon
- Autolyze – 30 minutes.
- Mix dough – 20 minutes
- Bulk Ferment (with stretch and fold) – 3 hours
Overnight
- Cold Proof – overnight in the fridge. This dough really does well with an overnight rest in the fridge. Not only does it help improve the sourdough flavor of the dough, but it helps the dough’s texture and shaping. The dough can stay in the fridge for up to 2 or 3 days at this point, so you can let it hang out there if you want to time the baking differently.
Next Morning
Make sure you take the dough out and let it come to room temperature before you start rolling.
- Shaping – 10 minutes. This can take longer if your gluten development wasn’t quite where it needed to be. If at any point your circles start to shrink back on you, and you are having trouble rolling them out nicely, just cover everything with a towel and walk away for 10-15 minutes. Once the dough has a little time out, it should roll nicer!
- Baking – 3-5 minutes each (Although you can do 2-3 at one time if you have enough room)
What kind of sourdough starter do I need for this recipe?
This recipe uses a 100% hydration sourdough starter – meaning one that has been fed equal amounts of flour and water. For more reading on what that means, check out Feeding your sourdough starter.
New to sourdough? Read my Ultimate Guide to Sourdough for Beginners to answer all the questions you have!
How to serve this to your family
What can you use pita for? Anything! This is a great addition to any Mediterranean or Middle Eastern meal your family is enjoying.
- Serve as a snack with hummus, carrots, celery, and other veggie dippers
- Serve with beef souvlaki skewers
- Use them as wraps with your chicken shawarma
- Use them with your beef kofta recipe
- Use them as a pizza base
- Cut into wedges, toss with olive oil and bake them into pita chips
Frequently Asked Questions?
Why didn’t my pita bread puff up?
If your oven is not preheated enough, the pita might not puff up. Make sure you preheat the oven for a good 20 minutes before you need to bake so that the oven is nice and hot. Also place a dark colored baking sheet or baking stone into the oven to preheat at the same time. The puffing comes from the water evaporating and creating steam when it gets in the hot oven, so you want the oven to be nice and HOT.
It is normal for your pita to collapse when it comes out of the oven and cools.
How do I store pita bread?
After baking, wrap the pita bread in a fresh kitchen towel. It will stay fresh for 1-2 days at room temperature, although I think they are best the day you bake them.
You can rewarm it by wrapping it in foil and placing it in a 350 F oven for a few minutes, until warm. It won’t take long. Don’t microwave to rewarm, as it will change the texture of the bread.
You can also freeze any leftover bread in a freezer bag for up to 3 months.
Love and links are always appreciated! If you’d like to share this post, please link to this post directly for the recipe, please do not copy and paste or screenshot. Thanks so much for supporting me! xoxo

Sourdough Pita Bread Recipe
Ingredients
Equipment
Method
- Mix the dough
- In the bowl of your electric mixer, combine the active/fed starter, water, and 210 grams of the flour to form a thick paste.
- Cover the bowl with plastic wrap and allow it to autolyse for 30 minutes.
- Switch to the dough hook.
- Add the sugar, olive oil, salt, and the rest of the flour.
- Mix until the dough begins to clear the bottom of the bowl and forms a ball around the hook.
- Bulk Ferment
- Place the dough in an oiled bowl, cover, and allow to rest on the counter for 30 minutes.
- Grab the edge of the dough farthest from you and pull it up as high as you can, and then fold it over towards you. Rotate the bowl 90 degres, and repeat the stretch and fold. Repeat until you have folded all four sides of the dough in and it more resembles a ball.
- Return the dough to the bowl, cover, and allow to rest on the counter for 30 minutes.
- Stretch and fold the dough all the way around the bowl..
- Return the dough to the bowl, cover, and allow to rest on the counter for 60 minutes.
- Stretch and fold.
- Return the dough to the bowl, cover, and allow to rest on the counter for 60 minutes. At this point, the dough should be lively, elastic, and airy.
- Overnight Proof
- Cover the dough tightly and place in the fridge overnight to proof. This helps the texture of the dough and improves the sourdough flavor.
Recipe Note: At this point you can leave the dough in the fridge for 2 to 3 days. - Baking
- Remove the dough from the fridge and allow it to start to come to room temperature.
- Place a baking stone or dark colored baking sheet in the lower third of the oven.
- Preheat the oven to 450 F.
- Divide the dough into 8 equal portions and roll each portion into a ball.
- Cover the balls with a towel and allow them to rest for 10 minutes.
- Roll each ball about 6-7” in diameter. If at any time the dough is really springing back a lot, cover them with a towel and allow them to rest for another 10 minutes to relax the gluten.
- Place the rolled out dough circles, one or two at a time, on the hot baking stone in the oven. Bake for 3-5 minutes. You do not need to turn them over.
- Remove from the oven and wrap in a kitchen towel to keep warm.
- Repeat with remaining dough.
Nutrition
Nutrition information is provided as a general estimate and may vary based on ingredients, brands, and substitutions. For specific dietary needs, we recommend calculating nutrition using your preferred tool.
Notes
- PIta will keep wrapped in a towel for up to 3 days, although it is best the day it is made.
- You can freeze pita for up to 3 months.
I found that in my oven, I needed to up the temperature to 500,and add a pan of water to generate some steam, gave me better results. Thanks for the recipe.
I’m new with starter. What percentage of starter, flour & water to get 224g starter? 100g flour + 100g water + 24g starter? = 224? Thank you!
Yup! That will work!